Backyard Redo Progress
We have made progress in our backyard-rotting-deck-makeover! It’s one of those projects that is moving along slowly, but it is moving along- whew.
If you recall, this is what we inherited when we moved to this house six years ago:
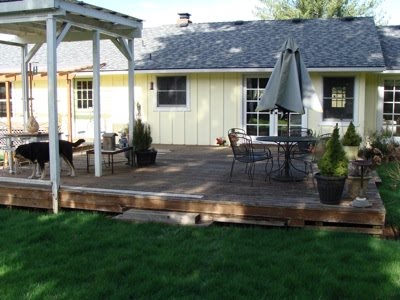
A huge deck. As in, gargantuan. And very square. And boring. And without purpose (I mean, it’s a foot off the ground for goodness sake!).
And very, very hard to figure out how to use. Look at that expanse of bare decking. How do you use all that? And what’s with the roof-thing in the corner? It’s too exposed to be an outdoor “room” and has a heavy, shed-like roof.
Oh, did I mention it gets southern exposure? Yes, it gets very hot out there in the summer.
All in all, there’s not much to induce you to spend some time in the backyard.
But if I’m completely honest, we would have lived with that huge deck for longer if it weren’t for this:
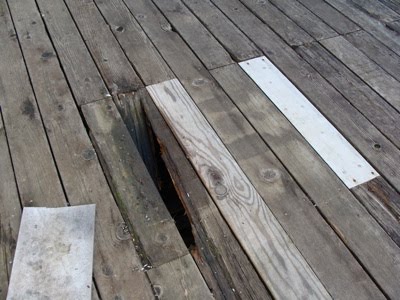
Rotting wood. Patched in some places and holes in others.
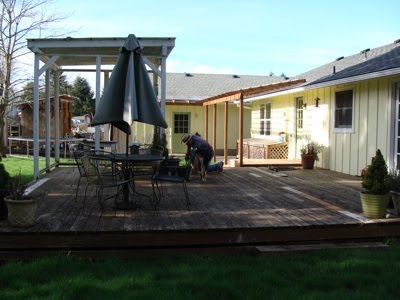
We didn’t want to pay the presumably huge amount of money to replace something we didn’t like (and became dangerously slippery when wet, which, um, happens a lot in Oregon…), so a few months ago Brian started tearing it apart.
Step one was pulling the boards from around the corner structure but leaving the deck in place under it (which isn’t rotten, thanks to the covering) in order to make this into a gazebo-style shelter with railings, steps, and a nicer roof.

Step two was pulling the rest of the boards off, stockpiling any good ones and recycling the rotten ones.
Yes, we have a landscape supply company in our area that recycles treated wood into something called “hog fuel.” We still have to pay to dump it off, but only a minimal amount.
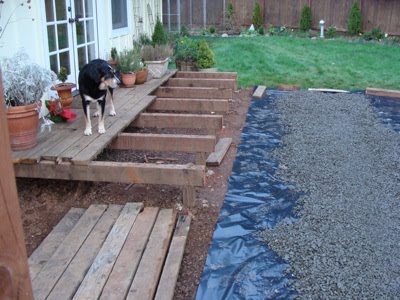
Step three was to lay some plastic and gravel down to cover the exposed mud so our dog wouldn’t track it inside.
A very important step.
As you can see, we’re keeping a small porch-deck off the french doors. And we’re keeping the posts and 4″x6″ treated beams that were still in perfect shape.
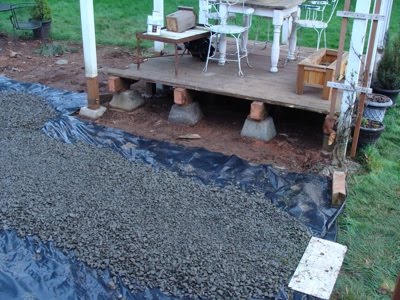
Brian added deck blocks to support the new gazebo where he cut off the 4″x6″ beams.
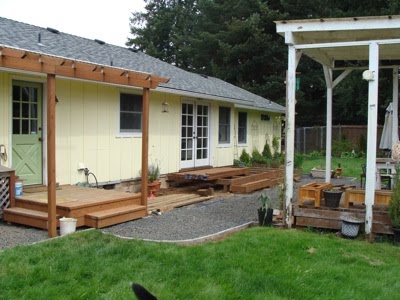
Step four was to make walkways to the new gravel patio from the back doors of the house- one here to the laundry/mud room and one on the other side to the master bedroom French door. We also added cement edgers all around the whole area to hold the gravel.
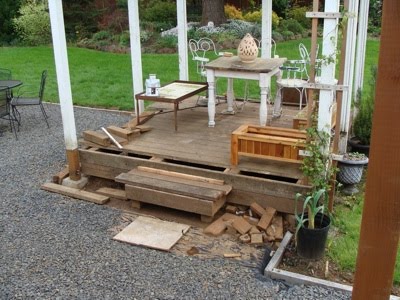
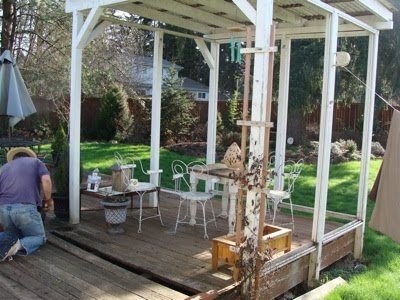
Step five is making (notice the change from past to present tense?) the steps for the gazebo and back porch. Brian will also patch the wood as needed and we’ll make some small planting beds on each side of the step.
Don’t you think it’s already taking shape and looking so much more “user friendly?” I can just picture this gazebo with rails, a daybed, table and chair, and maybe an outdoor chandelier and some canvas curtain panels…what do you think?
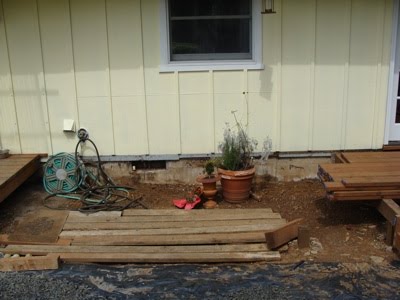
And this area? I’m most excited about this- my new herb garden right out the back door! I finally won’t have to water so many pots and I found that the herbs I had in the ground at our other house did so much better.
As you can see, we’ve still got quite a bit of work to do, but seeing my vision (which I’ve thought about for years) take shape is so rewarding and fun. This area just makes so much more sense to me, with various garden “rooms” to keep it interesting. We already think losing the deck makes the yard look bigger, and the few times the sun has been out, the gray gravel has seemed a lot cooler than the deck.
In my bigger dreams, we’d have a real porch with a peaked roof and we’d screen it from pesky bugs and probably lay a paver patio. But what we can afford right now is this and the gravel, which I’ve recently seen in a number of garden magazines- it seems very European- which helps to make it seem less “unfinished” to me.
The real issue will be how easy it is to sit on the table and chairs when they’re sitting on gravel…
oh how exciting to be making over things!!! I love doing this type of reno!!! sorry it took me so long to reply and visit…just been super swamped…three kids make a single mom tired!!! lol
well off to make sure I have followed your awesome blog!!! seems there are a few of the great blogs that I didn’t get to follow yet! lol
Following via Flaunt Your Flowers
Thanks for the inspiration!
Life Below Zero
http://casinofreebies3.blogspot.com/
Looks like you have a bsuy day there in your backyard renovation. Herbs would be beautiful and scent will fill the air there. 🙂 Your lilacs are so gorgeous! Your flowers are fantastic that you had one theme color for them. Been busy for Easter. Sorry for my late visit but my post is not late 🙂 Hope you can visit my Fertilizer Friday here.
Kathryn- First of all, I’m going to amend the soil since it’s been under a deck for 30 years. 🙂 I’m getting some good topsoil and compost and will mix it in to the existing clay. Then I will plant herbs. Some of mine are bigger because they’ve been in pots for awhile, but I’ll probably buy some in 4″ pots as well- it doesn’t matter their size, just give them room to grow. And this is southern exposure right up against the house (which will protect the herbs from extreme cold), so I think they will do well.
Most herbs do well in the NW, though a few are borderline and may die if the winter temps get in the 20s or teens. The herbs that have always done well for me are rosemary, thyme, oregano, and chives. I’ll save room for annual herbs like basil and parsley, too.
Its looking great! I think a daybed would be awesome out there!
I’ve been following your blog for quite a while and haven’t commented much, but I LOVE this! I can’t wait to see it all finished and the herb garden sounds PERFECT! I’m in Oregon too and am curious how your herbs do! Great work and love your blog!
Great work! Question: how big do your herb plants have to be before you can plant them in the backyard spot you prepared? I’ve never done herbs out of small pots into clay-like ground. ~Kathryn
What a romantic backyard you will have when you are done.Lucky!