
Mid-Summer Raised Bed Vegetable Garden Tour
A visual tour of our cottage’s large raised bed vegetable garden about halfway through the gardening season. See what’s growing, what’s not growing, what we’re harvesting, and what we look forward to harvesting in a garden that isn’t magazine-perfect, but is productive in the midst of real life.
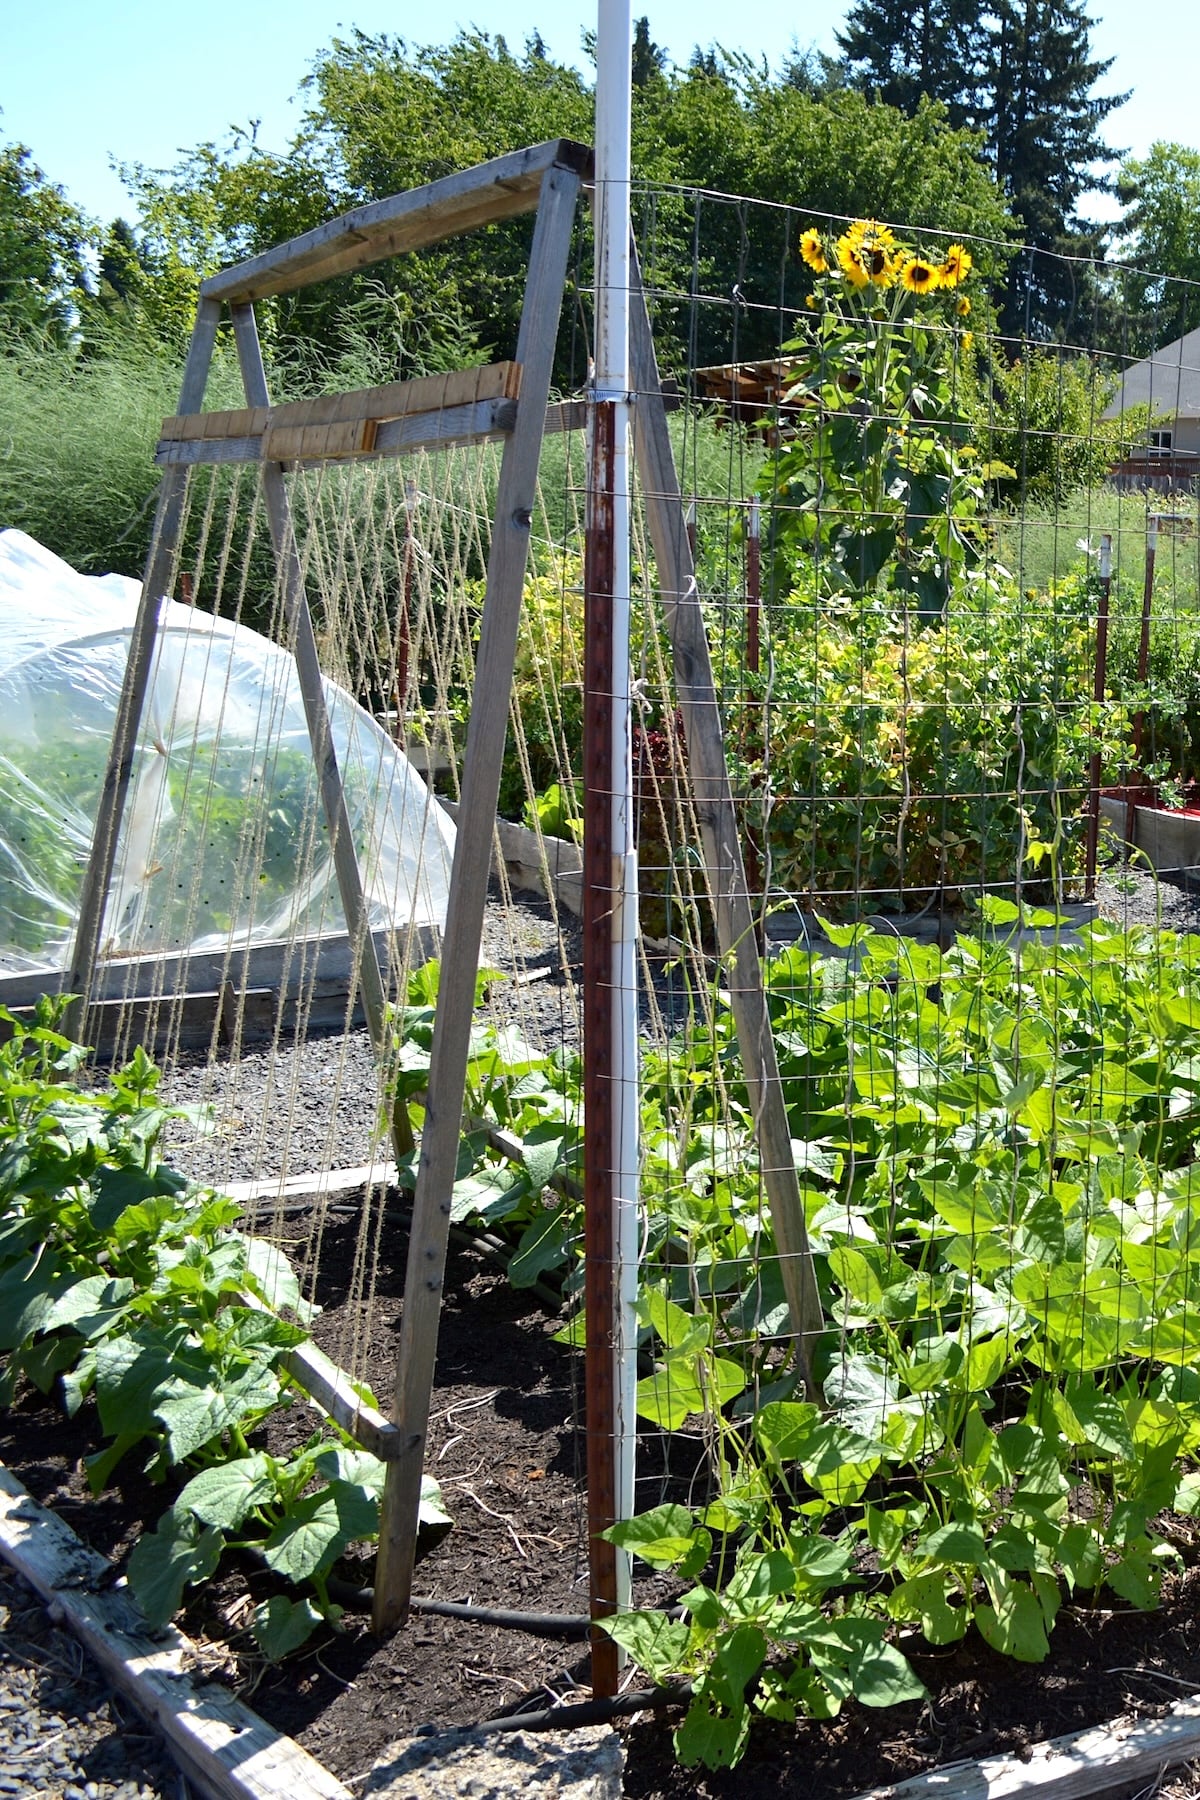
This garden tour shows what our cottage’s raised bed vegetable garden looks like in mid-July, a great time of year in our Oregon vegetable garden since everything is growing nicely, but nothing is too overgrown yet that the bones of the garden design aren’t visible.
This is not a magazine test garden – you will see hoses, crooked bed borders, and broken homemade cold frames. We’ve cobbled together hoop houses, tomato towers and bean trellises from cattle fencing, metal posts and pvc pipes.
It’s not always the most beautiful, but it is pretty, I think, with it’s neat edges, green growth, and lack of weeds (which is not because I spend hours weeding – read about no-till gardening for less weeds here!).
The Garden Design
Here are a few other notes to help you on the tour:
- The overall garden space is about 60′ x 30′ and is fenced all around (Yes, it’s huge! But you can make raised beds in any amount of space you have).
- Fruit trees, fruiting shrubs, asparagus, strawberries, and a wind break hedge line the perimeter of the fence inside the garden.
- The six long ‘traditional’ raised beds are 4′ x 12′ with 10″ tall sides.
- The four larger permanent beds are about 9′ x 20′ with 4×4 posts outlining them (these were salvaged posts and have broken down through the 10 years of the garden’s life, and now we are transitioning these into no-edge beds by simply mounding the dirt up from the gravel paths).
- You can see a hand-drawn plan for the overall design here.
Raised Bed Vegetable Garden Tour

1. Entrance
The entrance to our vegetable garden is metal gate (it was here when we purchased the house) with a large grape arbor that we built over it. The arbor holds one seedless ‘Flame’ grapevine – and it completely takes over the whole thing by the end of the season! It grows larger every year, so unless you want to spend a lot of time pruning, I wouldn’t plant more than one grape for an arbor even as large as this (about 8′ x 3′).

2. Traditional Raised Beds
These beds hold tomatoes, cole crops like broccoli, cauliflower & cabbage, lettuce & greens, peas, carrots, beets and both hot & sweet peppers. The bed that holds our super high-tech pepper house is the first thing you see (though it changes year-to-year because of crop rotation). The house needs to be moveable, so Brian figured out this pvc-pipes-in-holes-in-a-two-by-four-held-down-by-large-rocks system. Oh, and I added the row-cover-clothespin system protecting the hot peppers out side of the house. I know – we should patent these, right?
Seriously, I LOVE the pepper house – I use a perforated plastic cover so I don’t have to open and close it so it stays on all season long. It’s the only way I can guarantee ripe peppers in September and October (and ripe means fully colored because I hate to break it to you, but green peppers are just unripe and that’s why they’re bitter).

This photo above shows how much the peppers like being in the perforated plastic hoop house – they’re bigger and greener than the outside plants. I add a layer of black plastic on the soil (with soaker hoses underneath), too, to help hold in the heat. The peppers will produce into November sometimes for me with this system.

3. Larger Permanent “Raised” Beds
I planned these 4 large beds to be able to grow larger amounts of corn and potatoes and to easily rotate them. I use 2 for corn, 1 for potatoes, and 1 for pole and dry beans and cucumbers.
As you can see, I cram a lot into the roughly 9’x20′ bed pictured. I wrote about why I always grow Emerite Beans here and 5 reasons to grow cucumbers on a trellis here. Behind this bed you can see the 6 traditional raised beds, two of which are planted with 18 tomatoes.

The other three large beds are divided between corn and potatoes. You can see one stubborn dandelion on the edge of the lower right corn bed, but other than a weed here and there like that, I never weed these beds (you can read all about how to grow corn without weeding here).
The Yukon Gold potatoes will soon be hilled up with straw. I plant the two corn beds 1-2 weeks apart and they are different varieties so the will ripen over a month-and-a-half so we’re not swimming in corn for a week or two and then without.
I keep the broccoli and cabbage bed under cover most of the season – it’s the only way I’ve found to grow broccoli without having it become ruined from aphids. A few cabbage worms get in, but it keeps the bulk of those out, too.

4. Other Raised Beds
We had extra space and cinder blocks from the previous owners, so we created these long beds that I grow onions and sunflowers in each year. I love growing sunflowers!
But, this is just one of those bizarre things that happen in gardens, no matter how many years you’ve been gardening. These two beds were given the same soil prep & water, and have the same exposure, and yet the late planted onions and sunflowers have done well in the longer bed and are almost nonexistent in the shorter bed. Sigh.

5. Raised Beds for Permanent Crops
Along one of our garden edges we created 2 long 4′ x 18′ beds to hold our permanent asparagus crops. Raised beds are perfect for crops like this, since they don’t like to be disturbed and don’t like weeds.
Did you know that this is what asparagus looks like when you stop harvesting? You need to let it ‘fern out’ to be able to feed the roots and produce well the next year. The bed on the left did not get harvested in the spring, though – my goal is to cut it down in August and then harvest the shoots for three weeks in September to spread the asparagus harvest over the season.
So, that’s our real world garden tour and how we use raised beds in our vegetable garden to make gardening easier for us. I hope you’ve been inspired to plan a bed or two somewhere in your yard, too!

Your newsletter and podcasts are so valuable, extremely helpful and informative to experienced gardeners as well as the novice. I really appreciate that you continue sharing your experiences and update topics with regularity. You make it easier for the rest of us. THANK YOU.
Oh my goodness, Linda, your comment just made my day – thank you so much!
I’m so happy to know that sharing my experience is helpful, because that’s how I learn to and I hope I’m passing it on. 🙂