Easy Sourdough Sandwich Bread Recipe – Same Day or Overnight
If you’ve been searching for a soft, versatile sourdough sandwich bread that fits your schedule, you’re in the right place. This easy recipe gives you the best of both worlds – bake it the same day when time is tight, or let it ferment overnight for deeper flavor and added convenience. With a tender crumb and mild tang, this loaf is perfect for everything from grilled cheese to morning toast. Whether you’re a seasoned sourdough baker or just getting started, this forgiving recipe is sure to become a staple in your kitchen.
✩ What readers are saying…
“Oh my gosh this sourdough sandwich loaf bread recipe was so easy to follow and it tastes great! It’s the first bread I baked with my starter.” -Kathy
Some links in this article are affiliate links and if you click on them I will receive a small commission at no cost to you.
My first attempts at making bread with my sourdough starter was an easy artisan sourdough bread. It was so good that I didn’t really branch out from that for awhile, saving my other sourdough baking for non-loaf breads like English muffins, bagels, crackers, and waffles.
While this cheesy batter bread is more like a traditional sandwich bread since it’s made in a loaf pan, the crumb isn’t as tender as we’re used to when made without the cheese.
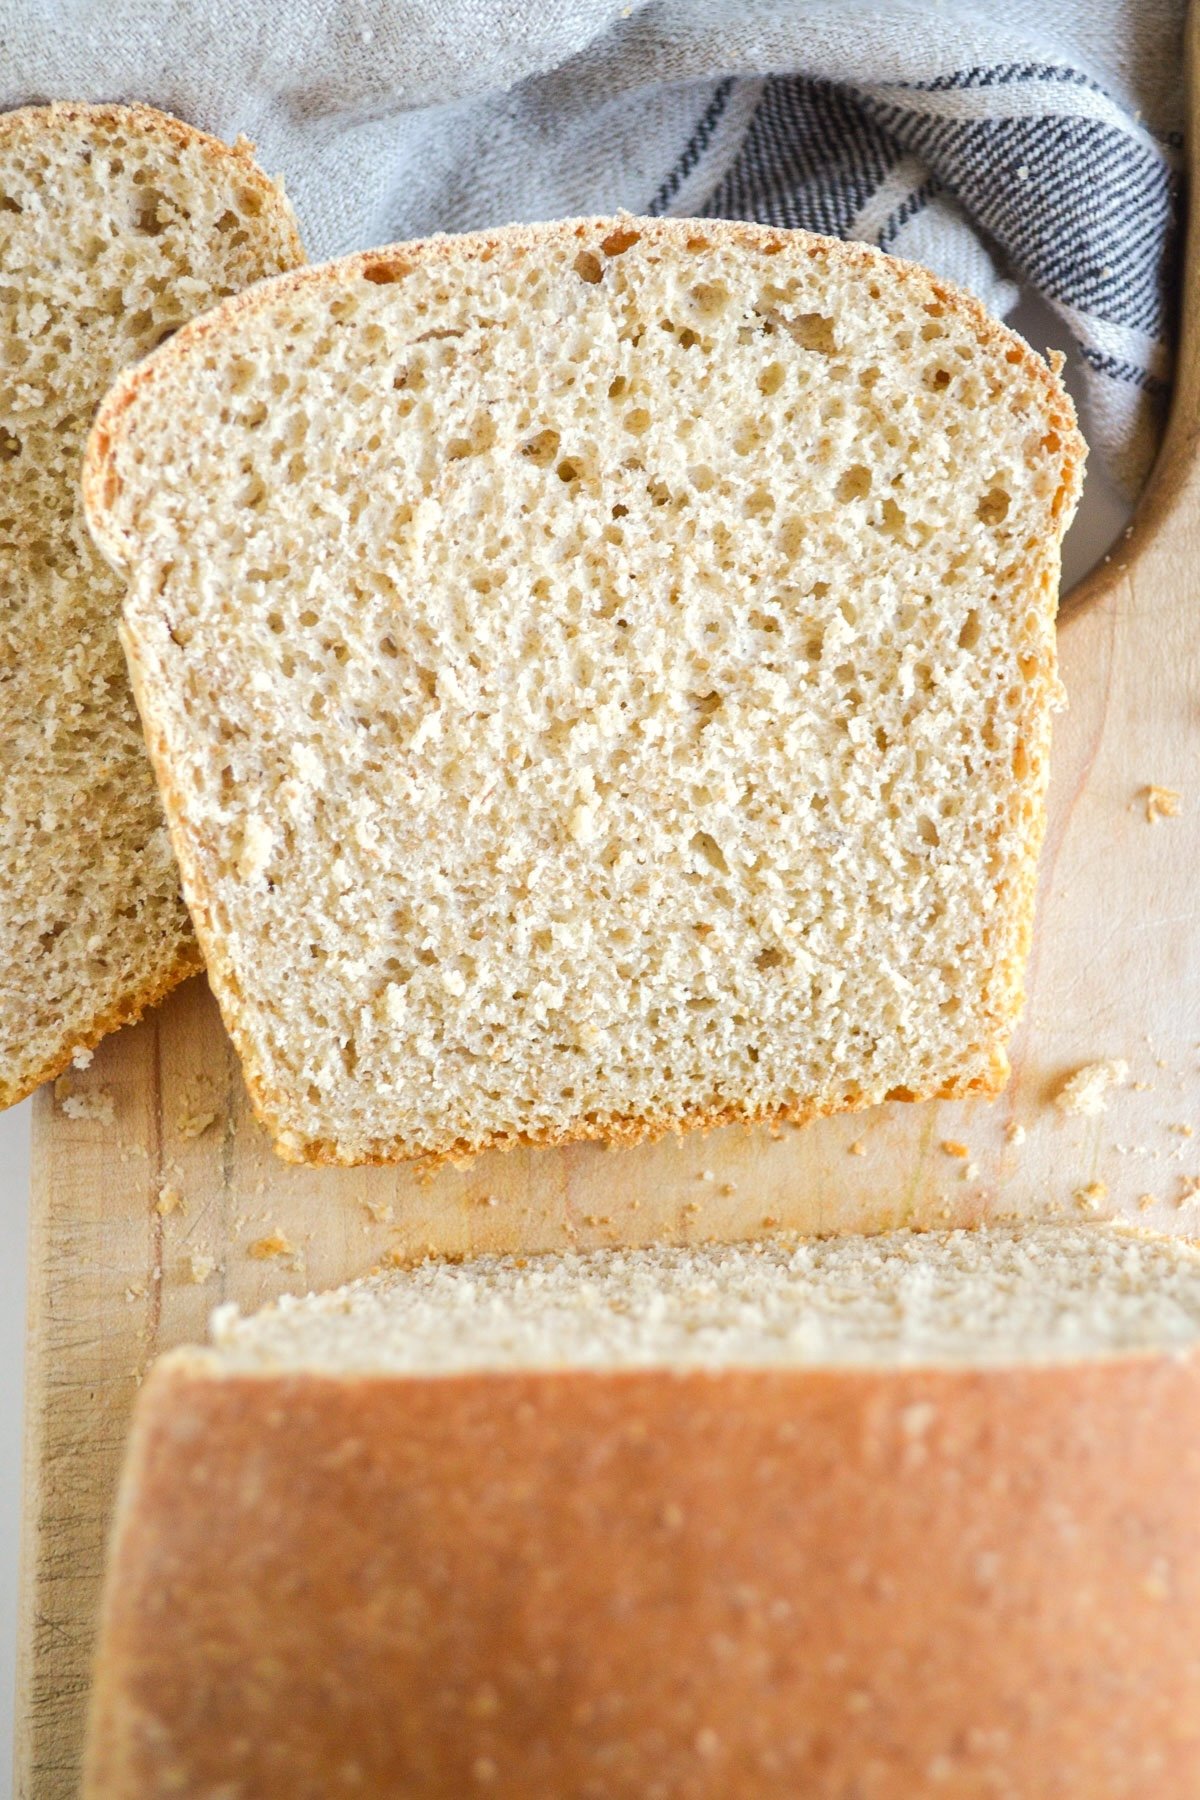
Which is where this soft sourdough sandwich bread comes in, filling the hole in my sourdough recipes with a loaf that has that tender crumb that’s perfect for any sandwich or type of toast.
Not only that, it’s also incredibly easy and flexible. This can be a same-day sourdough bread with only one rise (although a long one, since it is sourdough), or you can leave it to ferment overnight in the fridge and then shape and rise in the pan the next day.
Does this recipe use only sourdough starter to raise the bread?
Yes! I was actually shocked when I first started baking with sourdough how many “sourdough” bread recipes actually include commercial yeast. I don’t get this at all – is this our modern quest for all things to be quick?
A big selling point of sourdough for me is to NOT use commercial yeast in bread (although using up your discard with yeast or baking powder or soda for things like a lemon loaf or sticky bun coffee cake isn’t what we’re talking about here – that’s simply using up what you have). If a bread recipe says it’s sourdough and then you see yeast in the ingredients, it seems like false advertising – that’s not really sourdough then, is it?
And just like food labels, you really have to read ingredients – I found one “sourdough bread” on Pinterest that not only called for a whole package of commercial yeast (many only add 1/4 teaspoon), but also baking soda!
Yes, 100% sourdough bread will take longer to rise. But you’ll reap more of the sourdough health benefits, since longer rises also helps ferment the flour more because the sourdough bacteria has more time to work.
Ingredients
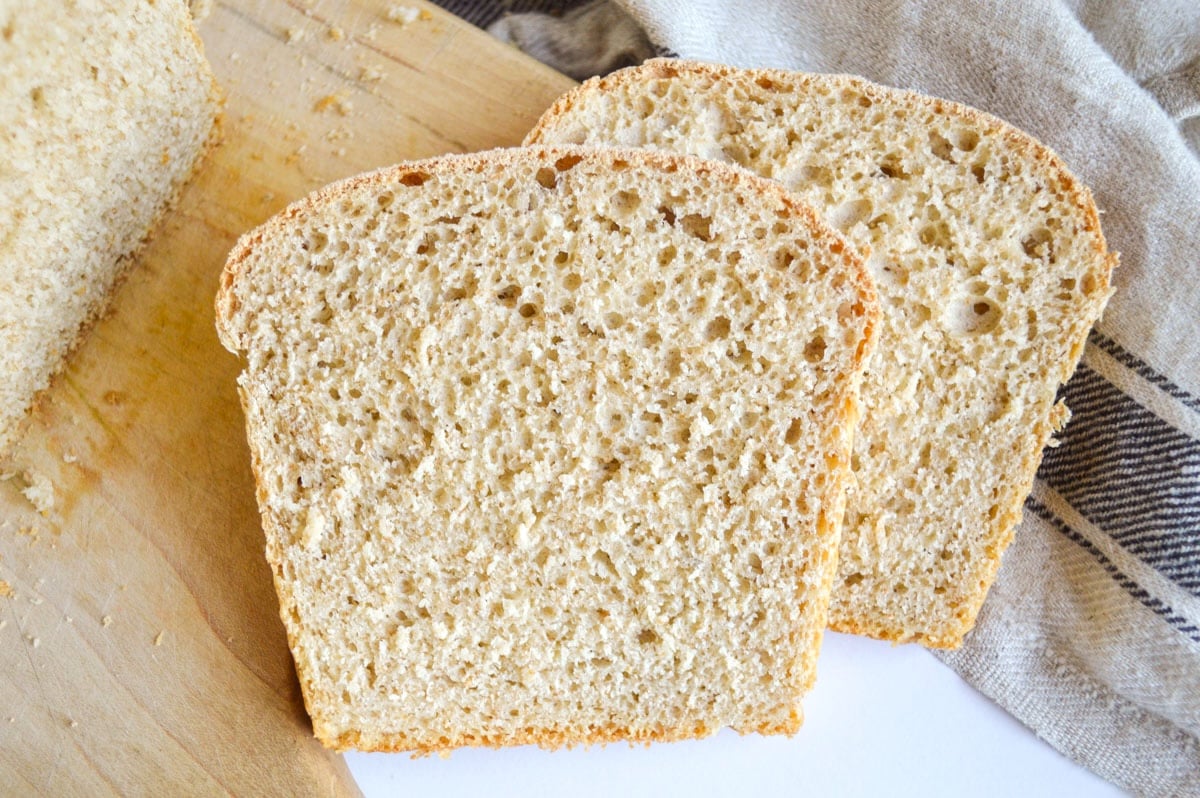
This sourdough sandwich bread recipe is made with eggs, milk, and butter to increase the fat content and help the dough consistently turn out a loaf with a soft and tender interior and crust, just like your favorite sandwich bread.
The 7 basic ingredients you’ll need to make this bread:
- Sourdough starter: Active and bubbly, one that is doubling in 6 hours or less.
- Flour: Unbleached flour, or a combo of unbleached and whole wheat. You can also use bread flour or freshly milled flour.
- Milk: Regular milk – I haven’t tested almond milk, though it may work.
- Eggs
- Honey
- Butter
- Salt
Starter Notes
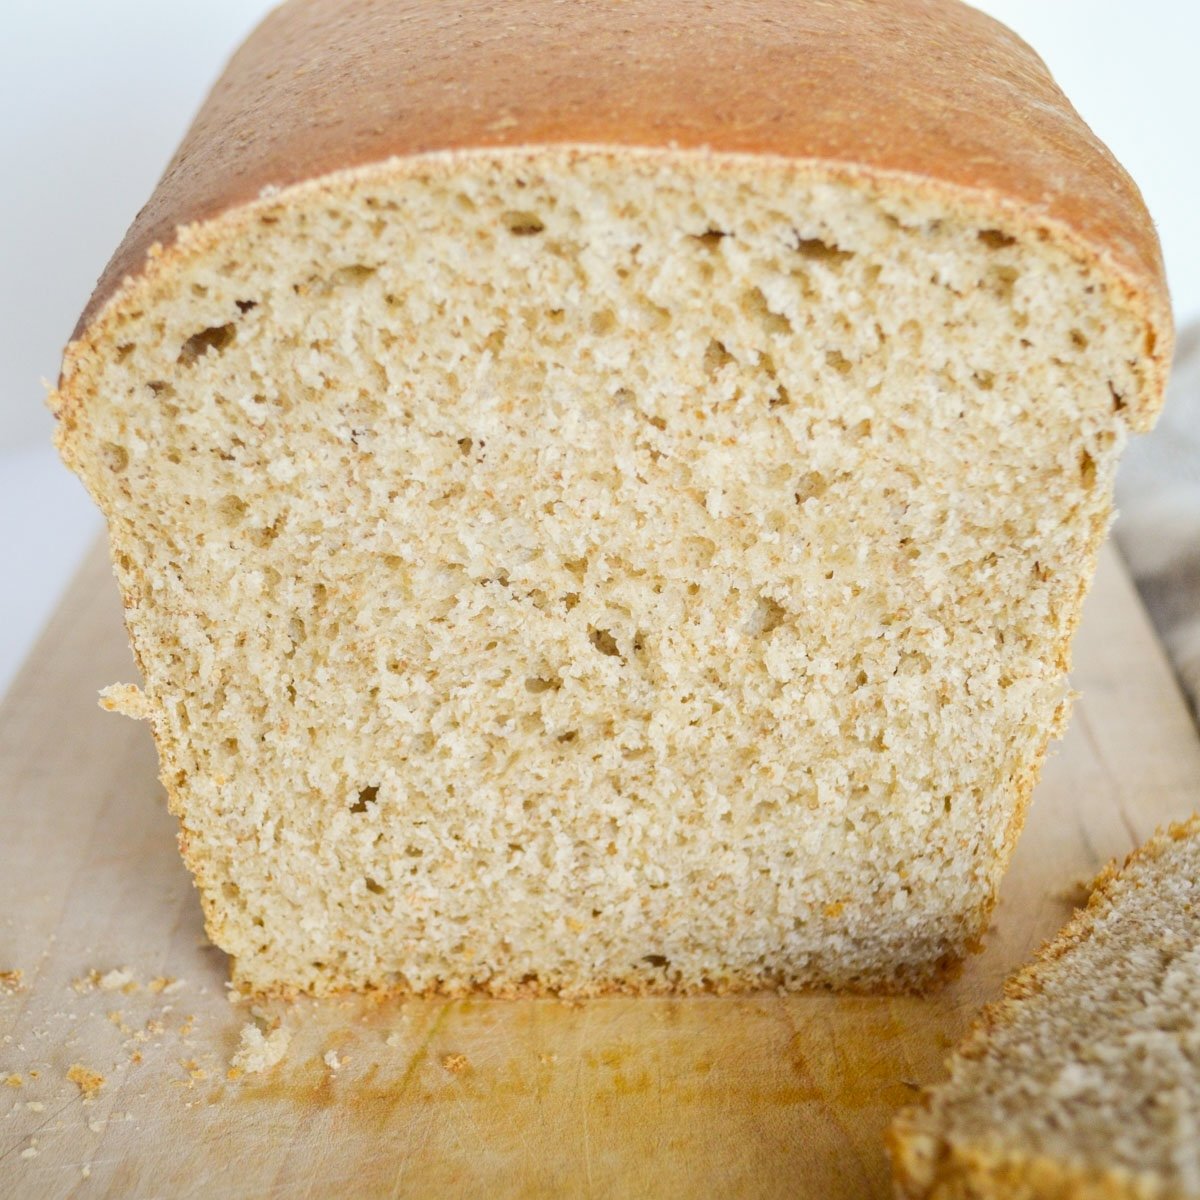
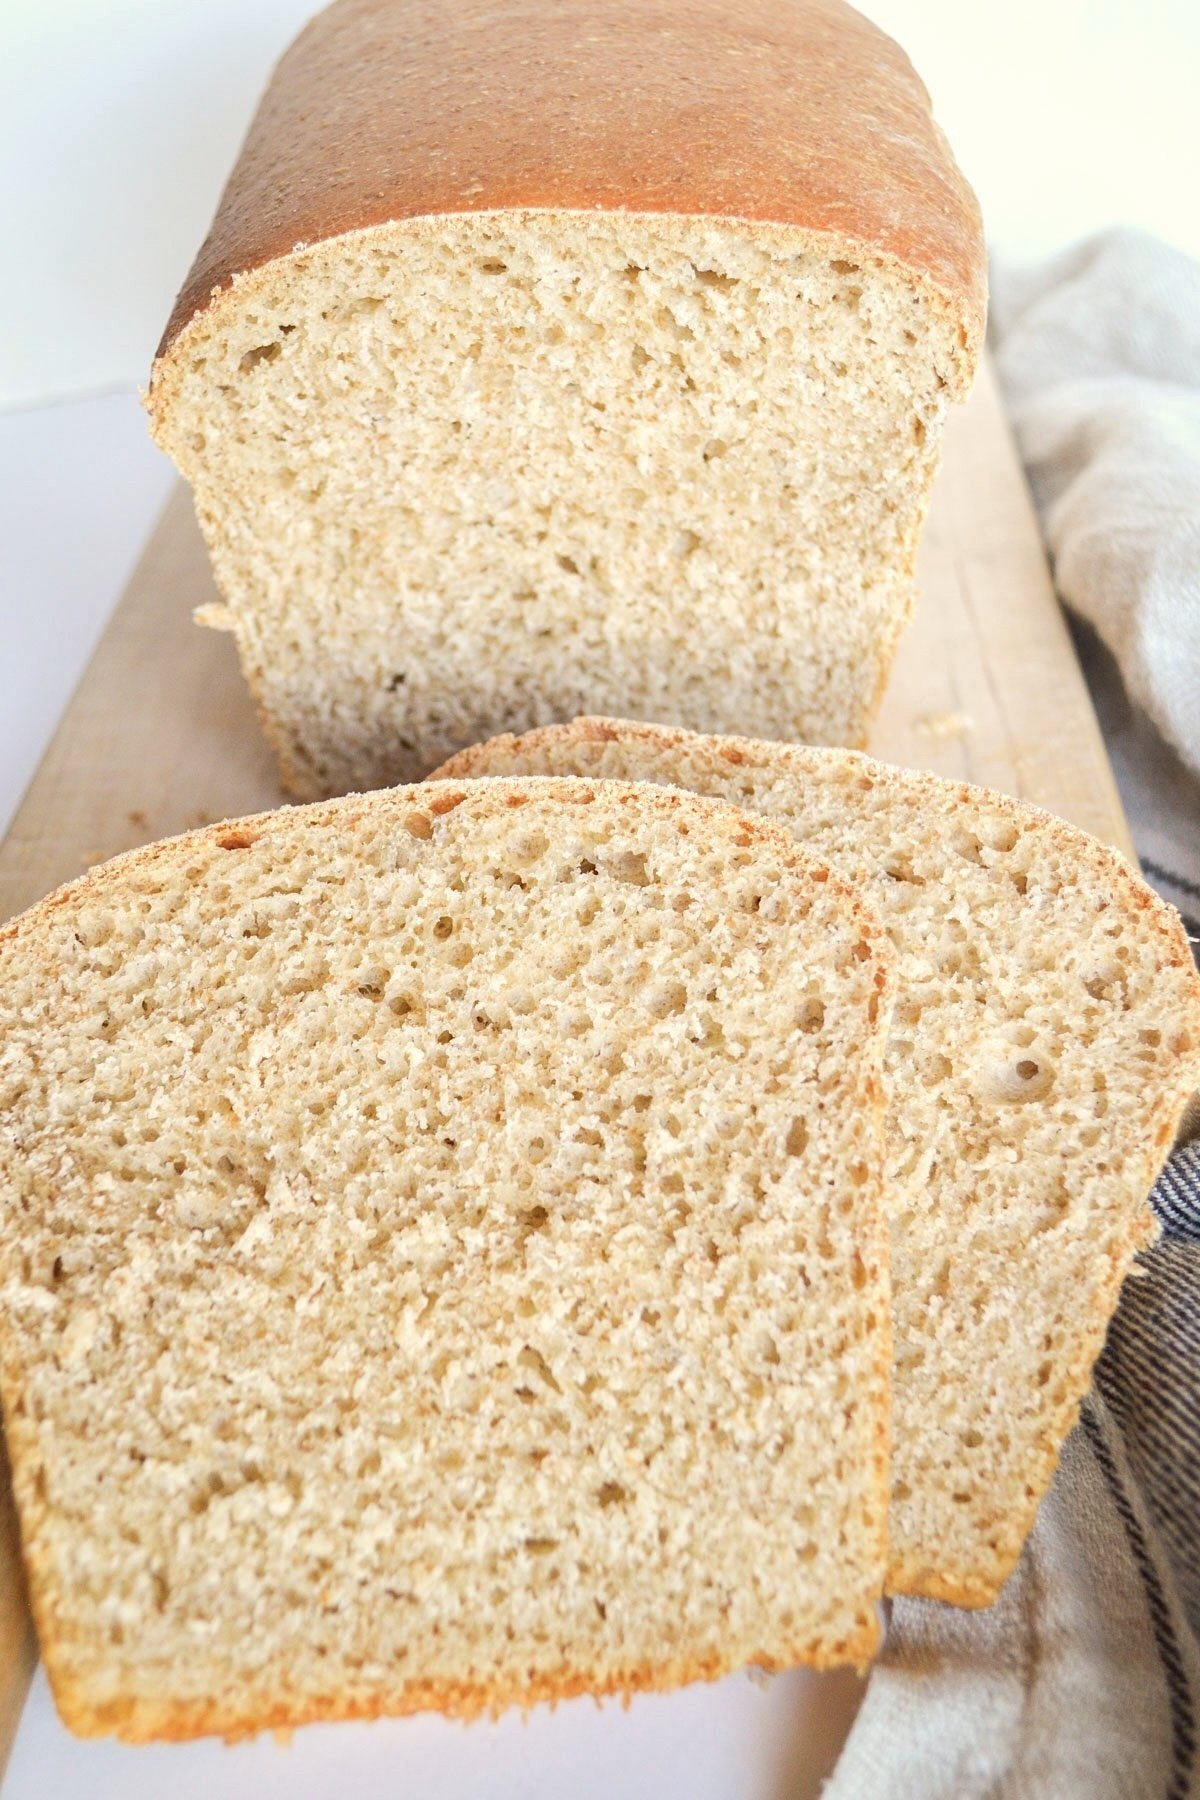
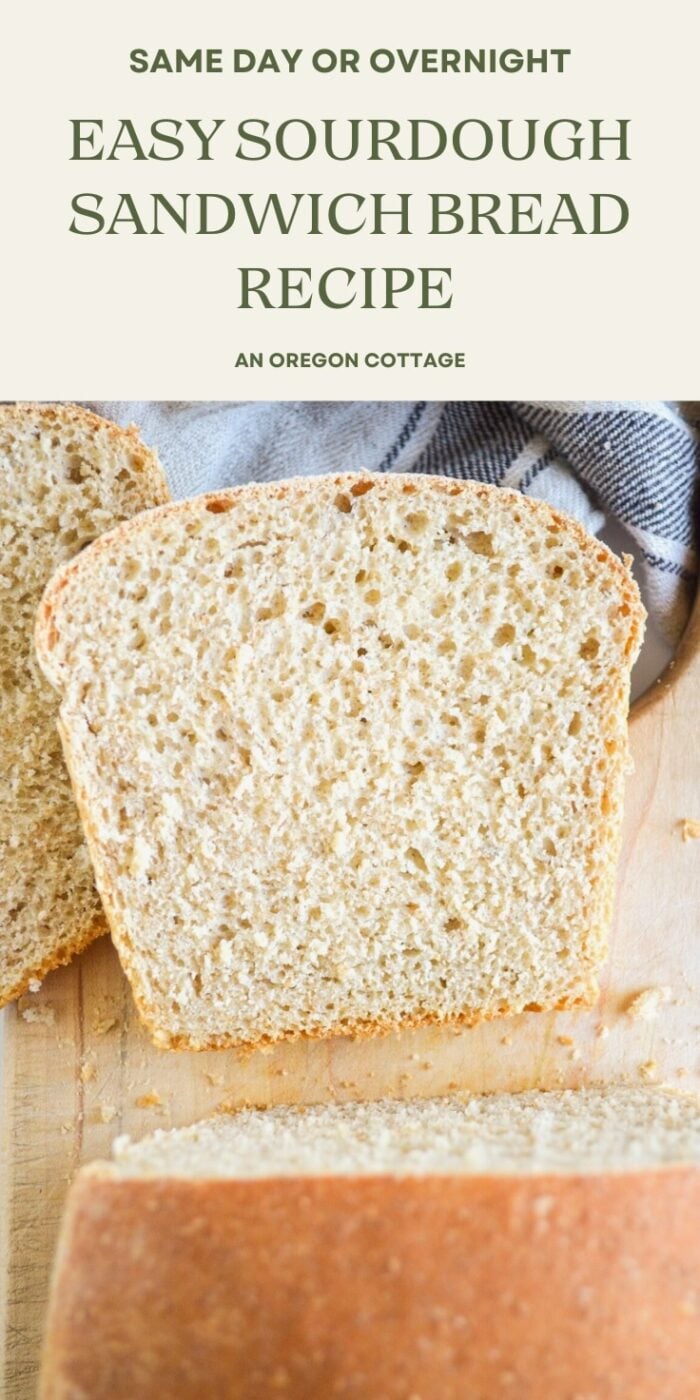
My starter is 100% whole wheat and kept at about a 85%-90% hydration level (so slightly dryer than 100% hydration). For the bread pictured, I used all unbleached flour, but the whole wheat in the starter makes it look browner. You can use half unbleached and half whole wheat flour if you’d like to try that, though your bread will be a bit more dense.
If your starter is made with all purpose flour, then I recommend you use at least 1 cup of whole wheat with 2 cups of unbleached all purpose.
Supplies
- Loaf Pan: Since this loaf uses just 3 cups of flour, it’s best to use an 8.5 x 4.5 loaf pan (also called a 1-pound pan), NOT a 9 x 5 inch pan. While you can still use the larger size, the loaf will not be as tall as the bread pictured here. I purchased these USA loaf pans and they are wonderful – wish I’d gotten them years ago!
- Stand mixer (though you can knead by hand).
- Large bowl, preferably with a lid, if letting ferment overnight.
- Beeswax covers or “shower cap” covers to keep the top moist in the loaf pan during it’s long rise.
Sourdough Sandwich Bread Recipe: Step-by-Step
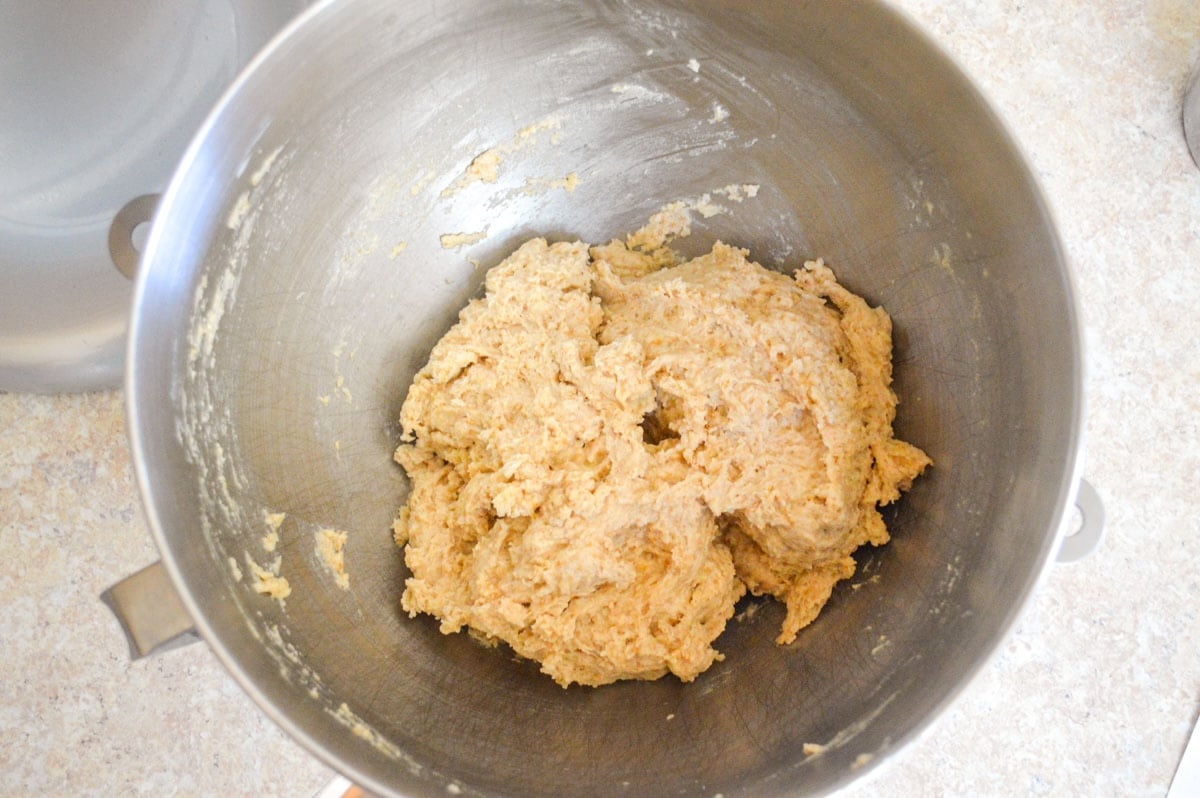
Step 1: Mix all the ingredients into a shaggy dough and let sit for 30 minutes to allow the flour to absorb the liquid. You can wait and add the salt after the rest, but I tend to forget, so I always just add everything at once and haven’t noticed a difference.
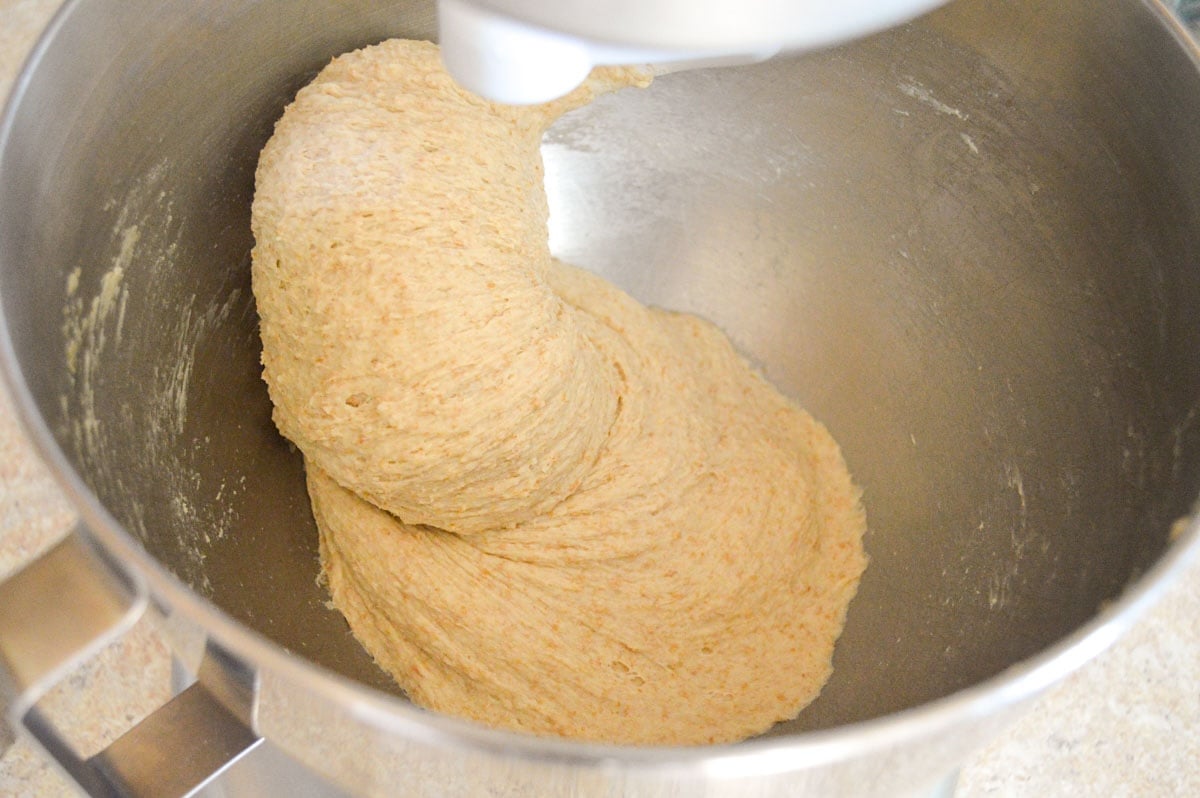
Step 2: Knead the dough for about 5 minutes with a mixer (or about 8 minutes by hand). The dough should be clearing the sides but still sticking to the bottom of the bowl and should be tacky when touched, but with no dough sticking to your finger.
Note: You will probably only need to add about 1 tablespoon of flour during kneading – this is a pretty easy dough to work with.
Step 3 For same-day sourdough: Shape the dough into a loaf shape, creating tension as you do and place it right in the pan to raise.

Step 4: Let rise covered with plastic – it’s the best thing I’ve found to keep the top moist during the long rise. I’ve had these ‘shower cap’ type bowl covers for years and simply clean and reuse them (see similar ones here). UPDATE: I’ve replaced these with beeswax covers when they were finally used up to avoid more plastic.
Why only one rise?
Since we are using a well-fed starter that has doubled, the yeast is already active and a double rising isn’t necessary. It allows for a same-day sourdough and makes this recipe that much more versatile!
Alternative Overnight Ferment
If you’d prefer your loaf to ferment longer, or need an overnight rise for timing, use these steps below in place of Step 3:
- After kneading, place the dough in a large, oiled bowl, cover with plastic and place in the refrigerator overnight (8-12 hours).
- In the morning, remove from the fridge, continue with step 3, shaping into a loaf, placing in a greased pan and covering.
- Continue with step 5 below, but note that the cold dough will need a bit more time to rise, so find a warm spot and let it rise 4-6 hours.

Step 5: Let the dough rise in a warm area for 3-5 hours, until it is at or 1/2-inch above the edge of the pan, like pictured above. TIP: Rich doughs like this need warmth to rise, so find a good spot somewhere! You can use an oven with the light on or a proofing setting if you have it.
Step 6: Bake about 40 minutes, let cool in pan about 5 minutes before turning out onto a rack to cool completely. Optional Slashing: You can slash the top down the middle with a sharp, serrated knife to reduce cracking along the sides (I didn’t in these photos, and there was a crack down one side but it’s not noticeable in the sliced bread).
TIP: Do not slice the loaf until the bread is completely cool, or the crumb will become gummy (though you can slice off an end to eat warm!).
How to Store Sourdough Sandwich Bread
- Store at room temperature in a bread bag for 1-2 days or the fridge for 3-4 days. I’ve used these beeswax-lined linen bread bags and really like them!
- Freeze up to 3 months for best quality (see tip below).
FREEZING TIP: Once completely cool, slice the loaf (keeping the amount you will need in the next couple of days if you’d like) and freeze the rest in a freezer or bread baggie. Homemade bread starts to get stale after a few days at room temperature (and the fridge affects the crumb), so freezing in slices that you can remove when you’ll need it the best way to store bread.
Reader Raves
“I love the tender crumb and flavor. It is unlike other sour dough. The crust is tender too. It was a very easy recipe and turned out better than I ever expected!” -Cindi
“This was my first loaf of sourdough bread ever and it turned out beautiful. I’m sure I need to practice making it more but it came out very delicious! I’m learning but this was a good one to learn with. Thank you for this great recipe. I was so confused with the grams and other measurements but your recipe was very good for someone trying to learn sourdough baking. I’ll be baking this again and trying some of your other recipes!” -Ginger
I hope you love this sourdough sandwich bread as much as we do – if you try it, be sure to leave a rating and review so I know how you like it!
Want to save this?
Enter your email below and you’ll get it straight to your inbox. Plus you’ll get easy new recipes, gardening tips & more every week!
Easy Sourdough Sandwich Bread – Same Day or Overnight
Equipment
- 8.5 x 4.5 inch loaf pan
- stand mixer (optional)
Ingredients
- 3 cups (378g) flour* plus 1-2 tablespoons for kneading
- 1 cup (227 to 250g**) active sourdough starter, reliably doubling in 6 hours or less
- 1/2 cup (125g) milk lukewarm
- 2 large eggs
- 2 tablespoons (28g) butter, melted plus more for pan and top of loaf
- 2 teaspoons (12g) honey or maple syrup, or cane sugar
- 2 teaspoons (12g) salt
Instructions
- Combine all ingredients*** in a large mixing bowl and stir with a spatula or wooden spoon until all the flour is mixed in and you have a shaggy dough. Cover and let rest for 30 minutes.
- Using a dough hook on a mixer, knead for 5 minutes until the dough pulls away from the sides, but still sticks to the bottom, adding a bit of flour as needed (up to 1 to 2 tablespoons). Alternately, you can knead by hand about 8 minutes or use a dough cycle on a bread machine. ****See notes for overnight rise instructions at this point if desired.
- Grease a 8.5 x 4.5 inch loaf pan with butter, coconut oil, or avocado oil.
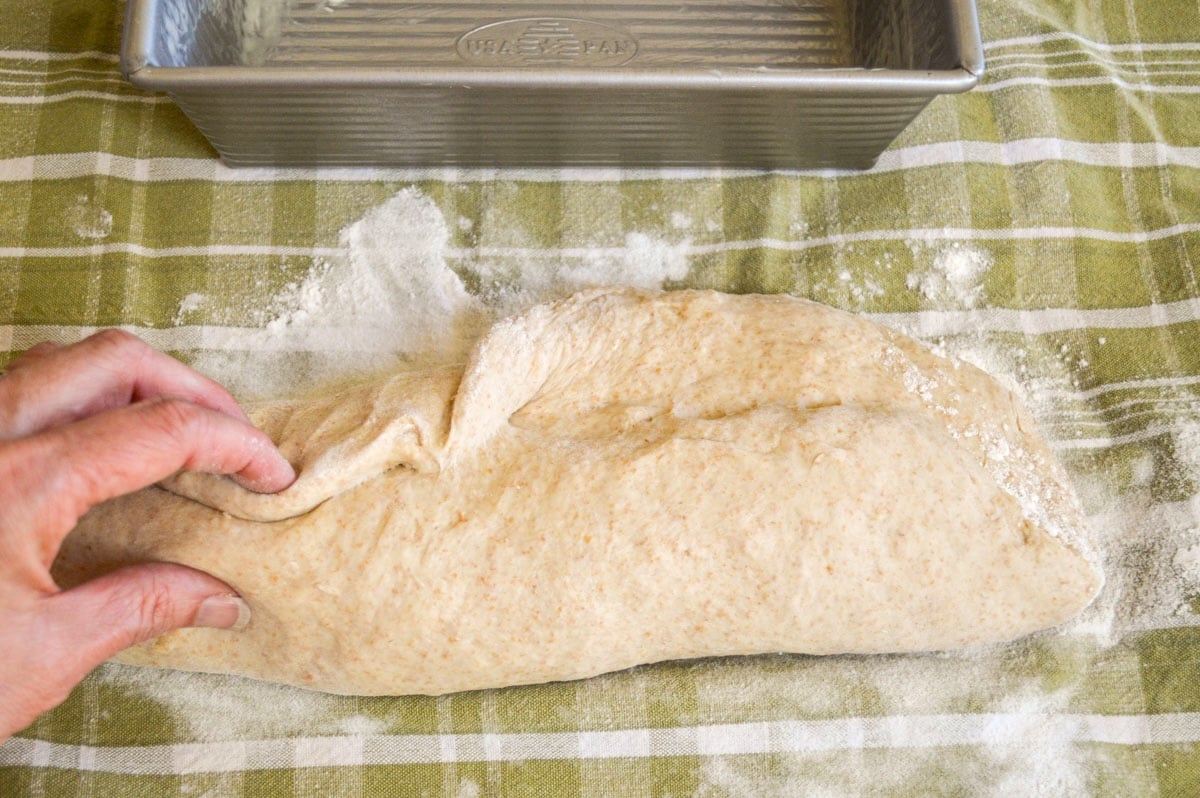
- On a floured surface (I use a tea towel for easy clean up), shape dough by patting into a rectangle the length of the pan, rolling up tightly, and pressing the seam together. Pull the short sides under to create tension on top of the loaf. Place shaped dough into prepared pan.
- Using a pastry brush, spread some melted butter over the top to help keep the cover from sticking as it rises. Cover the bread with a plastic "shower cap" or wrap (a damp tea towel will dry out over the long rise, so plastic is best to keep the top soft). Optional: Before covering you can slash the top of the bread if you'd like to minimize cracks on the edges of the bread.
- Place loaf pan in a warm area (I use the oven with the light on which is 95-100 degrees) and let rise 3-5 hours or until dough is 1 to 1½ inches above the pan. Warmer kitchens will need less rise time, cooler will need more.
- Heat oven to 350 degrees (remember to remove your pan if you're using your oven light!). Bake loaf for 40 minutes, rotating as needed for even cooking, until brown and bottom sounds hollow when tapped. You can also use an instant read thermometer inserted in the middle of the loaf – it should read 195 to 200 degrees.
- Cool in the pan 5 minutes before turning out onto a rack to cool completely before slicing.
- Slice and use within 1 to 2 days at room temperature or freeze slices for longer storage.
Notes
- After step 2, place dough in an oiled bowl, cover, and place in the refrigerator overnight, 8-12 hours.
- Remove dough from fridge, shape into a loaf, and place in pan as in step 4.
- The cold dough will need a bit more time to rise, 4-6 hours.
- Once the dough is above the edge of the pan, bake as directed.
Nutrition
Frequently Asked Questions
For a bread recipe like this one, a “fed, bubbly starter” is one that has been fed and then risen at least double in about 6 hours or less (learning this was key for my breads to consistently rise). To get this you’ll have to revitalize your starter if it has’t been fed: Remove a portion of it and feed according to how you do it (weight or volume) every 12-24 hours until you have a starter that is doubling in 6 hours or less. Once you have that you can feed it to get the amount you need for the recipe (if you don’t have enough), using it as soon as it’s active since you know it’s doubling. (You can make “discard” recipes with the starter you don’t use – keep a jar in the fridge and add to it until you have enough for the recipe you want).
Yes.
Sure, if it’s hard wheat and you follow the weight measurements.
Yes.
Yes, sourdough is very forgiving that way – you can keep it in the fridge up to 24 hours, it will just ferment a bit more and be more sour, which we like.
More Easy Sourdough Recipes
- Artisan Sourdough Rolls (with Everything Bagel Topping)
- Easy No Knead Sourdough Focaccia (Long Ferment)
- Sticky Bun Sourdough Coffee Cake (Using Sourdough Discard)
This recipe has been updated – it was originally published in July of 2020.
Disclosure: affiliate links in this article will earn commission based on sales, but it doesn’t change your price. Click here to read my full disclaimer and advertising disclosure.
Hi I am new to sourdough baking but love it! My similar recipe says to make the dough and allow it to ferment/ rise 8-10 hrs. on the counter, form loaves , then either let rise immediately to bake or put in fridge for up to 30 hours total . May I get your input on this idea please. Thank you
Sure, there are lots of different ways to make sourdough – your recipe includes a longer ferment in the beginning. Some people who are sensitive to gluten find the longer fermented doughs easier on the gut. In my recipe, choosing the overnight option results in a longer ferment. I always try different recipes to see which works best for my schedule and tastes, so test out both to see which you like!
OmG this is the best souedough sandwich bread Ive made, Im pretty new to souedough but THIS is my now new favorite recipe! I just eyeballed it pretty much though, and added a bit more honey then it calls for, and OMG it is SOOO good! Will be making this recipe again and again for my big family of 7!
I’m so glad you like this bread and that it will the the bread you feed your family, Melissa!
We love this recipe! I have made traditional sourdough for years, but sometimes we want something softer. And it lasts much longer than 1-2 days!
Oh, that’s good to know! Thanks for sharing your thoughts!
Made this today and my whole family loves it! Thank you for an easy and delicious recipe!
I’m so glad – you’re so welcome!
I bet this is a good bread, but technically, it’s an enriched sourdough bread. It may not use extra leavening, but it’s also not traditional, or standard either . You kind of come down hard on those who add yeast, which I agree should only be for discard recipes, but sourdough loaves are flour, water, yeast and salt. As a vegan, this isn’t a recipe I’d make, but I’ll check out your other recipes.
Not sure what you mean by “traditional” – does all sourdough have to be one kind? Only artisan?
Yes, this is enriched – it’s for people who want a soft bread for sandwiches and not the hard crusts non-enriched doughs produce.
I’m laughing over “coming down hard on those who add yeast” – anyone can do what they want, but I didn’t want to go to the trouble of making sourdough only to use commercial yeast – otherwise I’d just keep making my yeast sandwich bread (which I love) – and I felt there must be others like me out there. It’s just a perspective.
Hope you find other recipes you’ll make!
I’m with YOU, Jami!
You are certainly a patient and very giving woman.
Thank you, Jules!
I agree with you on enrichments vs yeast additive. You still get the true sourdough benefit plus increased softness with eggs but without a leavening “crutch.” I just discovered your recipe and will be baking this asap. P.S. I also use a 100% whole wheat starter.
Hope you like this bread as much as I do, Deborah!
This recipe is great! My starter is only 2 weeks old and worked perfectly. Make sure that when letting this bread raise, the dome should just crest the top of your loaf pan. It will continue to rise while baking. The crust is really soft and it has a smooth soft texture, perfect for sandwiches . Be aware that this is a slightly yellow bread and denser than yeast type breads.
Thanks so much for the tips, Deborah – I’m glad you enjoyed it!
This recipe tastes delicious and it was easy to make for this newbie.
However, although it’s my third time making this bread, I finally got it right after asking a seasoned SD baker why my loaf had a lip to it. I showed her pics and she immediately wrote back, it’s over-rising. I told her this recipe stated it should rise 1/2-1 1/2” above the pan. She said, no, even with the pan and it’ll rise the rest of the way in the oven. I followed her advice and I have a loaf that looks like a regular loaf of sandwich bread.
Great tip, Joy – thank you!
can the 100% soft sourdough bread recipe be converted to bread a machine.
I don’t know, Carlos, as I’ve never had one. From what I’ve read, most recipes can be used through the mixing and kneading stages and then removed to shape and cook. In this case the longer rise wouldn’t work with the machine – is it set only for shorter yeast rises?
I agree with everyone else! This
was my third attempt at sourdough and it was so good I can’t believe it. I’m going to bake it every week and can’t wait to share with my neighbors! Thanks for the great recipe 😊
I’m so glad, Amy! How sweet to share, too 🙂
My first sourdough bread ever and it worked out great! I used all purpose flour with a AP fed starter. To note, I used a glass pan (as well as the overnight option) and it cooked in 30 min. Thanks for the recipe!
Yay!! So glad you like this recipe, Courtney.
I bake sourdough bread twice a month. Decided to switch things up and try your recipe. Best bread ever! I used 2cups bread flour and 1 cup whole wheat. Followed recipe exactly otherwise.
I’m so glad you like this, Julie – thanks so much for the review!
I love the sound and results of your bread. Can you use freshly milled flour in place of store bought flour?
Sure, if it’s hard wheat and you follow the weighing options.
Can this recipe be doubled?
Yes!
I made this loaf today so easy and yummy. Can you use this method with any sourdough loaf?
I’m not sure what you’re asking? This makes a sandwich bread – if you’re asking if you can make rolls with it or something else like that, I think so, but I haven’t tested times, etc.
I am so excited to bake this bread.. one question? Can we use bread flour? Thank you!
Yes you can – hope you enjoy this!
I’m newer to sourdough and am excited to try this recipe. I seem to be off on my timing and would be baking bread at 2am. Can the dough be in the fridge longer then 12 hours? Thanks for your help!
Yes, sourdough is very forgiving that way! You can keep it for longer, it will just ferment a bit more and be more sour, which we like. 🙂
I made a loaf but it fell back a bit while baking.but it’s very good n want to bake again. Why is there two different measurements grams for starter?I used bread flour..could that be my problem. Or could I use more flour? My dough was very soft.Please and Thanks
When the loaf falls like that, it’s usually a sign of overproofing – try baking as soon as the loaf is at or a little above the pan.
As for the starter measurements: The weight of a cup of starter varies with how much the starter is stirred down before it is measured. I measure my mature 85-90%-hydration starter after being stirred at about 240 grams per cup of starter. I’ve updated the recipe with this info.
You could try adding a bit more flour, but you want a softer dough for a softer bread.
Just made 2 sourdough sandwich loaves in 9 by 5 pans and they are huge. Glad I went with the bigger loaf pan size because the bread dough rose nicely to fill the pan . 12hrs of cold proofing and 6hrs of warm proofing before baking was perfect. They smell heavenly! Your recipes are so easy to follow I love it . Thank you for sharing.
I’m so glad you’re enjoying the recipes like this – your bread sounds amazing! Thank you so much for reviewing.
Great Recipe! I was looking for a soft sourdough on a bit of a lark today because I had some extra starter that I was reluctant to discard. I found several that required a levain but I was already underway for creating a Miche using a levain I didn’t want to wait for this loaf. Your recipe turned out wonderfully! Nice tender crumb and soft crust. I only had 190g of starter but she is ACTIVE so the dough rose in about 4 1/2 hours. I will be making this again…and again…and again.
Oh, good – I’m glad that worked out for you, Scott!
I have been looking for and trying sourdough recipes for quite awhile and I had yet to find one I really liked until now. This bread is just beautiful. I did the kneading by hand and this dough had a wonderful feel to it as I gently folded and kneaded it. It took a good 4 hours to rise but it was worth the wait. I bought the recommended pan from Amazon and baked the bread the next day. Cannot say enough good things about both the pan and the recipe. One suggestion I would make is to let the eggs come to room temperature before cracking them. If they are cold they lower the temperature of the other ingredients possibly extending the time it takes the dough to rise.
I’m so glad you tried this and like it, Janice!! And you know from the article that I was the same way with recipes, never finding the “one” until I decided to go for a richer dough.
And I just baked a double batch of this yesterday with those lovely USA pans, again wishing I had bought them so much earlier in my bread baking career. 🙂
Good tip about the eggs!