
Sourdough English Muffins – Easy Overnight Whole Wheat
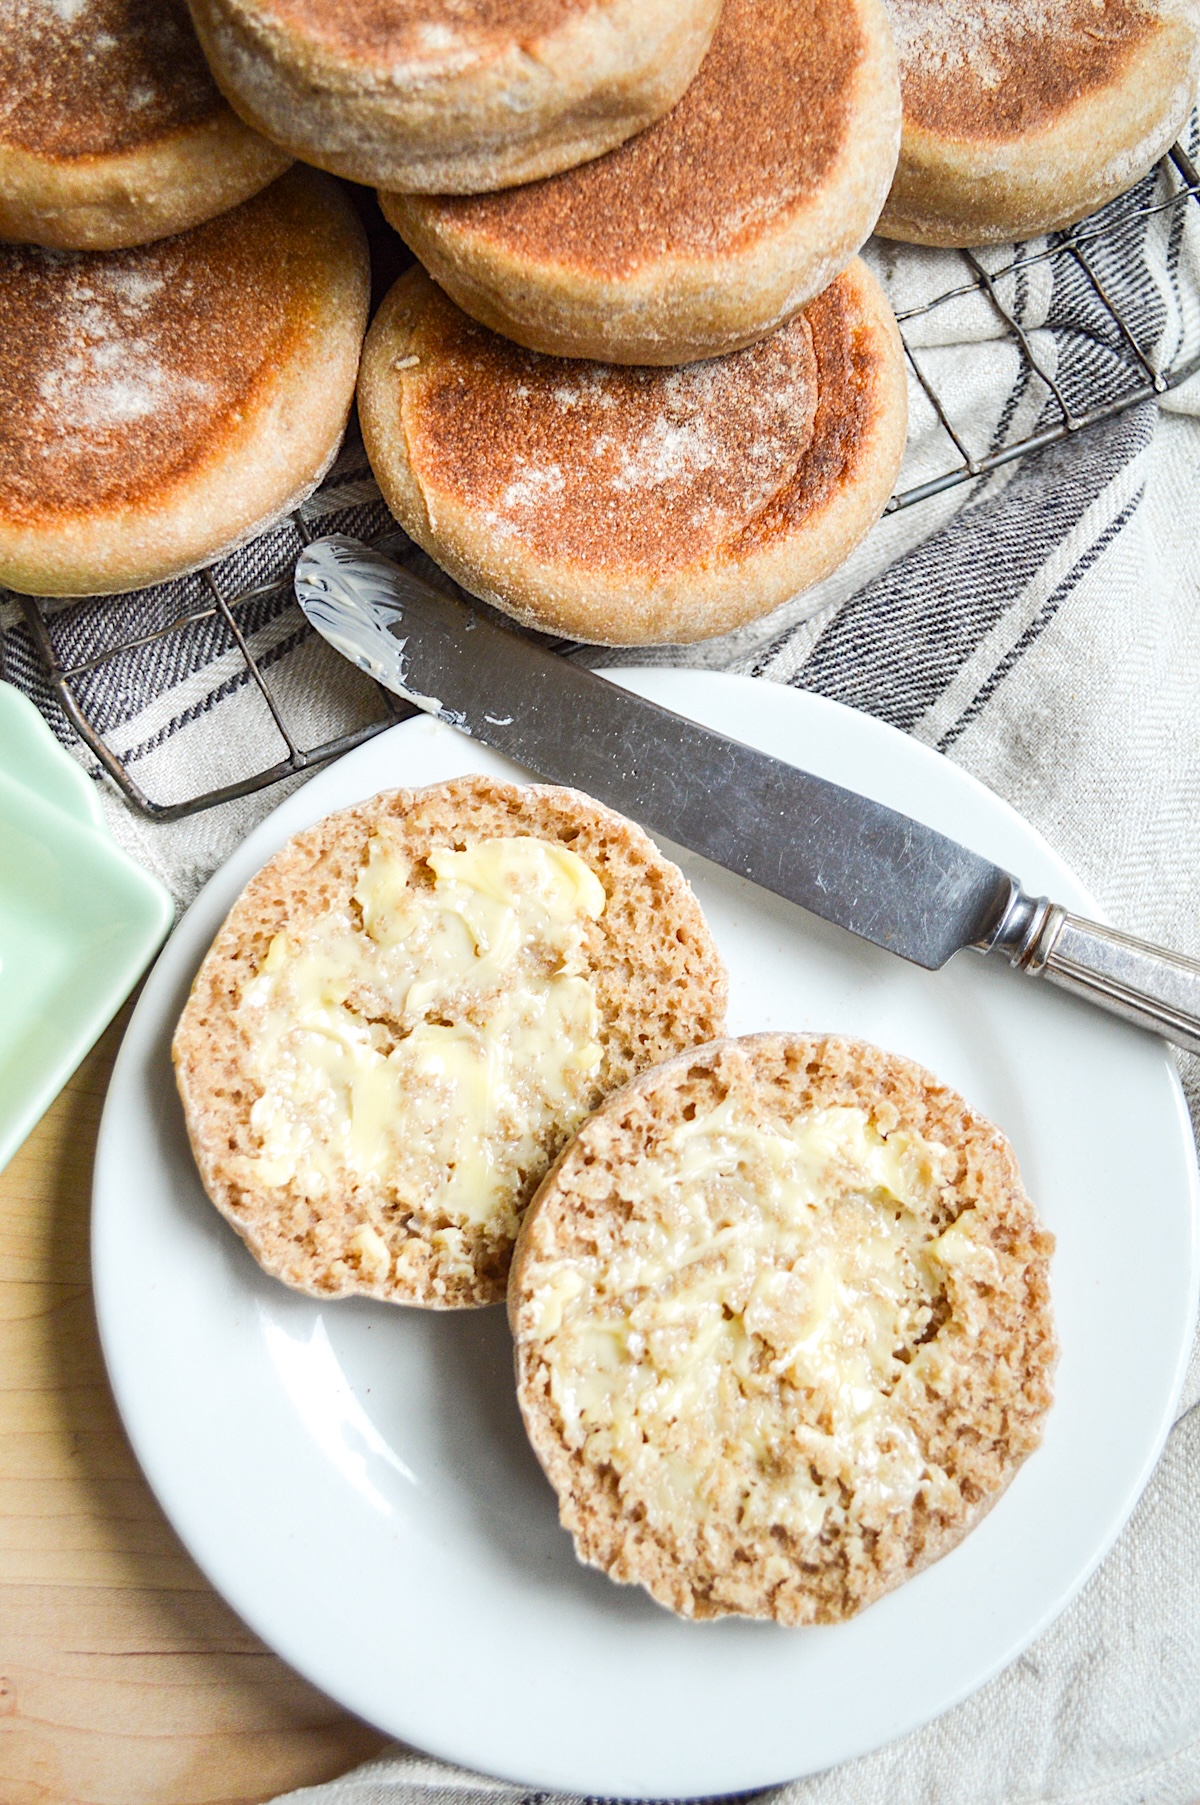
These whole wheat sourdough english muffins are surprisingly easy to make with a simply overnight sponge – and they taste so much better than store bought! Perfect for breakfast, sandwiches, mini pizza, and more. Plus it‘s another great way to use your sourdough discard.
✩ What readers are saying…
“I have tried several different whole wheat English muffin recipes and these are the best!!! They are so delicious and so simple once you make them a couple times and get all of the little tricks down. I now make them weekly and freeze. I’ll never buy English muffins again!” – Michelle
English muffins are one of those things that up until I started my real food journey it would have never crossed my mind to make – like so many other pantry basics that I discovered were often easier to make than buy.
When you don’t grow up around bread making and homemade stuff, it’s easy to think it can’t be made at home. Which seems silly, because I knew it was possible to make bread, even if I didn’t know many people who did. And sourdough? Well, that came only from San Francisco, right?
Now in addition to sourdough sandwich bread and artisan bread, and more, I have learned not only that English muffins can be made at home, but also that they taste incredible. AND they are really easy – I promise.
Plus, this recipe can be made with either sourdough discard or a fed starter!
Rant Note: I wish the term wasn’t discard, because you definitely don’t want to throw this precious stuff away! But I understand that from the starter’s perspective, it is the amount you’re removing to keep the starter strong and viable as you feed it.
And that “discard” is what we want to use in our baking. If it’s been fed in the last 6-12 hours, it’s active and can be used in bread making. However, if it’s a discard from the first months of the starter’s life, or from waking up a sleepy starter, it’s better to use it for low-rise things like crackers, quick bread, and these English muffins.
New to sourdough and want to get started? Check out my easy guide to all things sourdough.
The #1 Thing to Remember For This Recipe
While this recipe really is easy, there is one thing that’s sometimes hard for me to remember:
Start the night before you want to make them.
I’ve been known to make a big note and leave it on my bed to remind me I can’t climb in until I’ve mixed up the initial dough! Do what you need to do to make it happen – you won’t be sorry.
Ingredient Notes
- Sourdough starter: This can be an active fed starter or unfed “discard.”
- Milk: To make dairy free you can use water, but milk makes them more tender if you can do dairy.
- Flour: To make them 100% whole wheat, you will need to use either white whole wheat, whole wheat pastry flour, or spelt. If you only have regular hard red whole wheat, use half whole wheat and half all purpose (using only regular hard red whole wheat tends to make them heavier).
Let’s Make Sourdough English Muffins
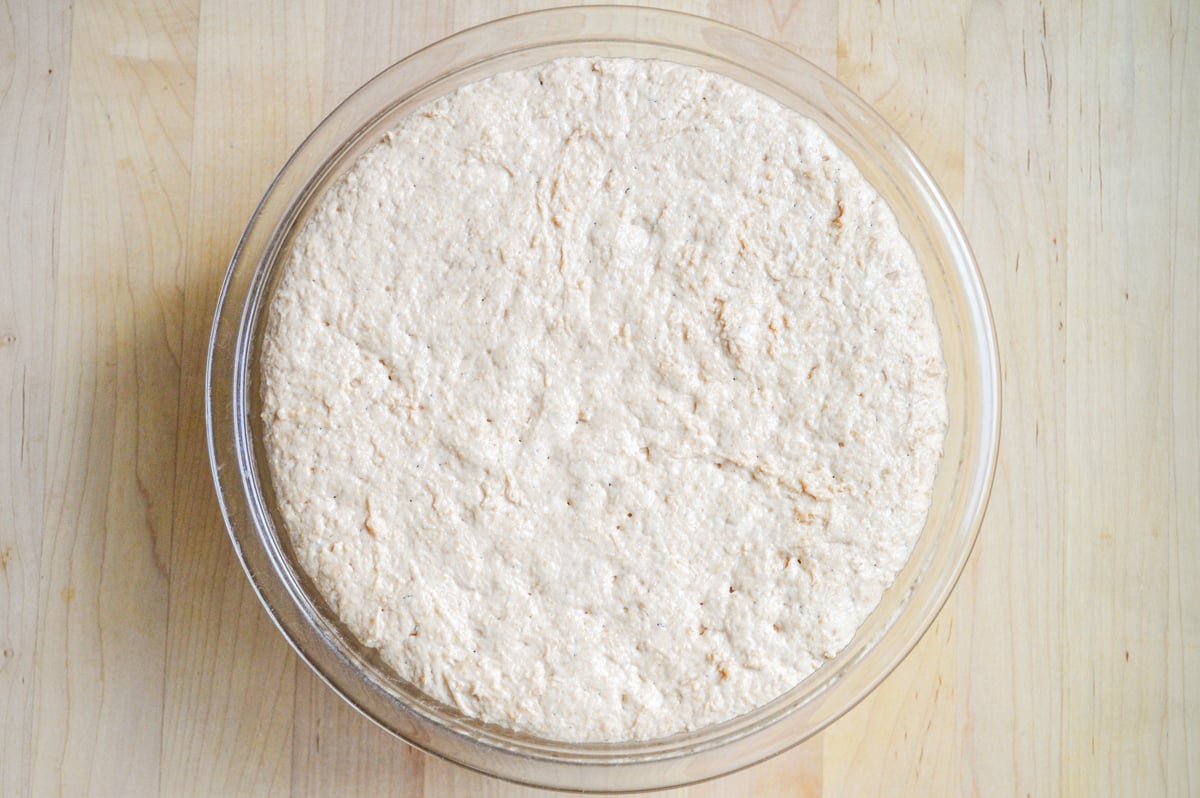
Step 1: THE NIGHT BEFORE you want to make them, mix the sourdough starter with a bit of honey, flour, and milk.
SPONGE TIP: Your sponge may look bigger or smaller than mine pictured above – go with whatever yours looks like. Some readers have had a stiffer sponge, and I’ve found for whatever reason the flour sometimes absorbs more water. Your starter could’ve been more loose or the flour is a type that absorbs more. Simply add water until it looks more like a sponge vs. a ball so that you can mix in the salt and baking powder. I’ve found English muffins, thankfully, are pretty forgiving and they should still turn out great!
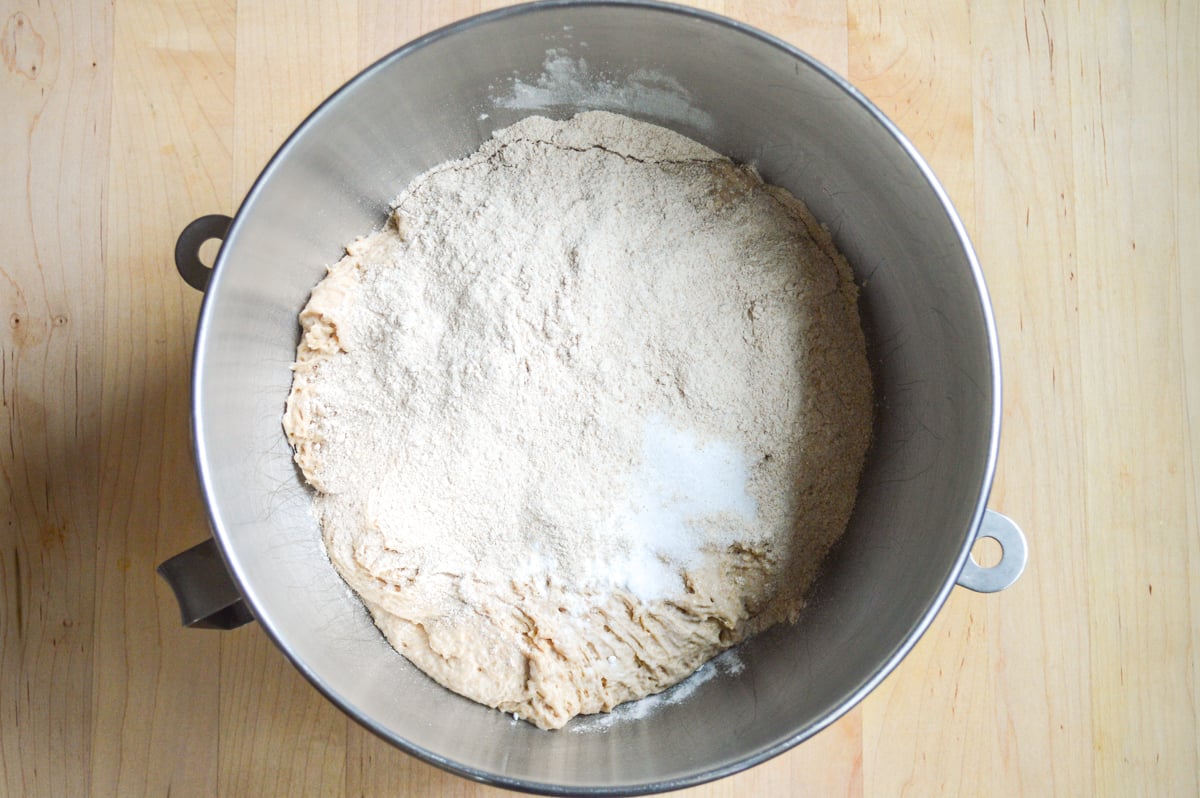
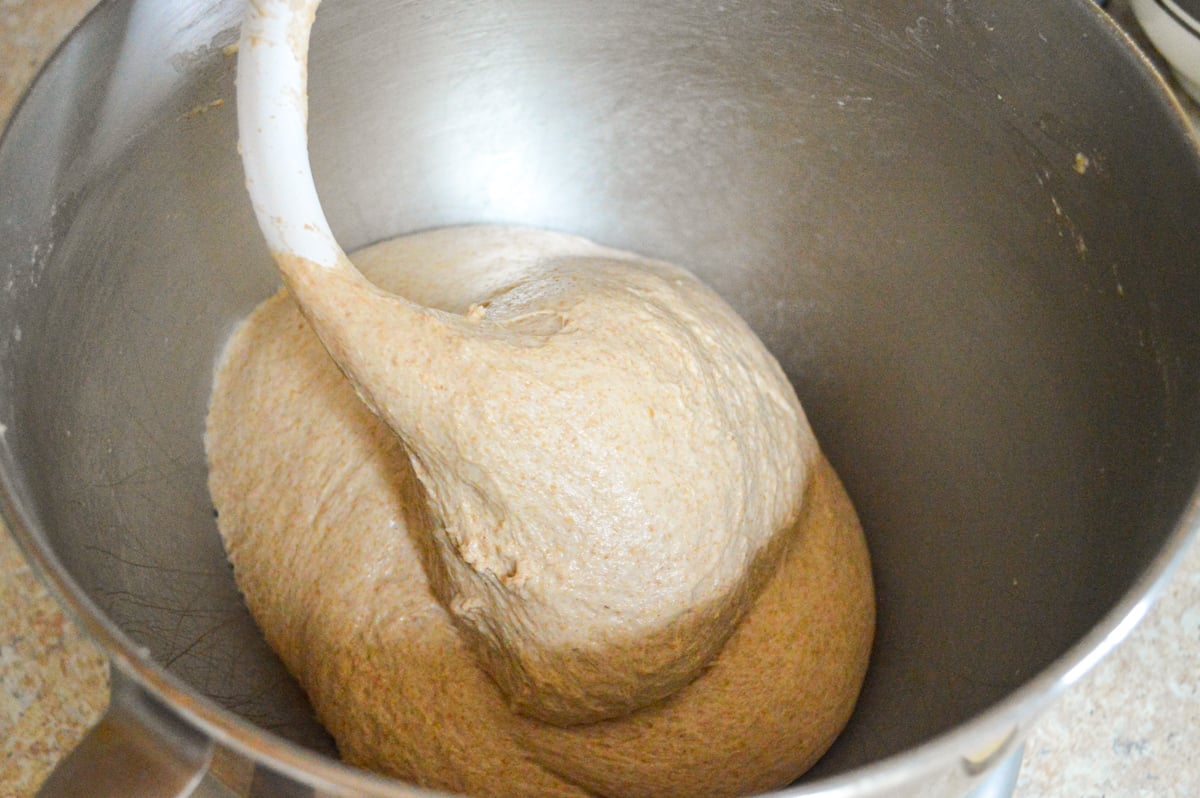
JAMI’S #1 DOUGH TIP: When the 1/4 cup of flour has been added while kneading, the dough should be moist enough to stick to the bowl, but only be a bit tacky when touched with a finger, but not sticking. If a lot sticks to your finger that’s how you know to add more flour, but no more than 1/3 cup total, as stated in the recipe. I’ve found that the enemy of any bread is too much flour– it’s best if the dough to needs to be scraped out of a bowl.
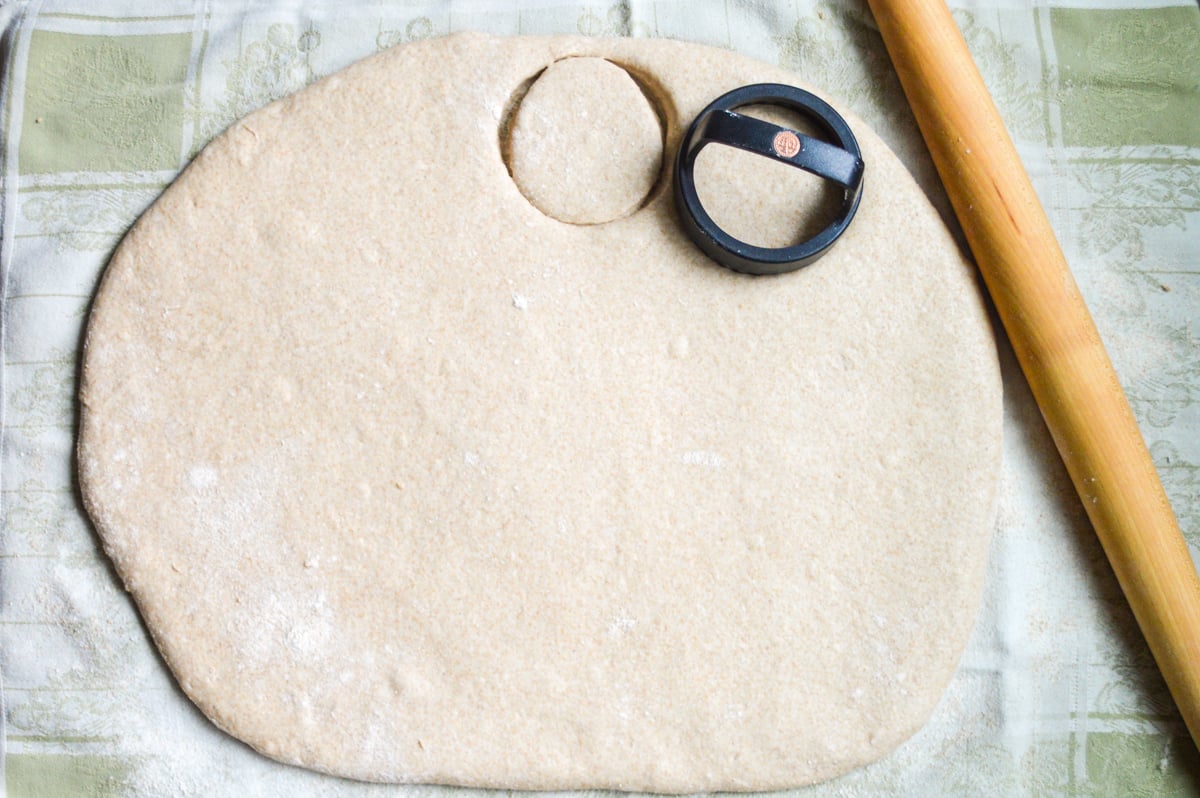

Rolling Out Tips
- I like to use a lightly floured tea towel. It makes for easy cleanup and also helps you use less flour in the rolling out process.
- Biscuit cutters or a wide mouth canning jar ring work great – there are recipes I saw that require you to shape each muffin with your hands, which is an option but I usually don’t have time for that.
- It’s okay to gather the dough and re-roll it to cut more muffins, I haven’t noticed any difference between the first roll and the second.


Transferring Tips: The muffins do tend to stick to the lining even with a dusting of flour/cornmeal, so as you slide a spatula under to transfer to the griddle, pick up a bit of the flour/cornmeal as you’re lifting the muffin with the spatula. Then invert onto the heated griddle. Some readers have cut the parchment or foil they’ve risen on in squares around the muffin, inverted onto the pan and then peel off the paper/foil.
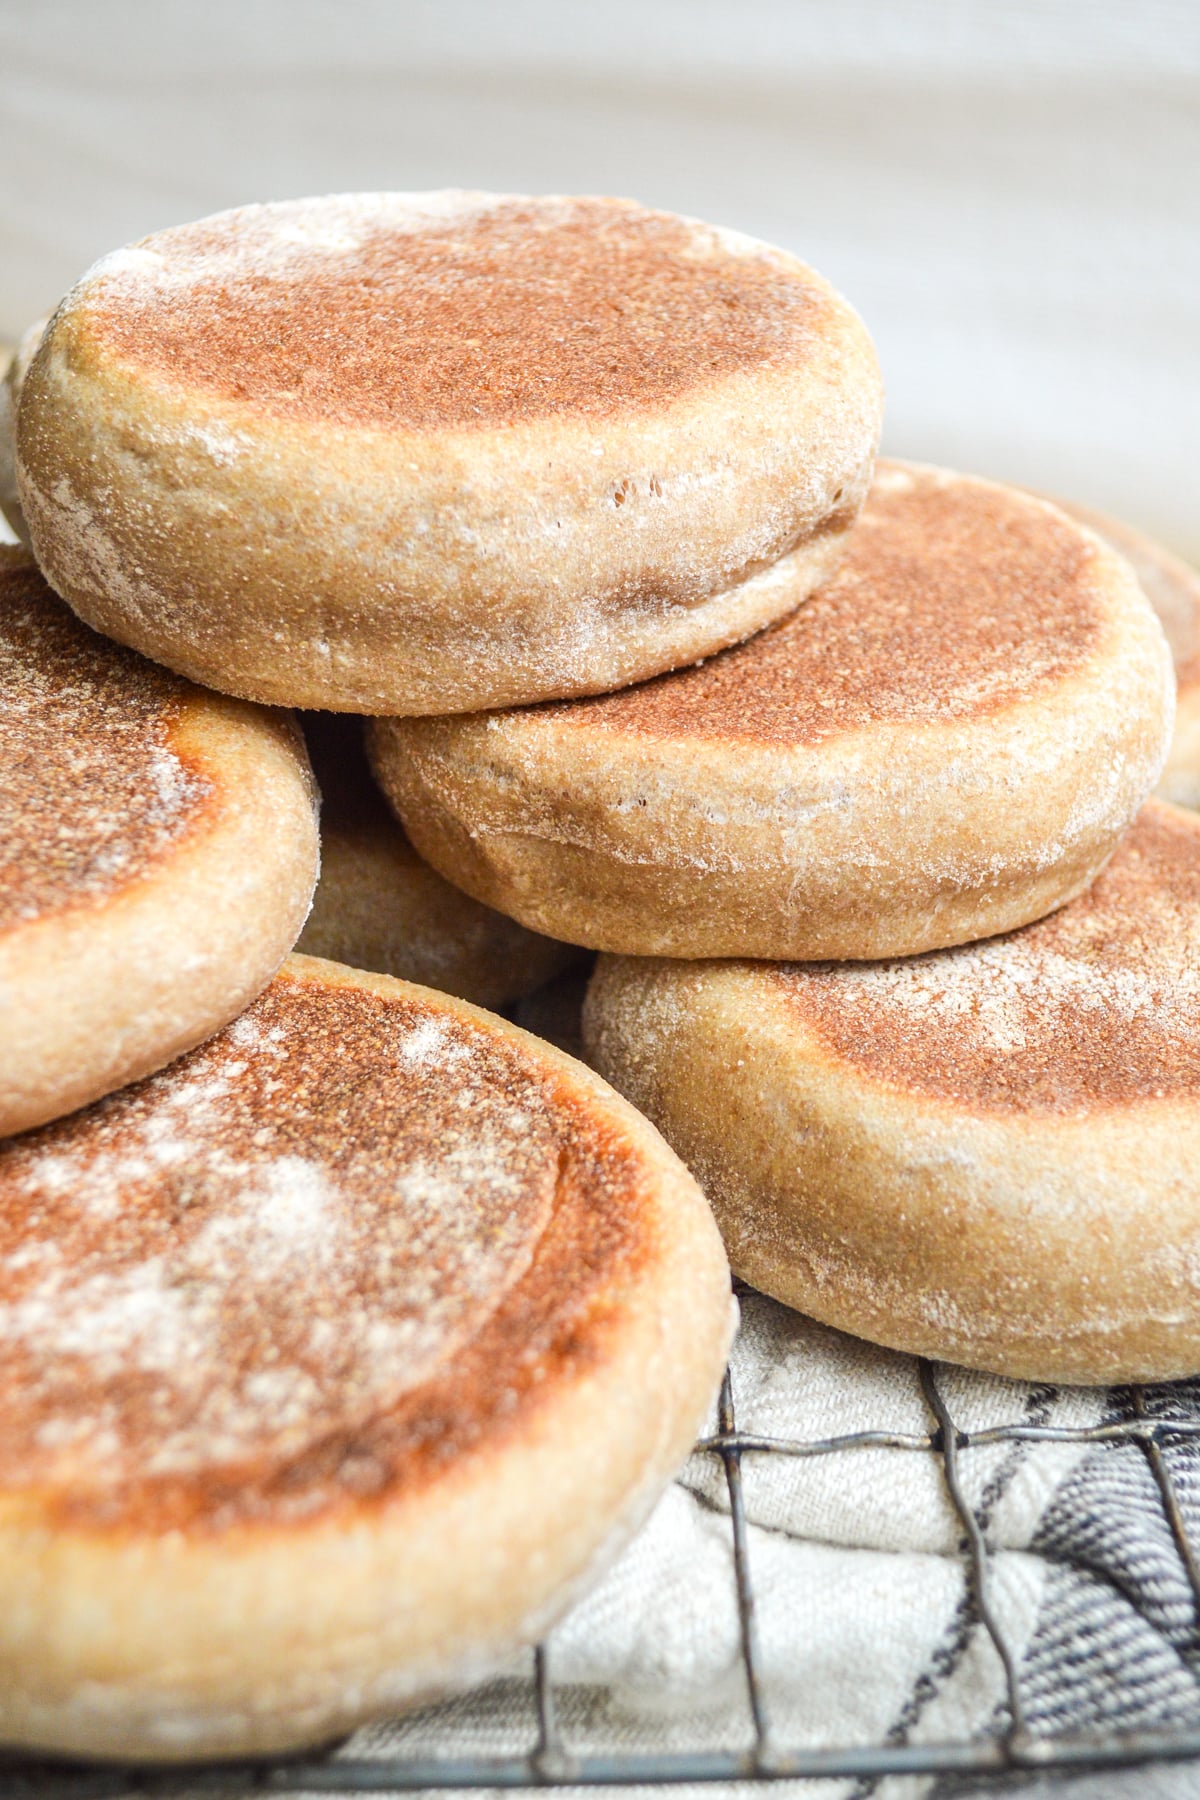
Remove to a baking rack to cool.
TIPS FOR FULLY COOKED CENTERS
I cook the muffins as I show and have always had centers fully cooked like in the photos, but I know cooking times, heat, and equipment vary and can impact the doneness. Here are some things you can do to make sure they are cooked all the way through:
- #1 thing to do: Use an instant read thermometer in the center of the muffin to see if it’s 195-200 degrees Fahrenheit. No need to open each one to see!
- Cook in a pan and then pop into a heated 350 degree oven for 5-10 minutes, or until the centers are up to temperature.
- Cover with a lid for the first 4 minutes of cooking.
- Put muffin rounds on a cold griddle to rise – no moving them and they will cook more slowly on that side as the griddle heats up (tip from King Arthur website).
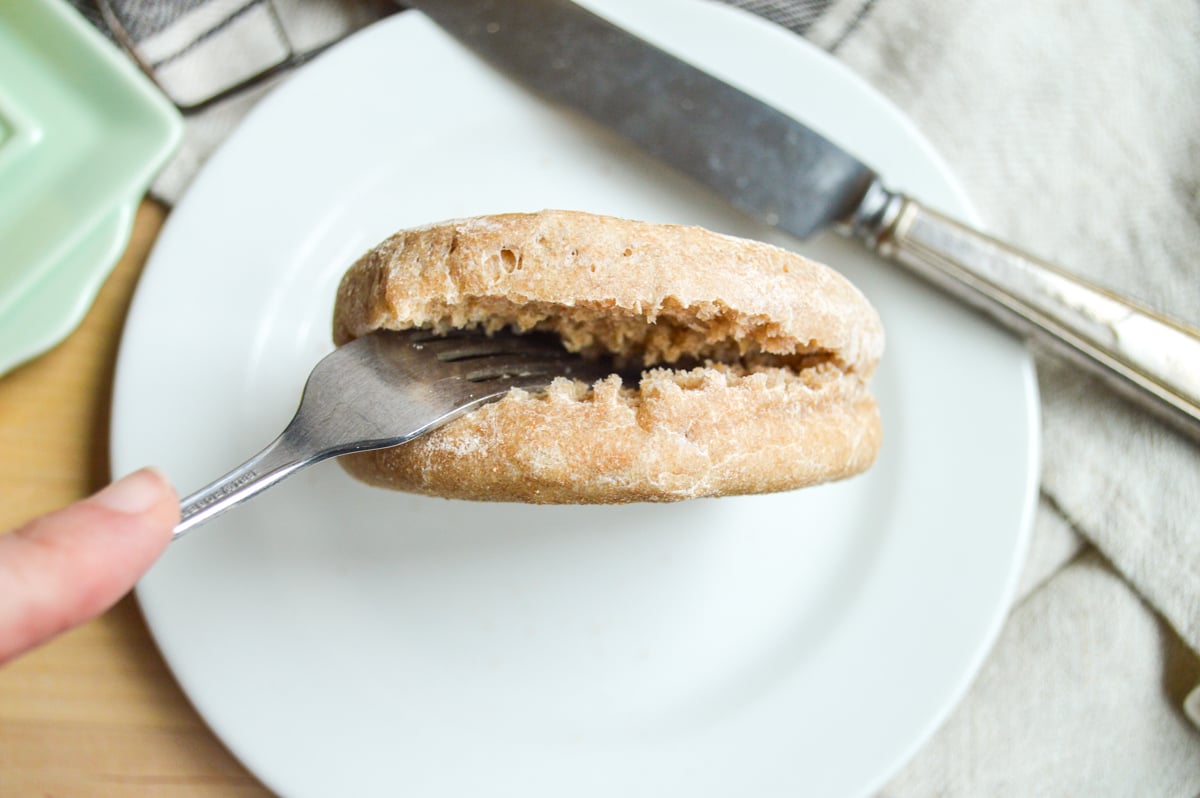
Slice – or better yet, split with a fork to preserve all the nooks and crannies – toast, and butter like you would any English muffin.

Just be prepared for a major taste difference!
So, a quick recap of making your OWN sourdough English muffins:
- One quick mix the night before.
- Another stir in a mixer.
- A simple roll-and-cut.
- A rise.
- A super-quick eight minute cook.
About 20-25 minutes total hands-on time is all you need for a baker’s dozen of great tasting fresh English muffins that cost around $1.00. Definitely worth it!
While these are amazing just with butter or as an egg-and-sausage sandwich, our family’s favorite way to eat the muffins is as a base for Eggs Benedict with super easy Hollandaise sauce – yum.
Reader Raves
“These came out awesome! Every one of your recipes I make comes out perfectly. So nice to be able to trust someone’s recipes, and to not have wasted ingredients.” -Lori M
“I love this recipe and can’t believe they turned out so tasty. It was my first try using sourdough starter.” -Kyra
“I love this recipe!!! I used combination whole wheat & spelt flours & muffins turned out perfect! They’re beautiful & delicious!!!” -Terri
“These are the best! I used whole wheat pastry flour, 3 1/2 inch cutter and found that kneading in the stand mixer really helped with texture. The taste and texture are perfect. Was hesitant about using all whole wheat, but will always make them this way from now on.” -Karen K.
Want to save this?
Enter your email below and you’ll get it straight to your inbox. Plus you’ll get easy new recipes, gardening tips & more every week!

Sourdough English Muffins – Easy Overnight Whole Wheat
Ingredients
Overnight Sponge:
- 1/2 cup (100g) sourdough starter, fed or unfed
- 1 tablespoon (20g) honey (or maple syrup or sugar)
- 1 cup (240g) milk (can use water, but milk makes them more tender)
- 2 cups (240g) flour*
For the Muffins (the next day):
- 1½ teaspoon (7.5g) baking soda
- 1 teaspoon sea salt (5g)
- 1/2 cup whole wheat flour (60g) (may need a bit more when kneading)
Instructions
- The night before: Mix the starter, honey, milk, and 2 cups flour in an 8-cup measuring bowl or batter bowl the night before you want to make the muffins. (It should be stirrable – if it's too stiff from a flour that absorbs more or a dryer starter, add a bit more milk or water). Cover and leave at room temperature overnight. (Note: it's safe to leave this at room temperature because of the fermentation.)
- In the morning: Transfer the sponge to the bowl of a mixer (or large mixing bowl to be made by hand). Add the soda, salt and 1/4 cup flour.
- If using a mixer, use the paddle attachment to mix together, then switch to the dough hook and knead for 3-4 minutes, adding another 1/4 cup flour, one tablespoon at a time, until the dough is just tacky to the touch, clears the sides of the bowl, but still sticks to the bottom. If too much dough sticks to your finger when pressed, you can add more, a tablespoon at a time, to bring the total amount of flour to about 1/3 cup (it should still be slightly sticky).
- If making by hand, stir the ingredients together well, turn out onto a floured surface and knead 5 minutes, adding the same 1/4-1/3 cup of flour until it's tacky but doesn't stick to your fingers.
- From the mixer, turn the dough out onto a floured surface and knead a few times into a round shape – just shape if kneaded by hand. Use a rolling pin to roll the dough about 1/2-inch thick. Cut into rounds with a 3-inch biscuit cutter (if wanting bigger muffins, use a 4-inch cutter).
- Place the muffin rounds on a baking sheet lined with parchment or silicone and sprinkled with a good dusting of cornmeal or flour. Leave about 2 inches between each muffin, as they will stick together if they touch after rising, and dust the tops with a bit more flour or cornmeal.
- Cover with a towel and let rise in a warm place for 1 to 2 hours. They will be just slightly more puffy.
- Heat a griddle to a medium-low to medium setting (about 275 degrees) in order to cook the inside of the muffin without burning the outside. Do not grease (for even browning.)
- Transfer the muffins, one at a time, to the heated griddle or pan and cook for about 4-5 minutes on one side. Flip the muffins, flatten slightly with the back of the spatula, and cook for another 4-5 minutes on the other side until both sides are nicely browned and an instant read thermometer inserted in the center of the muffins reads 195-200F.**
- Cool on a rack. Store for a couple days in an airtight container or freeze for longer storage.
Notes
- “For 100% [hard red] whole wheat, add either a few teaspoons of vital wheat gluten or a scant 1/2 teaspoon diastatic malt powder for a soft muffin.”
- “[I] used whole wheat pastry flour and they were the best batch yet.”
- “I used whole spelt and a little rye flour. These were delicious! I used 100% fresh milled spelt flour for these and they are AMAZING!!! I just rolled them a little thicker, and used a smaller cutter because spelt tends to spread out more than it rises.”
- “They are delicious. I did use 100% whole wheat that I grind.”
Nutrition
FAQs
Is the starter cold discard or fed recently, but removed for another feeding?
I’ve now found this works with both cold discard from the fridge or discard from a feeding, but if you’re having issues with rising, try using a recently fed starter as a test.
Could I let it sit in fridge after mixing, rolling out and cutting , then take out to rise 2-2.5 hrs , the cook? I don’t recommend letting them sit after mixing the baking soda into the sponge – once it’s mixed in it’s activated to help the dough rise and create the holes we like in the muffins. That said, there are some comments where people have done this successfully, so you can give it a try.
Can I put the sponge in the fridge for a slower ferment if I can’t make them until the next night? I haven’t tried that to know for sure, but with sourdough you’re usually able to do that easily, so I think it would work.
Can I use fresh-ground flour? Yes – multiple readers have. Stacey H. said: “They are delicious. I did use 100% whole wheat that I grind. I would highly recommend trying this recipe. It is so easy.”
More Easy Sourdough Recipes
- Easy Whole Wheat Sourdough Discard Crackers
- Easy Sourdough Artisan Bread Recipe (Ready in 1 Day)
- Amazing Whole Wheat Sourdough Waffles Recipe
- How To Make Easy Sourdough Bagels

This recipe has been updated – it was originally published in 2011.



If I make the sponge at night, but I won’t be able to do anything with them until early evening the next day, can I put the sponge in the fridge for a slower ferment? Or would that be too long to leave it before the next step?
I haven’t tried that to know for sure, but with sourdough you’re usually able to do that easily, so I think it would work.
I don’t have honey on hand. Can I substitute another sweetener or would it be better to wait till I get some?
No, you don’t have to use honey- substitute cane sugar instead.
So Good!!!