How To Lay Wood Chip Garden Paths For Weed Suppression
If you’re tired of weeding garden paths, you’ll love wood chip paths. They are one of the simplest, affordable ways to keep weeds under control while making your garden easier to work in and tidy. Using cardboard and a thick layer of chips creates a natural barrier that keeps weeds down and makes your garden easier to maintain, leaving you to do the fun planting and harvesting.
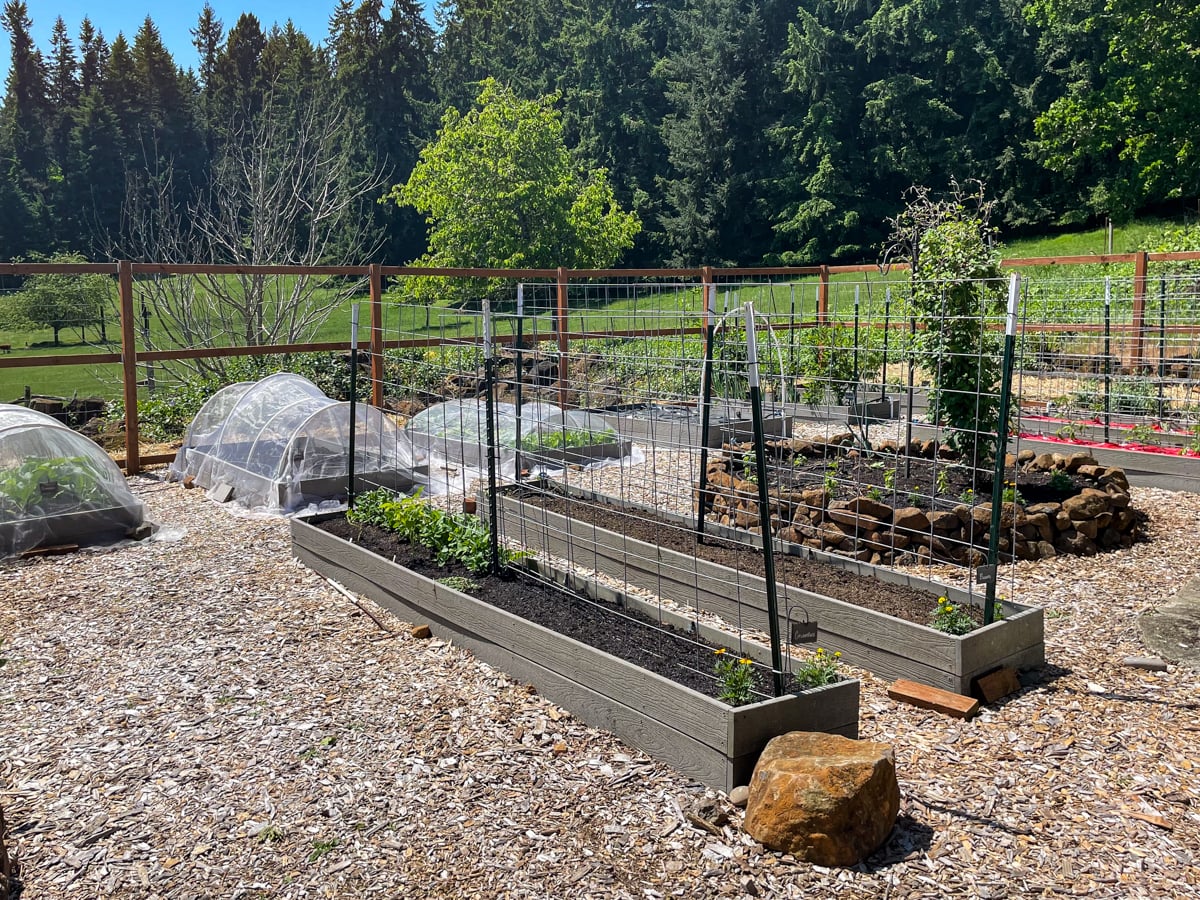
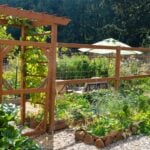
When I planned the new raised bed vegetable garden at our farmhouse, the one thing I knew for sure from my experience in our cottage’s vegetable garden was that I wasn’t going to use gravel for the paths again.
While I loved the look of gravel with raised vegetable beds – and they had worked wonderfully in our small city lot with 4 raised beds – gravel in a large raised bed garden became a maintenance nightmare. Between spilling compost and dirt, moles coming up through the paths, and cleaning up all the debris, the paths eventually had enough dirt in them to grow loads of weeds. Other than pulling or spraying, which I didn’t want to do, there wasn’t much I could do about it once the gravel was down.
Enter the cardboard-and-wood-chip garden path. This easy method for walkways uses inexpensive (and potentially free) materials, works well between garden beds, and only needs occasional refreshing as the wood chips break down over time. Most importantly, I could easily add another layer of cardboard under the new chip layer, if needed for weeds, and I wouldn’t have to worry anymore about dirt and clippings falling on it.
As you can maybe guess, I love the wood chip paths. Like, LOVE them. The freedom of not worrying about spilled compost and the ability to just toss small plant debris on the paths is wonderful.
I created a video a few years ago illustrating all the steps and materials used which you can watch below.
Now a number of years into using wood chip paths, I wanted to provide a guide showing not only how to build wood chip garden paths and what types of wood chips work best, but also the simple maintenance that keeps them working year after year with photos from the garden through the years.

Why Wood Chip Garden Paths Work In Vegetable Gardens
Grass paths need constant mowing and can easily creep into the beds, and gravel has to be kept meticulously clean, but wood chips (over cardboard for initial weed suppression) will:
- Block sunlight that weeds need to grow.
- Allow water to soak into the soil, reducing run off or muddy areas.
- Create soft, comfortable walking paths.
- Use natural, inexpensive or free materials.
- Define the garden and create areas that don’t need water (#1 tip to less weeds is not to water the areas that aren’t growing food).
- Be maintained easily by adding new layers.

Materials Needed for Wood Chip Garden Paths
- Cardboard: plain brown boxes (tape and staples removed) – you can also use heavy carpenter’s paper on rolls from a home store if you can’t get cardboard.
- Wood chips from a landscape company or arborist mulch/tree trimmings free from a local source.
- Wheelbarrow or cart for spreading chips.
- Rake
- Optional: Water source if it’s windy (to help hold down cardboard as you’re spreading the chips)
- Optional: Landscape staples if paths are on slopes.
Where to get wood chips?
Like I mention in the video, when I can get free wood chips I will use them, but when I can’t I purchase them from a local landscape company. Where to look for free wood chips:
- Friends who are trimming trees.
- Call local arborists.
- Ask utility companies about tree trimming piles (or if you see them trimming near you).
- Call your county to see if they have a free pile.
- Register with Chip Drop (I know people who have gotten chips from this organization, but in 4 years I never have, sadly).
Step-by-Step: How to Lay Wood Chip Garden Paths
1. Clear the Path Area
Remove large weeds with tap roots (dandelions) or tall growth. No need to dig or fully clear the soil of small, annual weeds.
2. Lay Down Cardboard
Break down cardboard boxes until flat, removing any tape and staples. Lay them along the path area, overlapping so weeds cannot grow through the seams.
3. Add a Thick Layer of Wood Chips
Use a wheelbarrow to spread chips 2 to 3 inches deep. The thicker layer you use, the better the weed suppression and the longer the paths will last before needing to add more.
4. Level and Smooth
Rake the chips where needed and walk on the paths to help the chips settle.
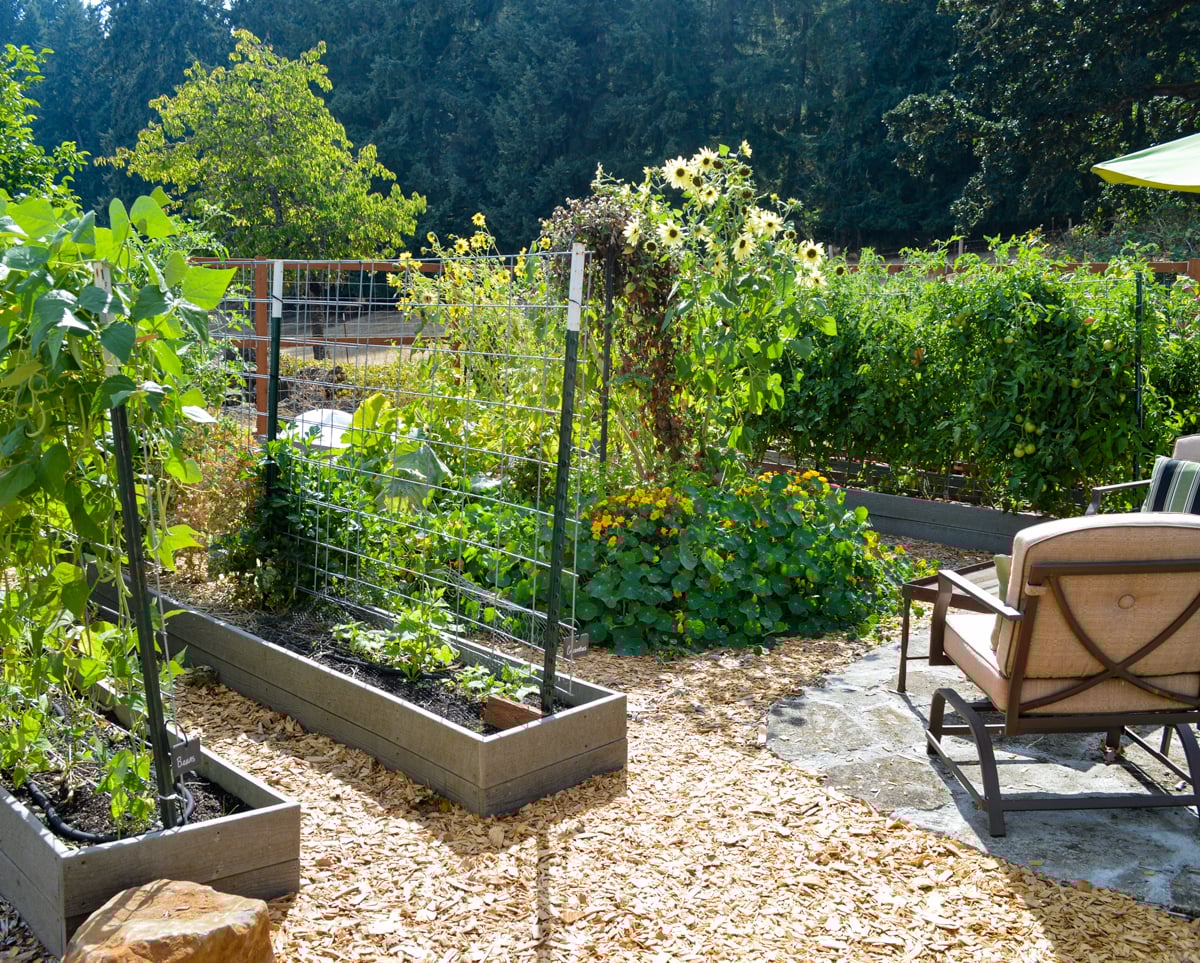
Wood chip garden paths work best for:
- Between raised beds.
- Vegetable garden rows (though I might prefer straw for this).
- Orchard paths.
- Around berry patches.
- Between large garden sections.
- Covering large shrub borders.

Maintaining Wood Chip Garden Paths Over Time
I have found wood chip paths to be very low maintenance, but they do need occasional refreshing as the chips break down.
1. Add New Chips When Needed
After 2 to 3 years, or as the bottom layer decomposes, simply add another 2 inches of fresh chips on top.
2. Spot-Treat Any Weeds
Occasional weeds may appear if seeds blow in. Pull them early or cover with a piece of cardboard and more chips.
3. Refresh Cardboard if Needed
If a path becomes heavily weedy after several years, you can lay a new layer of cardboard and then add fresh wood chips. This is easily done in just certain areas as needed.
4. Keep Edges Defined
Use a rake or shovel occasionally to pull stray chips back into the path, if needed.
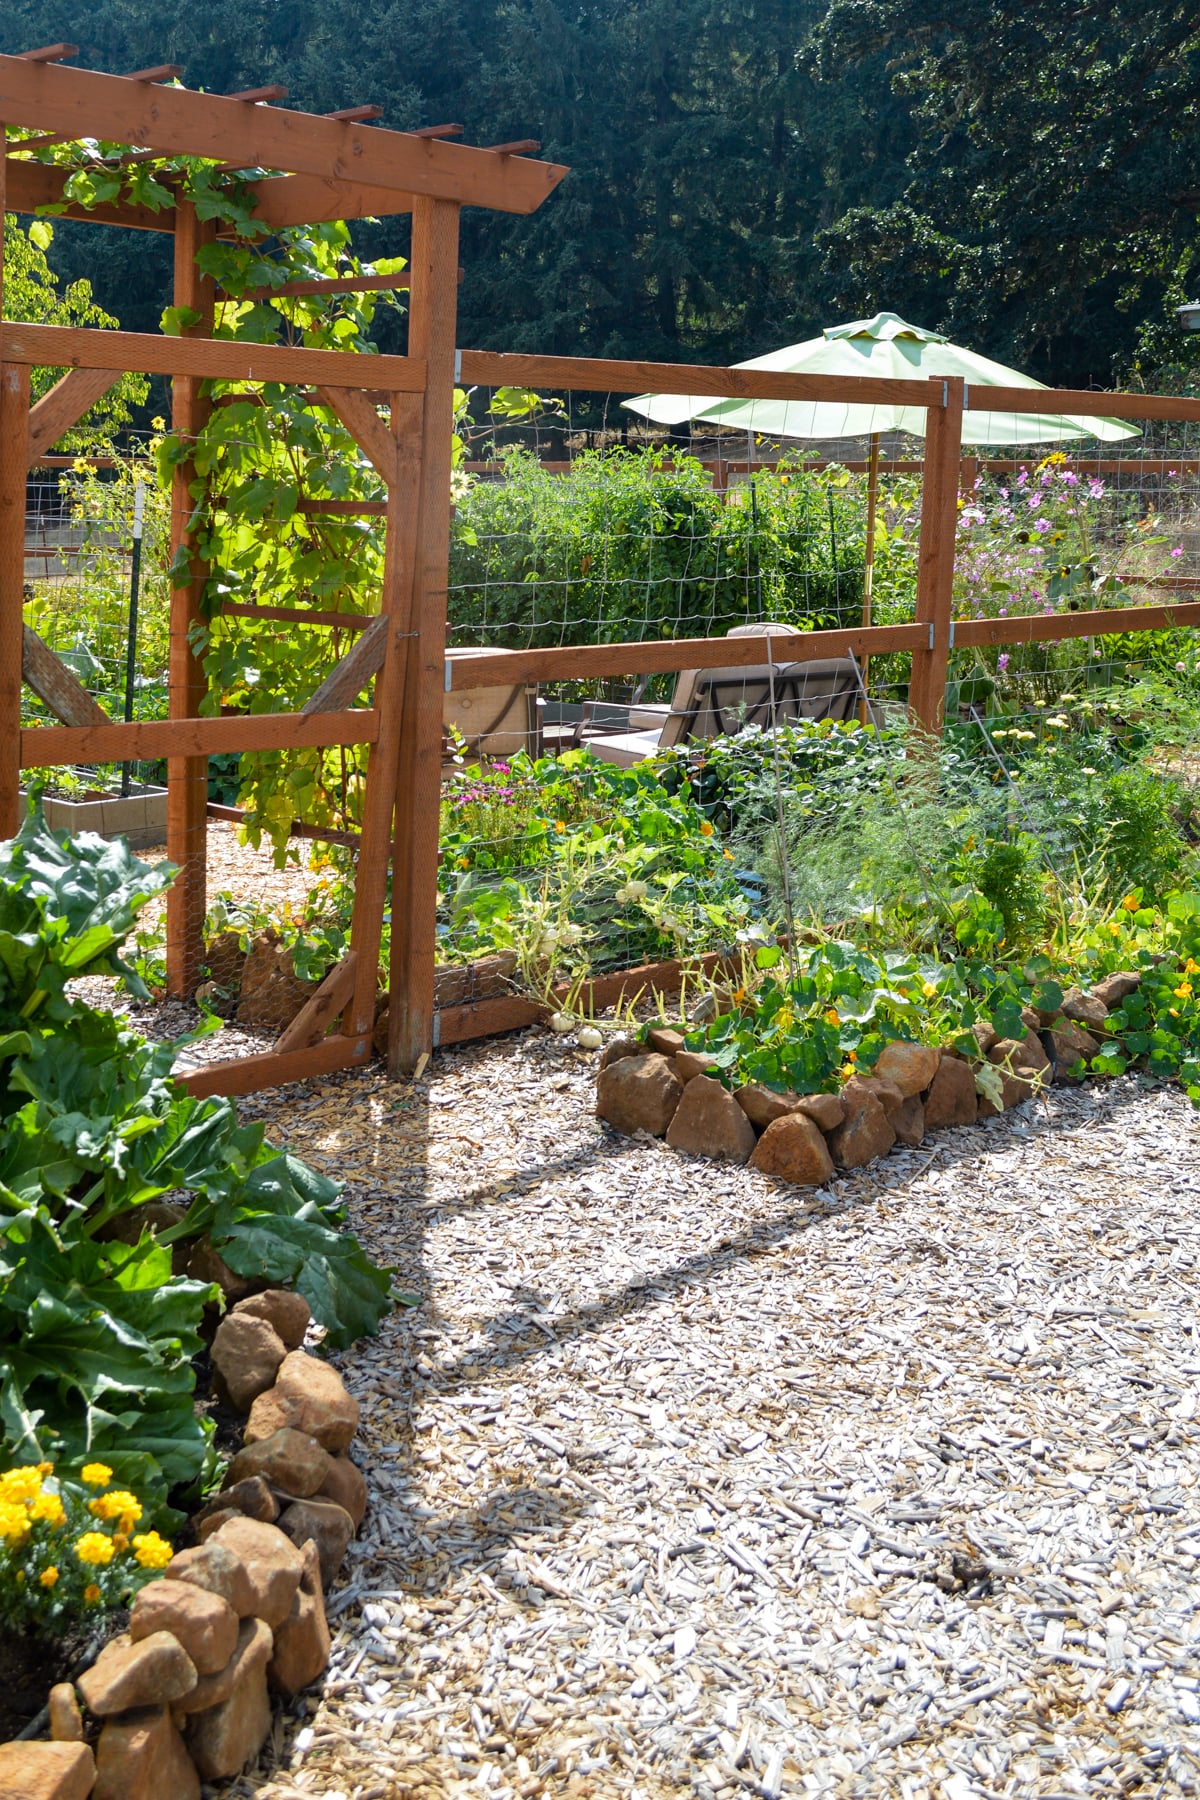
If you want less weeding over time, easier garden access in wet weather, a natural, tidy look in the garden, and no worry about dirt and debris falling into your vegetable garden paths, then wood chips are for you. I’ve found it to be a simple, forgiving system that can be adjusted over time, refreshing only the parts of the garden where needed. If you’ve been fighting walkway weeds, I hope you give this method a try!
Great looking garden area! I love the areas surrounded by stones.
Thank you! ALL the stones come from our property when you dig anywhere, lol. I’ve also made rock walls in more places with boulder-size rocks!
Hi Jamie, I’ve been a follower of your site for several years (because I’m a gardener, firm believer in fresh homemade food, and enjoy new recipes. ) I installed wood chip paths last year between my raised beds but over a layer of black plastic which, unfortunately retained water that nourished weeds along the edge. So love the cardboard based version. And secondly, my husband was prescribed a medicine that prohibits calcium foods when taking. Your inclusion of none dairy ingredients as an option has been great. Keep up the good work!
Thank you so much, Donna! Ugh, yes, the cardboard is better in garden areas like this for sure! The place I use and love plastic for is gravel paths, which I use in patios and our sunken flower garden. The pointy edges of the gravel puncture enough tiny holes that water isn’t a problem and any weed that blows in comes up easily.
Good to know about the dairy – I’ll keep working to provide alternatives!
Just wanted to chime in that I agree with you on using wood chips. We have been fortunate to get 4 or 5 loads of free chips over the past few years from Chip Drop, and cardboard can always be easily acquired. Now that spring is getting closer, I see some grass coming up in the paths, so I will be saving cardboard to add to those areas and spread some mulch from our last drop over it. You can’t beat free! Enjoy the gardening season!
Yes! It’s wonderful when that works out. I wonder if I’m too rural for Chip Drop? I’ve only gotten one call from them over the years and was so excited, then they never showed. 🙁 I keep reapplying anyway, hoping maybe one day!