
Easy Butter Mints Recipe – Only 4 Ingredients
Easy butter mints are a simple, nostalgic treat you can whip up with just four basic ingredients. These soft, melt-in-your-mouth mints come together quickly and can be shaped, colored, or packaged any way you like, making them fun for gifting or holiday gatherings. The creamy texture and gentle sweetness make them a wonderful candy you can customize for any season.
✩ What readers are saying…
“Wow! These things are amazing!!! I know what everyone is getting for Christmas this year! Thanks for a great recipe.” -Jen B.

Some links in this article are affiliate links and if you click on them I will receive a small commission at no cost to you.
This little recipe for homemade butter mints is amazing! I’ve always loved butter mints and never realized how easy (and inexpensive) they were to make. In fact, it was a little mind-blowing to me when I first made them – who knew they were so easy?
And we get to decide what’s in them! Not only that, they are melt-in-your-mouth good, too.
The butter mints make fantastic gifts for teachers, postal workers, and extended family as well as mints for weddings and other events – or just for keeping your own candy bowl filled. And at around a $2.00 cost to make a batch of 4-5 dozen mints, it’s inexpensive as well as special and unique!
If you’re thinking you don’t have the time to make mints – well, you may be right depending on your season of life. BUT this may also be the one thing you DO have time for: it takes about 30 minutes to make a batch with no more work involved, since the mints just air dry after that.
Oh, and maybe I didn’t emphasize enough how good these are? Smooth, creamy, and perfectly minty – they may spoil you for those hard, chalky store bought mints forever!
Recipe Video
Recipe Ingredients

Don’t you love it when something is so basic, yet delicious? You only need four ingredients, though you can add more.
- Butter: Use pure butter for this recipe, not margarine unless you are trying to be dairy free.
- Powdered sugar.
- Mint extract: Of course this extract (any type – peppermint, spearmint, etc.) would be used for mints, but you can also flavor these with other extracts (and even food oils – see the FAQ section) for different flavored candy. One of the most popular is cinnamon to go with red food coloring.
- Milk, cream, or half and half: I’ve never noticed a difference between these, so use what you have on hand. For dairy free, you can use coconut milk – or leave it out entirely and use less sugar mixed only a the dairy free butter option.
- Optional: Food coloring (some people like to coordinate with an event or holiday), and some people use vanilla (I’ve never used it).
How to Make Butter Mints

Step 1: Add all ingredients to a bowl and mix well. If it’s too dry, add a bit more milk, if it’s too wet, add more sugar. It should be like playdough and not sticking to your fingers.

Step 2: On a powdered sugar dusted surface, knead the dough with more sugar a couple minutes, adding a more powdered sugar as you’re kneading it until it’s smooth.
TIP: If you’d like harder mints, add more powdered sugar for a drier dough, just enough that you can knead it together. A softer dough will produce mints like I show here, firm on the outside, but soft and melty in the middle.
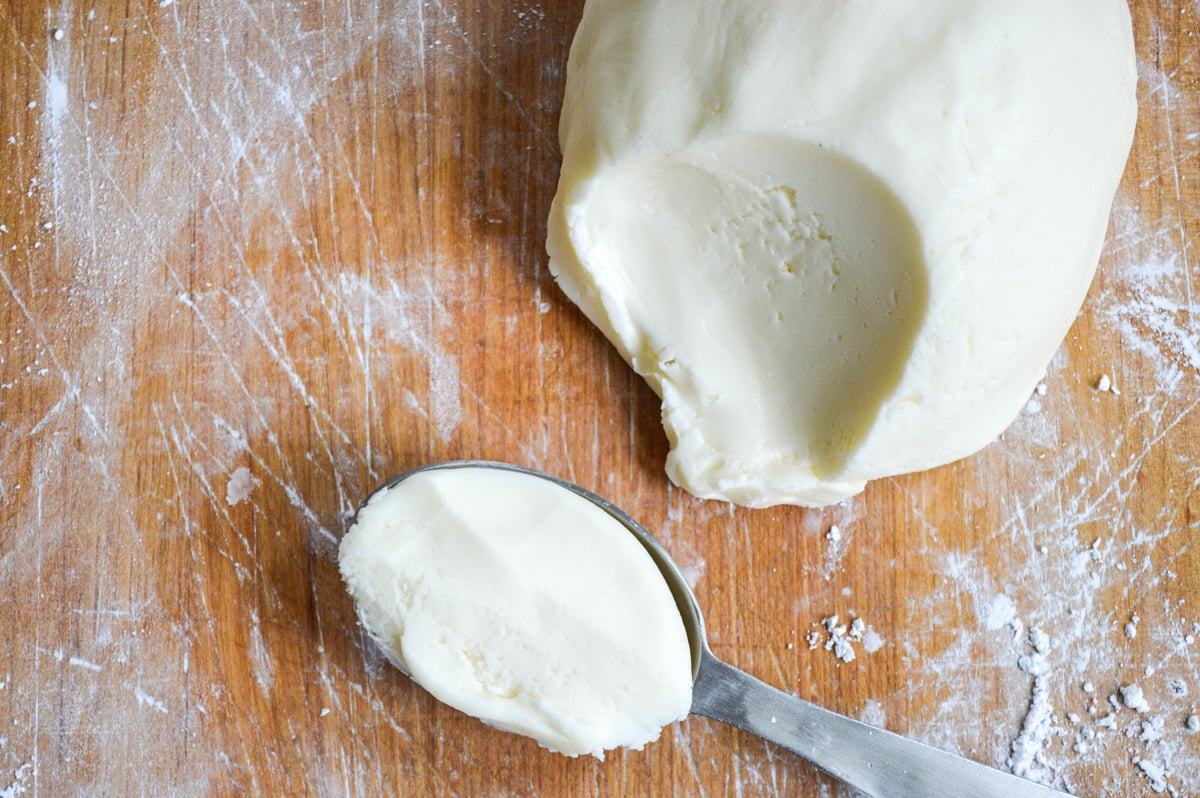
Step 3: Portion off about an 1/8 to 1/4 cup of dough to shape, keeping the remaining dough under a lightly damp cloth to keep it from drying out.
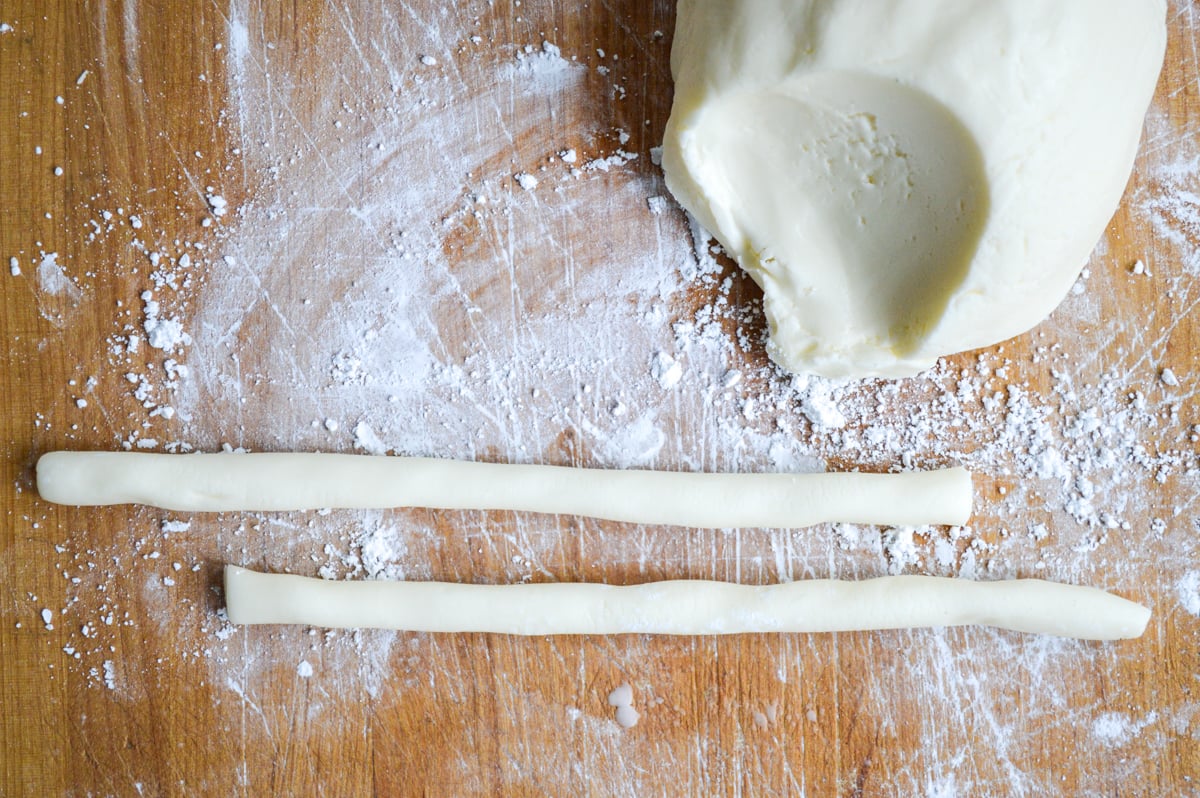
Step 4: Roll the portion of dough into a rope, cutting as needed if it gets too long in order to get them about 1/2-inch thick.

Step 5: Then comes the fun part- using a sharp knife, cut them into little “pillows.” These do not have to be perfect- anything from 1/2″ to 3/4″ is fine.

Step 6: Transfer them to a parchment-lined cookie sheet to dry, uncovered, for anywhere from 12 hours to one, two, or three days.

Yes, days.
You will have to test them at the 1-day and 2-day mark (tough job, right?) to see if they’re a consistency you like. We like ours pretty firm on the outside and just soft on the inside, so I find that 3 days is best here in Oregon in the cooler months.
TIP: The mints can take anywhere from 12 hours up to three days to dry. The difference depends on thickness and size of your mints, along with humidity and weather. Some people have pointed a fan on the pans to help them dry faster.

The long drying time does mean that if you’re making these for gifts, it’s not a last minute kind of gift, but one you have to plan out a little.
And then you have to hide them from your family as they are sitting out to dry, or they will slowly be whittled away every time they walk past them. “But mom, I’m just testing them for you to see if they’re ready!” Right.
Storage
- Room Temperature: The mints will last in a jar at room temperature for at least a couple weeks. For longer storage, place in the fridge.
- Refrigeration: For storage up to 3-4 weeks, keep in an airtight container in the fridge.
- Freezing: Flash freeze them in a single layer. Place them in a freezer bag or airtight container (single layers, separated by wax or parchment paper) and freeze for two to three months. To defrost: spread the frozen mints onto a baking sheet or large platter, separate, and let them sit for an hour. Then transfer to whatever you want to serve them in.

Gift Packaging Ideas
- Translucent plastic bags with cute stickers to hold the bags closed
- Sweet hobnail vintage style 8 ounce mason jars with lids (or a smaller 4 ounce version )
- Treat bags with gold stars.
- These 8 ounce flip-top glass jars would be a good option, too.
- If you have a collection of mason jars, gifting them with vintage zinc lids like I show or cool wood storage lids would be fun.
Reader Raves
“These turned out perfectly!!!!!! They were SO VERY easy to make (we double the recipe). Thank you!” -Ann
“Oh my goodness! I made these a couple days ago and they are almost gone! These were so quick and easy to make.” -Laurel
“I made them with strawberry oil and they are to die for! Melt in your mouth yummy!” -Liz
These mints are a classic candy that’s been offered for generations at events like weddings and baby showers. I love that they are an easy, real food that is still special enough to give as gifts!
I hope you love these butter mints – if you make them, be sure to leave a recipe rating to let me know!
Want to save this?
Enter your email below and you’ll get it straight to your inbox. Plus you’ll get easy new recipes, gardening tips & more every week!

Easy Butter Mints
Equipment
- stand mixer or hand-held mixer and large bowl
Ingredients
- 1/2 cup salted butter, softened to room temperature
- 3½ to 4 cups powdered sugar (1 pound), plus extra for dusting
- 1 tablespoons heavy cream or milk (start with 1 tablespoon)
- 1 teaspoon pure mint extract (or other flavored extracts)
- food coloring optional
- 1/2 teaspoon vanilla, optional
Instructions
- Line 2 baking sheets with parchment or silicone liners.
- In large bowl, beat butter until creamy. With mixer on low, beat in 3½ cups sugar, 1 tablespoon milk/cream, and extract until creamy and smooth (add food coloring at this point*). If it seems dry, add a teaspoon at a time more of milk, mixing well after. The consistency should be like playdough and not sticking to your fingers.
- Turn the dough out onto a work surface dusted with powdered sugar and knead until smooth and satiny, adding more sugar as needed. Cover the dough with a slightly damp towel to keep it from drying out.
- Adding more powdered sugar as needed, portion out 1⁄8 to ¼ cupfuls of the dough and roll into two 1/2-inch-thick ropes. Cut each rope into 1/2 to 3/4 inch pieces.
- Carefully transfer mints to prepared baking sheet with a spatula (the mints will be soft). Repeat with remaining dough.
- Let air-dry at room temperature anywhere from 12 hours to 2-3 days until firm enough to handle.** The outside will be firm, but the insides will be soft and creamy. Transfer the mints to covered containers or bags.
Notes
- Room Temperature: The mints will last in a jar at room temperature for at least a couple weeks. For longer storage, place in the fridge.
- Refrigeration: For storage up to 3-4 weeks, keep in an airtight container in the fridge.
- Freezing: Flash freeze them in a single layer. Place them in a freezer bag or airtight container (single layers, separated by wax or parchment paper) and freeze for two to three months. To defrost: spread the frozen mints onto a baking sheet or large platter, separate, and let them sit for an hour. Then transfer to whatever you want to serve them in.
Nutrition
Adapted from Women’s Day
Your Questions Answered
Yes, any flavor extract can be used.
I haven’t tried that, but one commenter said they did use a strawberry oil and that they turned out “melt in your mouth yummy.”
I haven’t tried and haven’t seen anything about it, either. I’d be worried about them melting.
They can take anywhere from 12 hours or up to three days to dry. The difference can depend on thickness and size of your mints, along with humidity. Some people have pointed a fan on the pans to help them dry faster.
Yes, but if the mold is bigger/thicker than the rope size we use, plan for them to take longer to dry.
I don’t know the science of it, but feel it may have to do with the ratio – there’s not much milk. That said, at room temperature butter can go rancid, although it takes quite a while and is dependent on weather (it may happen sooner if it’s hot or humid). If you want to keep them for longer than 2-3 weeks, I’d suggest freezing them.
More Easy Candies To Make
- Classic Chocolate Cream Cheese Mints Updated With Dark Chocolate
- Gluten Free Oatmeal Chocolate Chip Cookie Dough Truffles
- Healthy Homemade Honey Sweetened Chocolate Peanut Butter Cups

This recipe has been updated, it was originally published in December of 2009, updated in 2015 and again in 2025.
Disclosure: affiliate links in this article will earn commission based on sales, but it doesn’t change your price. Click here to read our full disclaimer and advertising disclosure.

these look delicious! Mints are my favorite candy and I’ve never seen such a simple, basic recipe for them.
thank you
These turned out perfectly!!!!!! They were SO VERY easy to make (we double the recipe). Thank you!
I WILL be trying this. I love butter mints!!!