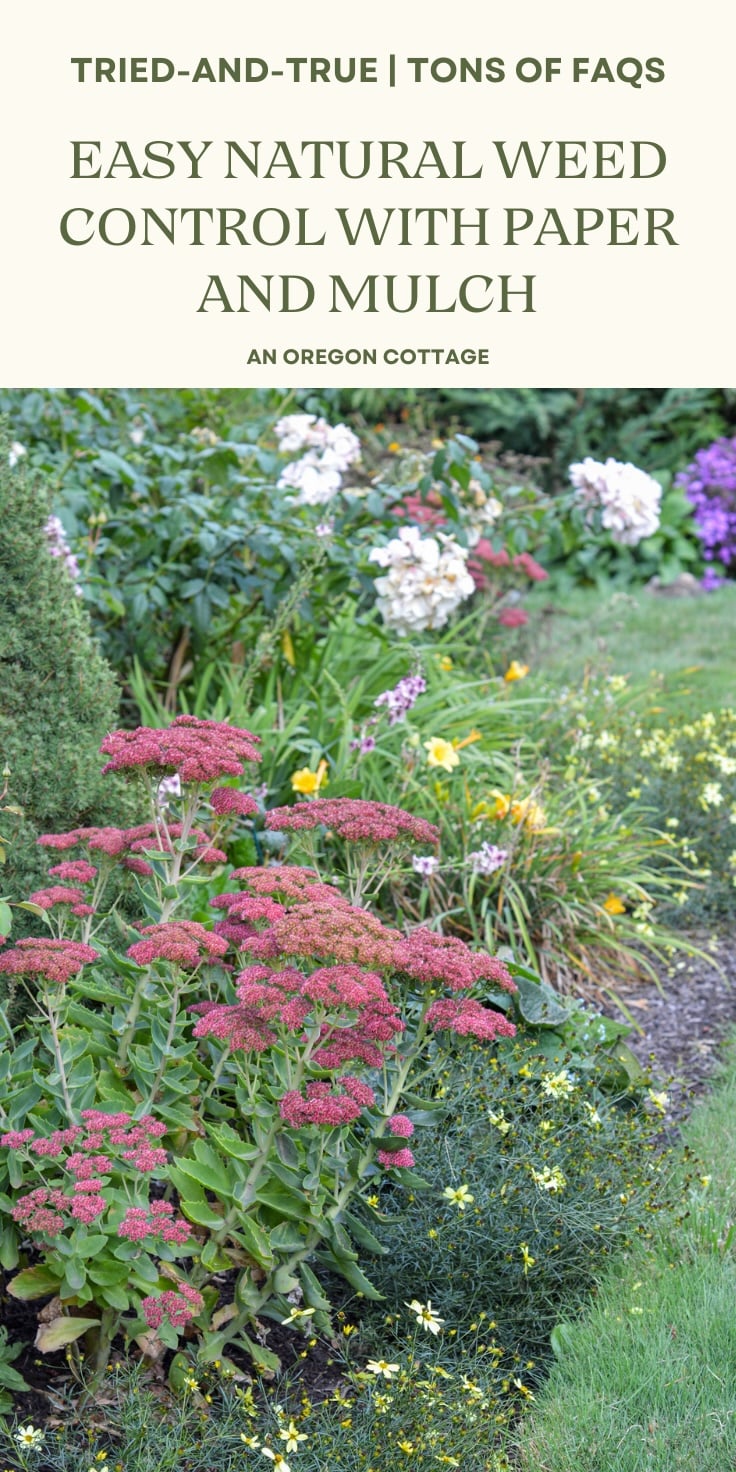
Easy Natural Weed Control with Paper and Mulch
Weeds don’t have to take over your garden or your time, I promise! Using this easy natural weed control method with paper and mulch changed my gardening life, blocking weeds as well as improving the soil. Instead of constant pulling or relying on chemicals, simply lay down a barrier that works quietly in the background, keeping weeds down in garden beds in a low maintenance, budget friendly way.
✩ What readers are saying…
“LOVE doing this, recycling as well as helping myself and the weed control. In Oregon, weeds will grow ANYWHERE, even in the asphalt. But this method that I finally tried after reading your blog, Jami, is cost-effective (ie CHEAP), it works, and YOU feel good for doing it.” -AndiW
Some links in this article are affiliate links and if you click on them and purchase I will receive a small commission at no cost to you.
Do you fight weeds in your garden? (Hello, doesn’t everyone?) Do you ever feel like giving up on gardening because of the weeds?
There were definitely times I felt like giving up, mainly because I’ve always gardened organically and in the beginning so many of the articles I read emphasized hand-pulling weeds as really the only way to get rid of weeds. That or try smothering them in a “thick mulch” and hope they won’t poke through in a few weeks (nope, not here in wet, mild western Oregon…).
But after years of trial-and-error, I’m here to say unequivocally, that there are ways to fight weeds that don’t involve chemicals. I’ve discovered how to minimize weeds in the vegetable garden, the corn patch, and in permanent gravel paths and patios. But the most life-changing (at least in my gardening life) for me have been the easy steps I use to control weeds in our garden shrub and flower beds – and not just for spring, but for the whole year!
That’s right, with the simple technique I outline below you won’t have to worry about weeds again until next spring. AND every year after that the weeds you’ll have to deal with will be less and less. Really!
In only a couple of hours you’ll be done with most of the maintenance for your flower bed – all that will be left to do is water and enjoy the blooms.
The Secret to Natural Weed Control in Garden Beds
Well, it’s not that much of a secret, since written about it and told everyone I know. The technique involves:
Paper (or cardboard) and Mulch
Yep. And every time I write that, I swear I hear angels singing (I mentioned it’s garden life changing, right?).

Why use paper and compost mulch for weed control?
- It’s the NUMBER ONE way I’ve found to have nearly weed-free beds with the least amount of work, money and time on my part and – this is key – for a long time. No expensive chemicals or reapplications through the season – we just do it once and we’re done for the year.
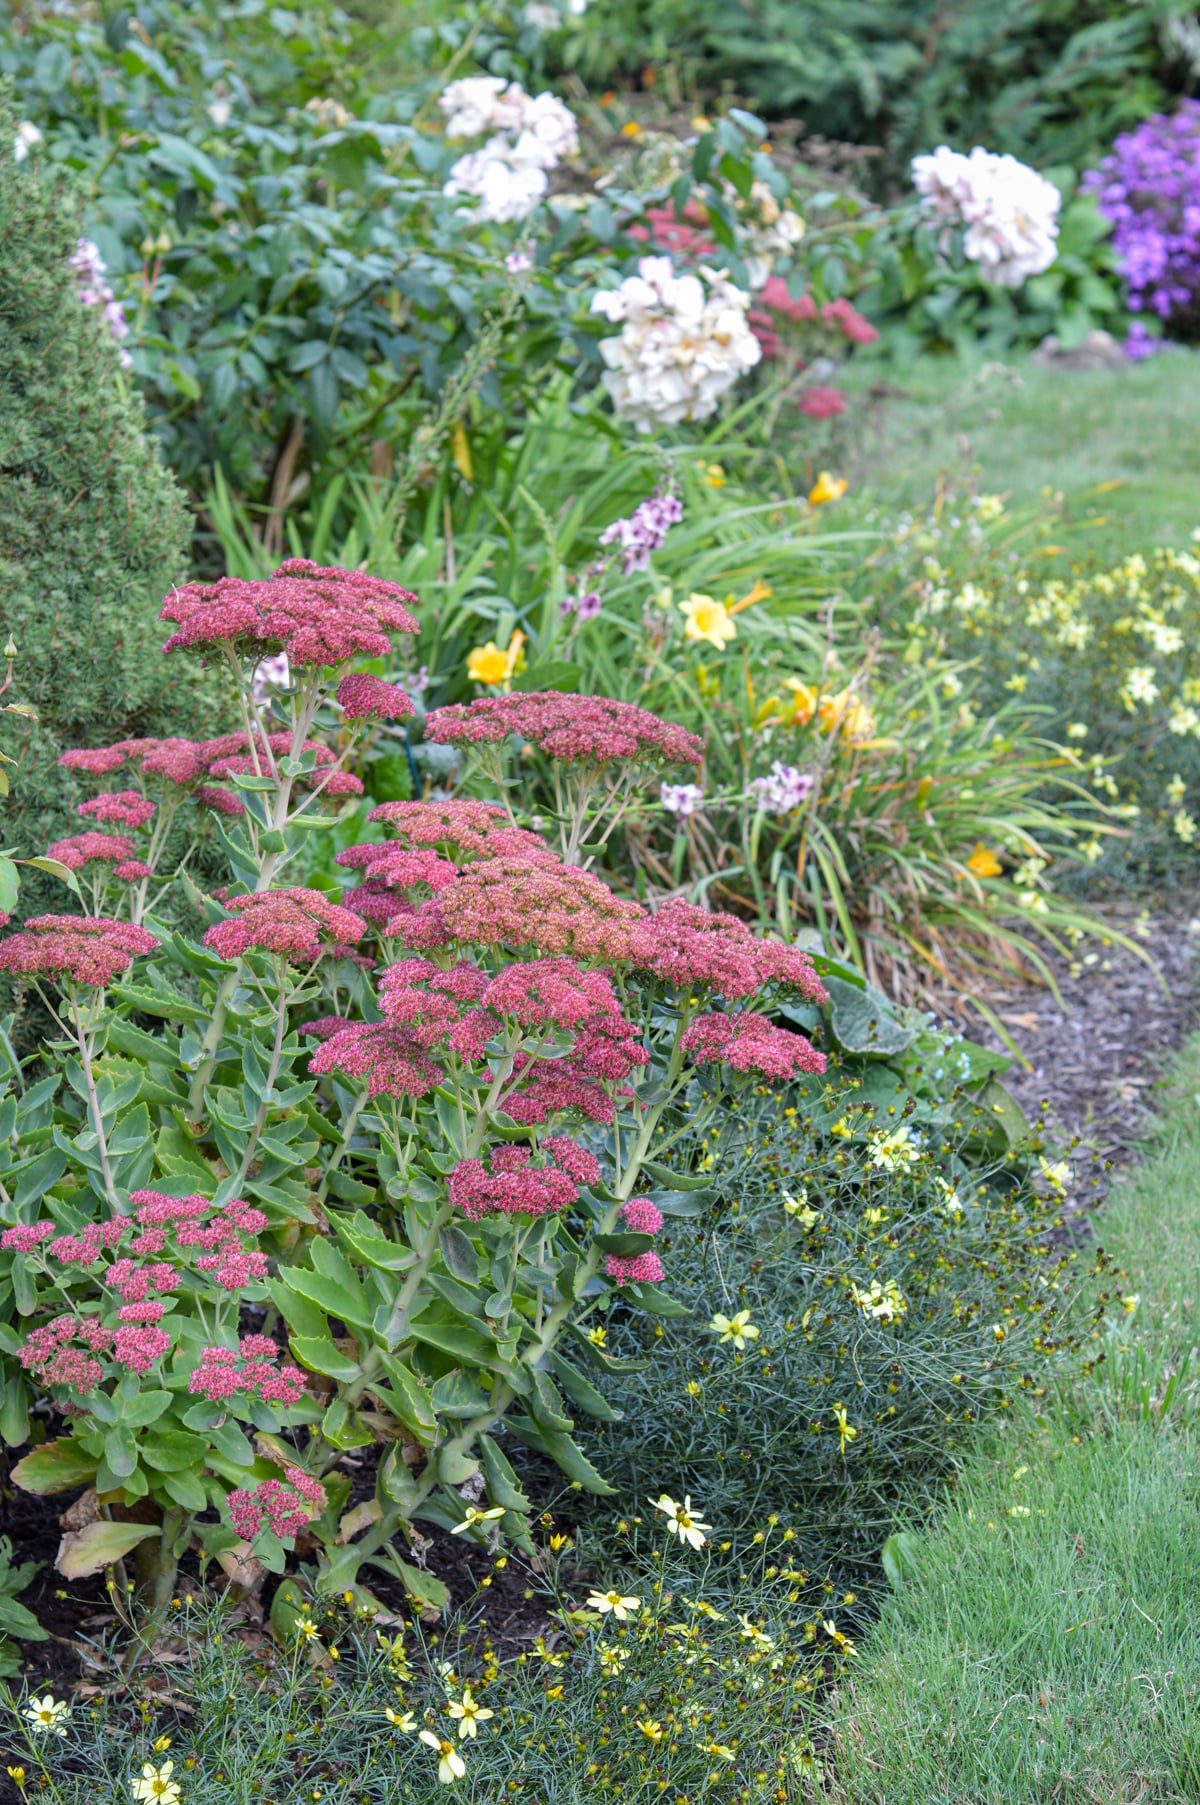
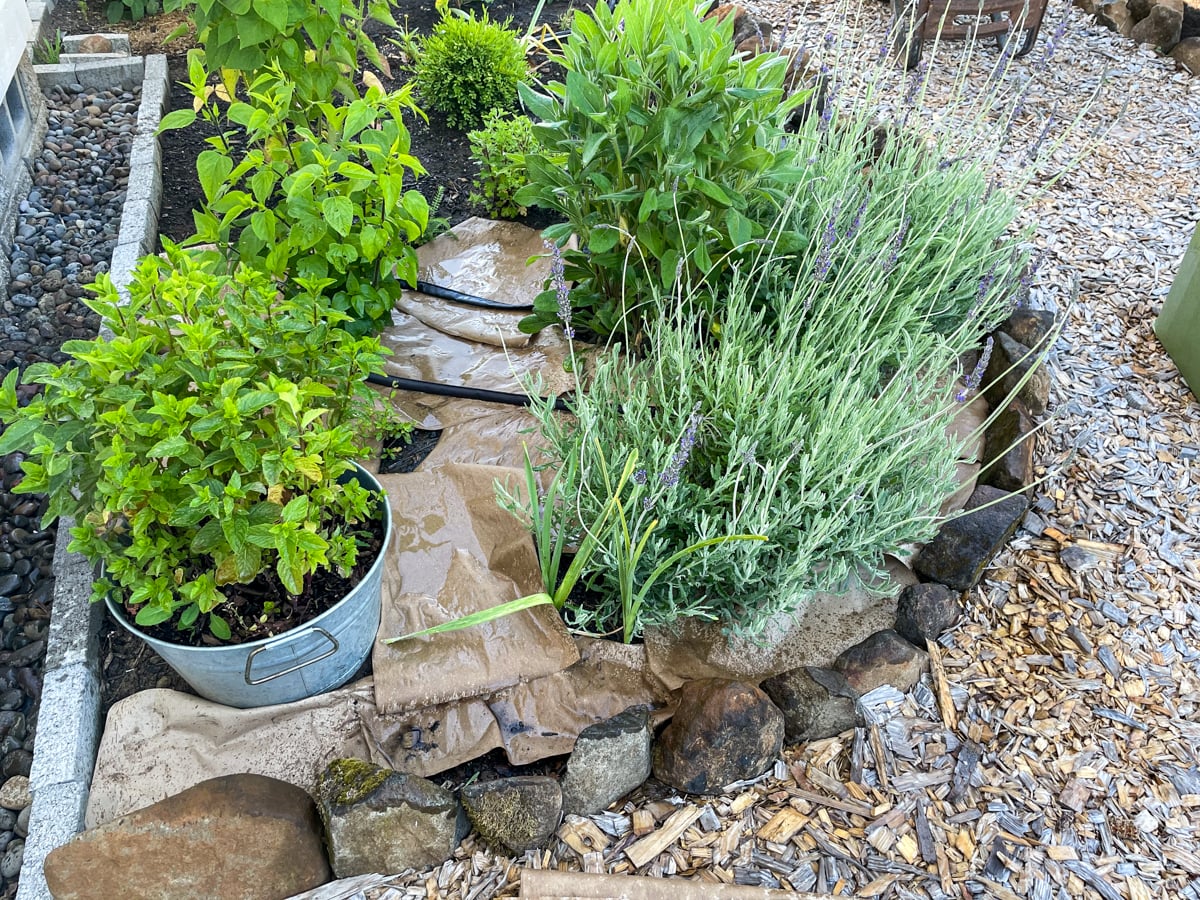
- It enriches the soil and feeds the plants. By using a garden compost, I’m feeding the plants and helping the soil as it breaks down naturally over time. See that photo above? I’ve never added any type of fertilizer to this bed other than the yearly (or every other year, a-hem) topping of paper and compost – it’s 9 years old and the plants love it. This goes for roses, perennials, shrubs, everything.
- It helps keep the soil moist during the summer months.
- It creates a clean and tidy look. I love how it immediately makes our yard look finished and ready for the season.
- It compounds over time. The first year you do this to a weed infested bed, you will only have a few straggling weeds to pick out during the growing season, but with the next spring’s rains you’ll see a number trying to return. Never fear – layer again and the next spring you’ll see less weeds, and so on. If you do this yearly, it compounds, smothering existing weeds and seeds, not allowing weeds to set seed and even keeping pernicious weeds like violets in check until eventually, you may be able move to an every-other-year cycle.
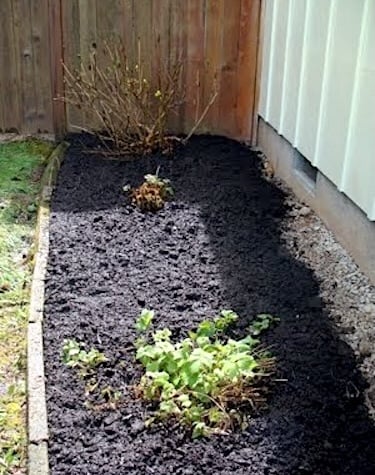
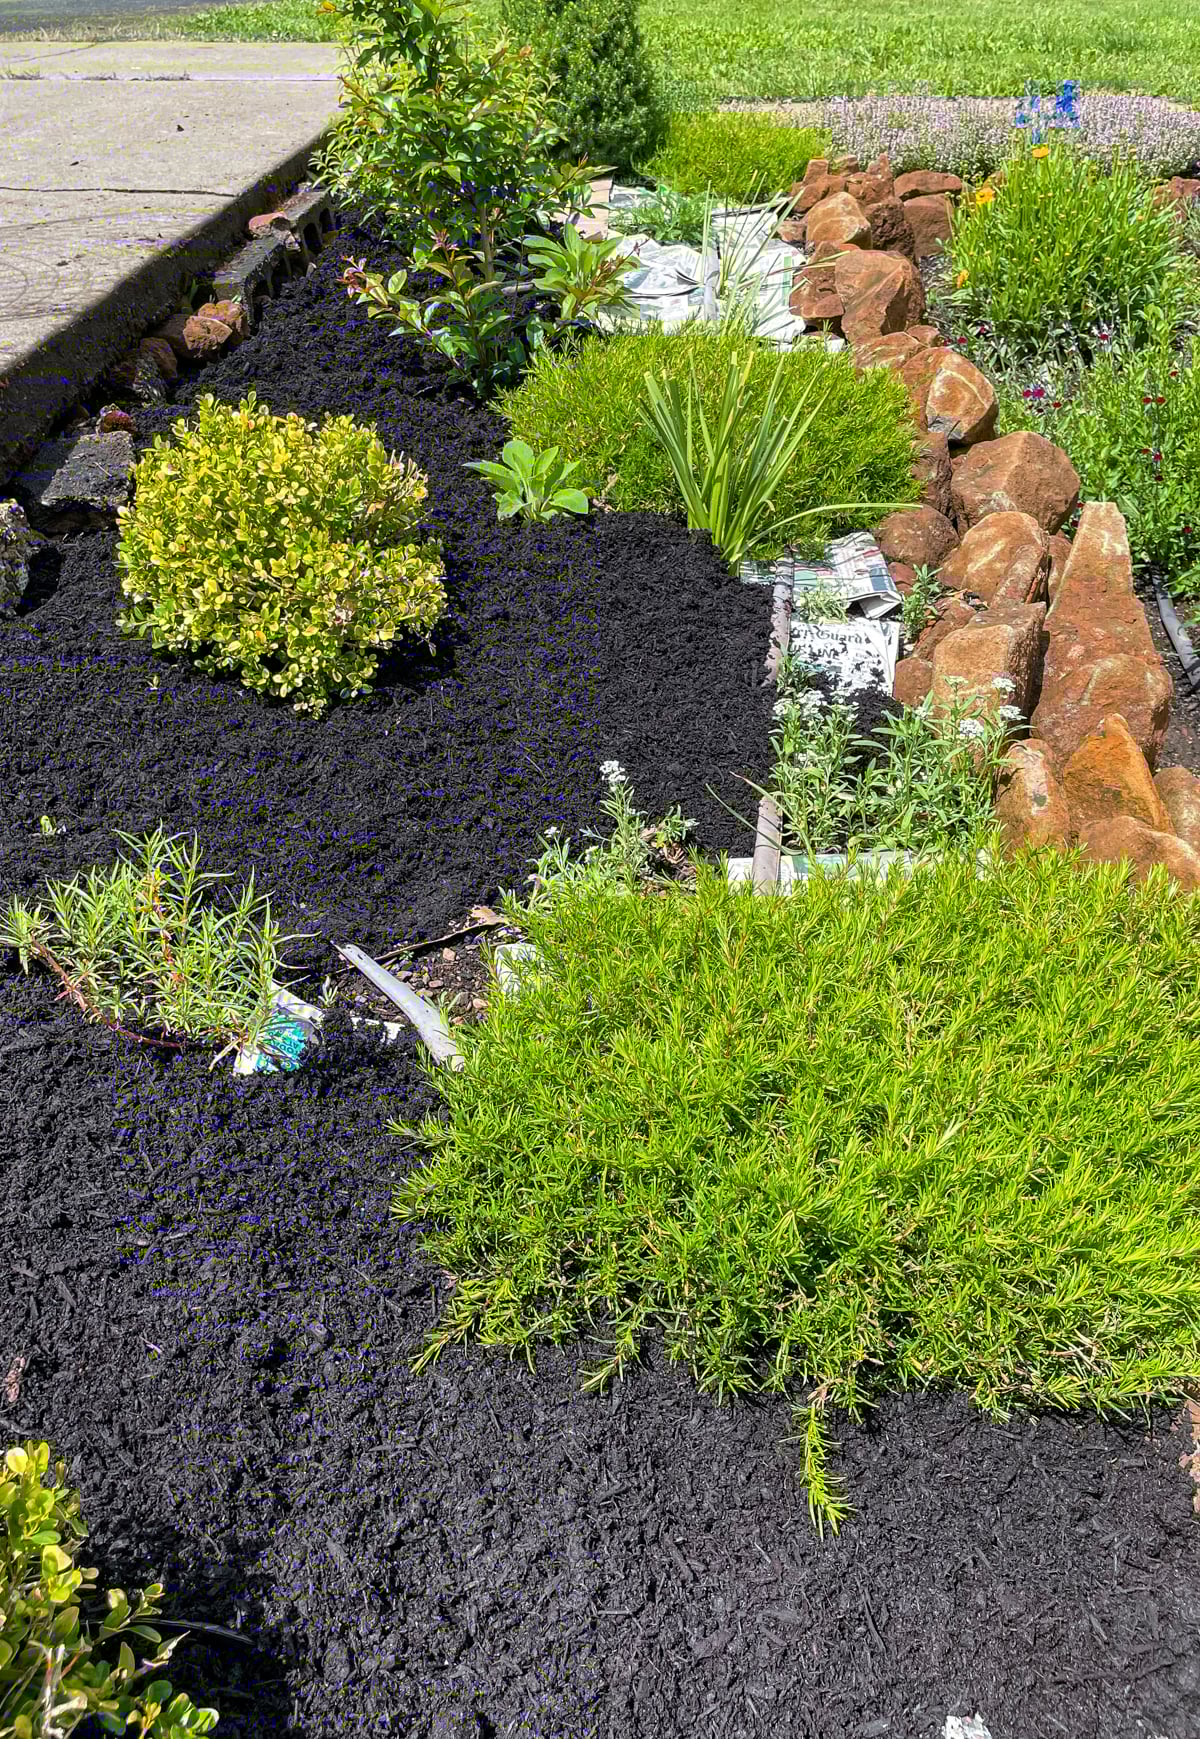
How do I know that it compounds over time? Here’s proof from our previous cottage garden in early spring:
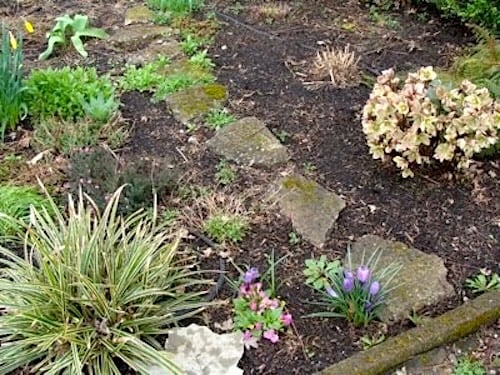
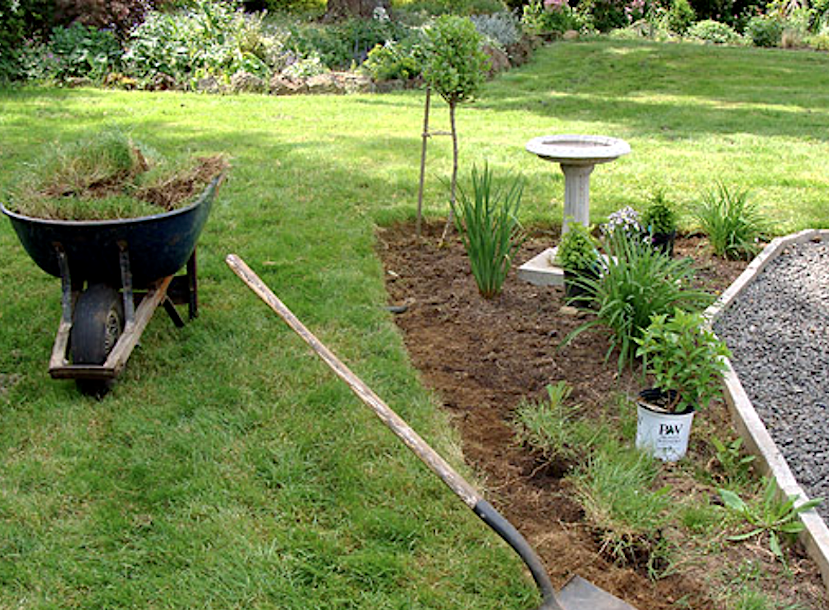
Previous papered-and-mulched part of the garden.
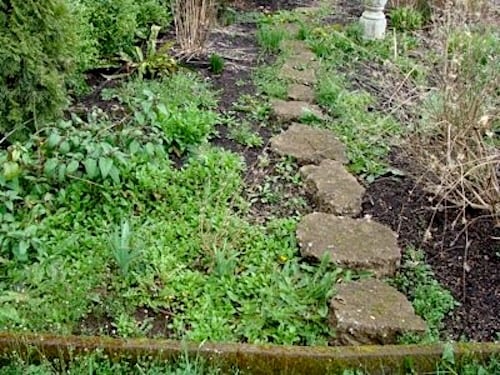
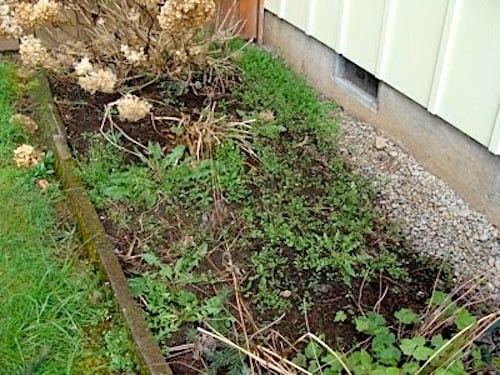
The side garden that didn’t get papered-and-mulch the previous year.
On the left is a flower bed that was covered in paper and mulch the previous summer (we use garden compost as a mulch, which I explain below). As you can see, there are just a few weeds here and there which are easy to pull thanks to all the mulch, with more concentrated around the stepping stones where I obviously didn’t take the time to lift the stones to put paper under them (a-hem).
On the right, for comparison, is the other end of the same bed, but a part I didn’t get covered the previous year. We ran out of the compost mulch and I never finished the bed – in fact you can see on the bottom right exactly where we ran out of the paper and mulch close to the stepping stones. There are some plants in all the weeds on the left of the stones, but most of the green is little baby weeds, plus those early spring “poppers” (aka, bittercress) I hate.
Don’t let this happen to your flower beds – follow these five steps to organic weed control and make your life easier!
Paper & Mulch Natural Weed Control Video
You can watch the video we made about this technique and then read on for more details on the steps.
Natural Weed Control with Paper and Mulch in 5 Steps
Below I outline the simple steps to do this in your own garden and then I answer the many questions I’ve gotten over the years about this technique, so be sure to check them out to see if your question was answered.
Step 1: Gather your materials.
- Garden tools: trowel and small hand rake, a small shovel, (my favorite shovel since I discovered it- the smaller square size is perfect for perennial beds) and a metal rake. You’ll need a good set of pruners, too, to cut back any plants that need it. I also always use a heavy duty kneeling pad and carry my tools in my favorite hard-sided garden tote so I don’t have to run back and forth when I forget something.
- Paper or cardboard (the secret weapon!) – and LOTS of it. Use anything you can collect easily: newspapers (you’ll need lots of layers, one will break down too fast), brown paper bags (cut and opened up), or cardboard (since it’s thicker, use cardboard only in areas you don’t want to plant any annuals, like under trees or between large, established shrubs. It does last longer, so you may get away with an every other year application). Don’t have a way to stock up on paper? Buy a big roll of brown paper like this at a home store for cheap.
- Mulch. You’ll need enough mulch to cover your area at least 2-inches thick. You can use what our local landscape company calls “garden compost” like we do (don’t use homemade compost for this, though, unless you know the weeds have been killed with heat like commercial compost), bark chips, tree trimmings, pine needles, and even straw (though it won’t look as good in flower beds).
Pros & Cons of Different Mulches:
Purchased Garden Compost:
- Pros: The brown color of the mulch garden centers call “garden compost” gives your beds a nice rich dirt colored finish. It also feeds your soil as it breaks down acting as a fertilizer – and in fact it’s the only fertilizer I’ve ever used on my beds (strike another thing off the to-do list!). We buy it in cubic yards with our truck, if you have only a couple beds, you can use bagged compost (the best quality you can afford).
- Con: It is more soil-like, so can grow more weeds than bark. If your area stays moist or is near areas where weeds blow in, this can be an issue.
Bark Chips or Tree Trimmings:
- Pros: Easy to lay (lighter weight) and tree trimmings can even be free. Weeds do not sprout in wood chips as easily as compost, making this a good option for moist, weed-prone areas.
- Cons: Doesn’t feed the soil on it’s own, as it takes nitrogen to decompose, though it can work if you spread it with another nitrogen source.
Straw or Grass Clippings:
- Pro: Easy to get and apply and inexpensive or free.
- Con: They break down really fast and don’t look very good around flowers and shrubs, so are mainly for vegetable gardens.
Local Mulches like pine needles, cocoa shells, and more:
- Pros: Some of these are abundant and cheap. If you live in an area where these any of these are available, definitely look into them.
- Con: They are very localized. And you need to know what they do as they break down so you’ll know how to amend your soil.
Step 2: Trim shrubs and perennials, then lightly pull weeds. I like to wait until late winter or early spring to do this instead of the fall, since the dead growth helps protect plants from frost damage and provides habitat and seed heads for the birds (okay, there’s no way I’d find time in the fall to do this with the vegetable harvest coming in, but I like the bird excuse better!).
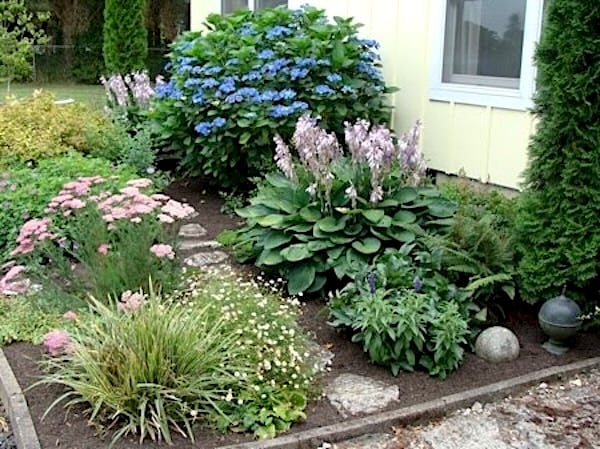
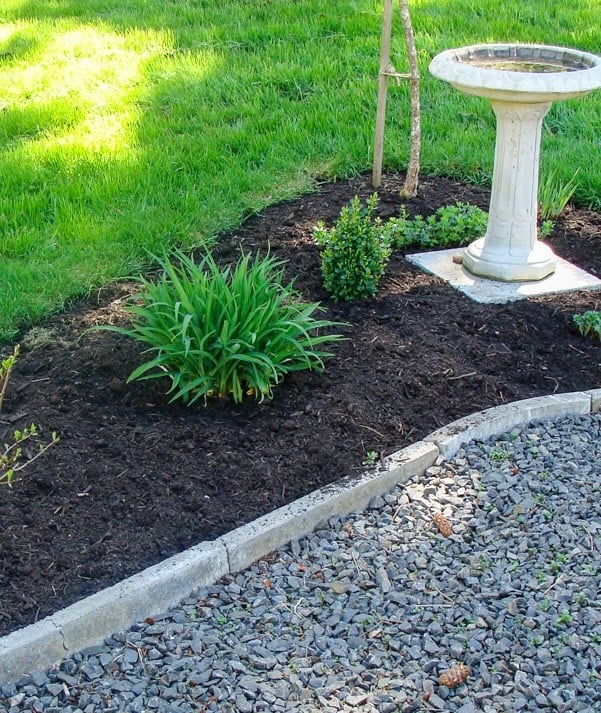
Step 3: Trim the bed edges by trenching a grass edge or cutting the grass near a permanent edge. The bed pictured on the left has cement edgers, but many of our other garden beds are just grass like above. I use a either a pointed shovel or a manual grass edger to cut a trench along grass edges, pull out the sod pieces, and compost them.
TIP: Try to pull the roots of the perennial weeds like dandelions, but for the annual weeds just pull any big ones so that won’t allow the paper to lay flat. The paper layers will kill any little ones left. Yes, this means you do NOT have to pull all the weeds, just cover those guys up. Yay!!
Step 4: Start layering the paper– your secret weapon.
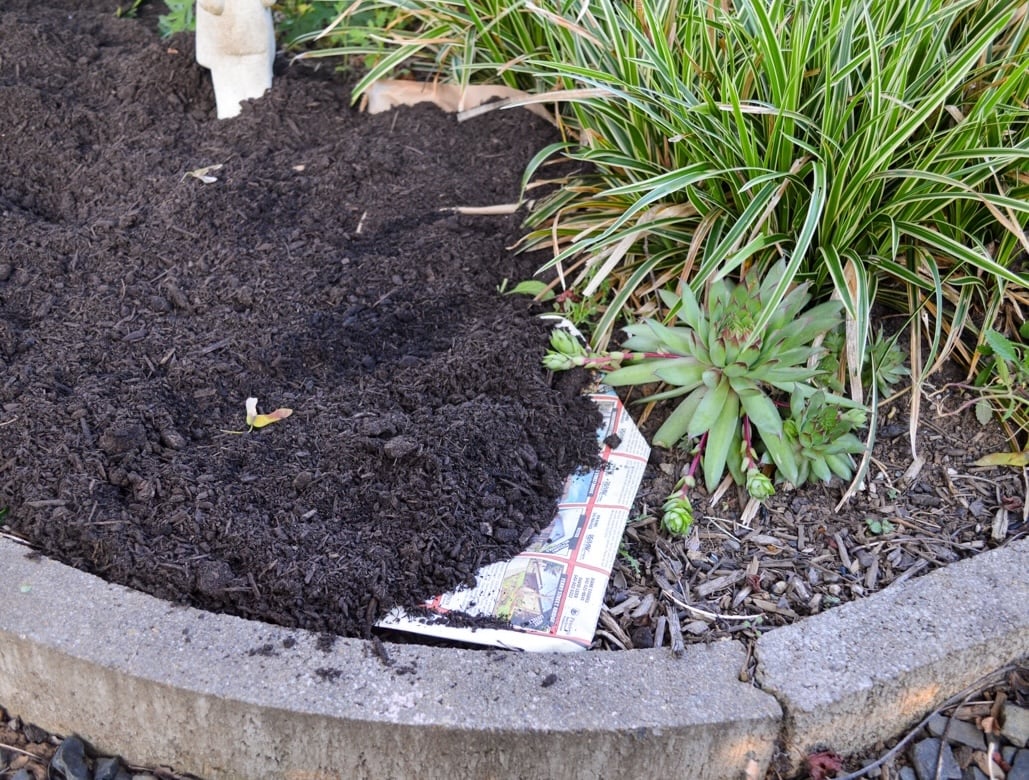
Step 5: Lastly, cover all the paper with mulch. The more mulch you use, the better it will suppress weeds – a 2-inch layer is minimum.
Points to remember when laying the paper:
- The thicker you layer the paper, the more weed-blocking it will do– I like to use 4 to 6 layers.
- Don’t use shiny, colored ads- just regular newsprint (which may have color, too- that is OK, just not the shiny paper). Note on the ink: the ink in newsprint is soy-based now, so it’s perfectly good to use in our organic landscapes like this (as well as ink on cardboard).
- Overlap the edges of the papers a good inch or two- the idea is to not give an opening for the weeds!
- If there is wind, keep a hose nearby and spray the papers as you lay them to keep them stable before adding the mulch.
- If the ground is dry, water well first- like, if you didn’t get to it earlier and it’s already July (not that I know about that, a-hem). Then spray the paper as well. The mulch will help hold in the moisture for that time of year.
- Lay the paper under soaker hoses, if you use them and then add compost to kind of cover the hoses.
Laying the compost is where the magic happens and you go from weedy mess to clean and tidy – it’s such a great feeling of accomplishment – especially because you didn’t have to pull all.the.weeds. Better yet, it will continue to look great for months!
Newspaper and Mulch Weed Control Q&A
What if I want to plant something later in the season?
It’s easy! Simply push aside the mulch where you want to plant, use a trowel to cut into the paper and bend it back (like a book cover). Dig a hole, place the plant in it and fill with dirt, tamp it down like you normally would. Then replace the bent over paper (tearing if needed to fit around the new plant) and cover with the mounded mulch. No problem.
Note: This isn’t as easy with cardboard, as I mentioned, so cardboard should be used in areas you won’t want to do any other planting.
Can you do this around trees?
Yes, this weed control method can be used around trees, too, instead of buying expensive “tree rings” or using plastic edging (than invariably gets nicked with the mower…). Here’s how to adapt this technique for trees:
- Lay a LOT of layers of paper (10-15 layers) right over the mown grass in a loose circle, tucking the sharp corners in on the outside as needed and leaving an inch or so bare around the trunk.
- Cover with 2-3 inches of mulch, but don’t mound it up to the trunk.
Have you had trouble attracting slugs with the cardboard/newspaper method of weed control?
No, we have the same amount no matter what I do, lol. Plus the weeds are worse than the slugs.
Is this something that you have to do every year?
Yes, if you make it a yearly habit to lay the paper and mulch you will have less and less weeds to worry about. It builds on itself, feeding the soil and discouraging weeds. That said, there were always areas I didn’t get to every year and they were every other year and it was still good! Just do what you can, knowing that it will help you the rest of the season for sure.
I am wondering if you have any recommendations as to where I can find the garden compost that you refer. Does this come bagged, or do you buy it loose?
For smaller beds, you can buy it by the bag, but it would be too expensive for larger areas. Call landscape products company and ask if they sell garden compost by the yard. That’s how we get it. It can be delivered for a fee, too.
What do you suggest for beds with fall or spring bulbs in them. I assume bulbs cannot push their way through the newspaper. So should I skip the newspaper in those beds? Or if I do this technique in the fall, should it be OK by spring?
Yes, if you lay the paper in one season, the bulbs won’t have a problem coming up the next. I’d only use newspaper for beds with bulbs, though, and save the cardboard for areas you don’t want anything to come up for awhile.
How many layers of paper is really ok around trees? Their roots need oxygen right? I actually did use newspaper in several gardens and around trees last fall, but I worry about suffocating them.
Unless you live in a very dry climate, the paper starts breaking down right away, so I’ve never had a problem. Plus the roots go out much larger than the little circle we do – basically just to make it easier to mow around- so most of the air and water gets to the roots. What you really want to make sure is that the mulch doesn’t pile up around the trunk.
Just wondering if I need to fertilize will I have to pull the paper back and then do over or will fertilizer make it thru the paper?
As the paper and compost I use as mulch break down, it feeds the soil, so I rarely add extra fertilizer, but if you need to, you can add it right over the paper, as it really starts breaking down pretty quickly. If the paper is thicker and you feel you need to pull some back around the plant, you could do that as well.
All of my plants in my flower beds are spreading perennials. Will the newspapers hinder the spreading of my plants?
Yes, to some degree they will but I haven’t noticed it to any large degree since it all breaks down. I usually put the paper up as far as I can against the perennials – it means there’s still weeds within the perennials (I have NEVER found that planting thickly deters weeds completely – they still find a way to grow, lol), but I just hand-pull those. The paper starts breaking down pretty quickly – you can always go with thinner layers to just get the new spring weeds. You’ll have to play around with it and see what works best for your beds.
What do beds look like with wood chips?
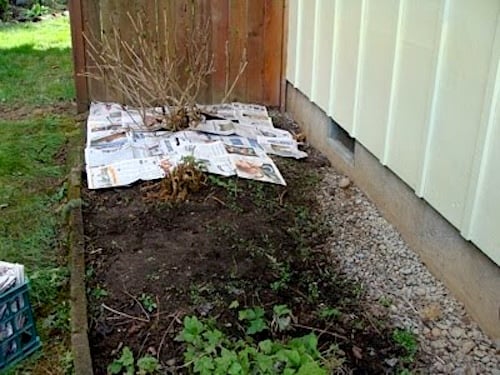
Above is an example of my mom’s garden in early spring that we covered in cardboard and free tree trimming wood chips (you can see more details on the clean up here, including how full of weeds it was!). This is an area that is constantly moist (from deer auto sprayers all season long), so the regular compost didn’t work to keep the weeds down. Even two years later, there were just a few weeds that needed to be pulled!
If you put wood chips down over the newspaper last year, do you have to remove all the wood chips to put down more newspaper the second year?
Wood chips actually last for a couple of years. In my mom’s garden, there was only a bit of hand-weeding in certain areas needed in year two. Year three needed a bit more and some of the chips were broken down enough to do the layering right over the top. In other areas, we raked wood chips up in an area, laid new cardboard/paper and raked them back, adding more as needed.
Do you have any more examples I can see?
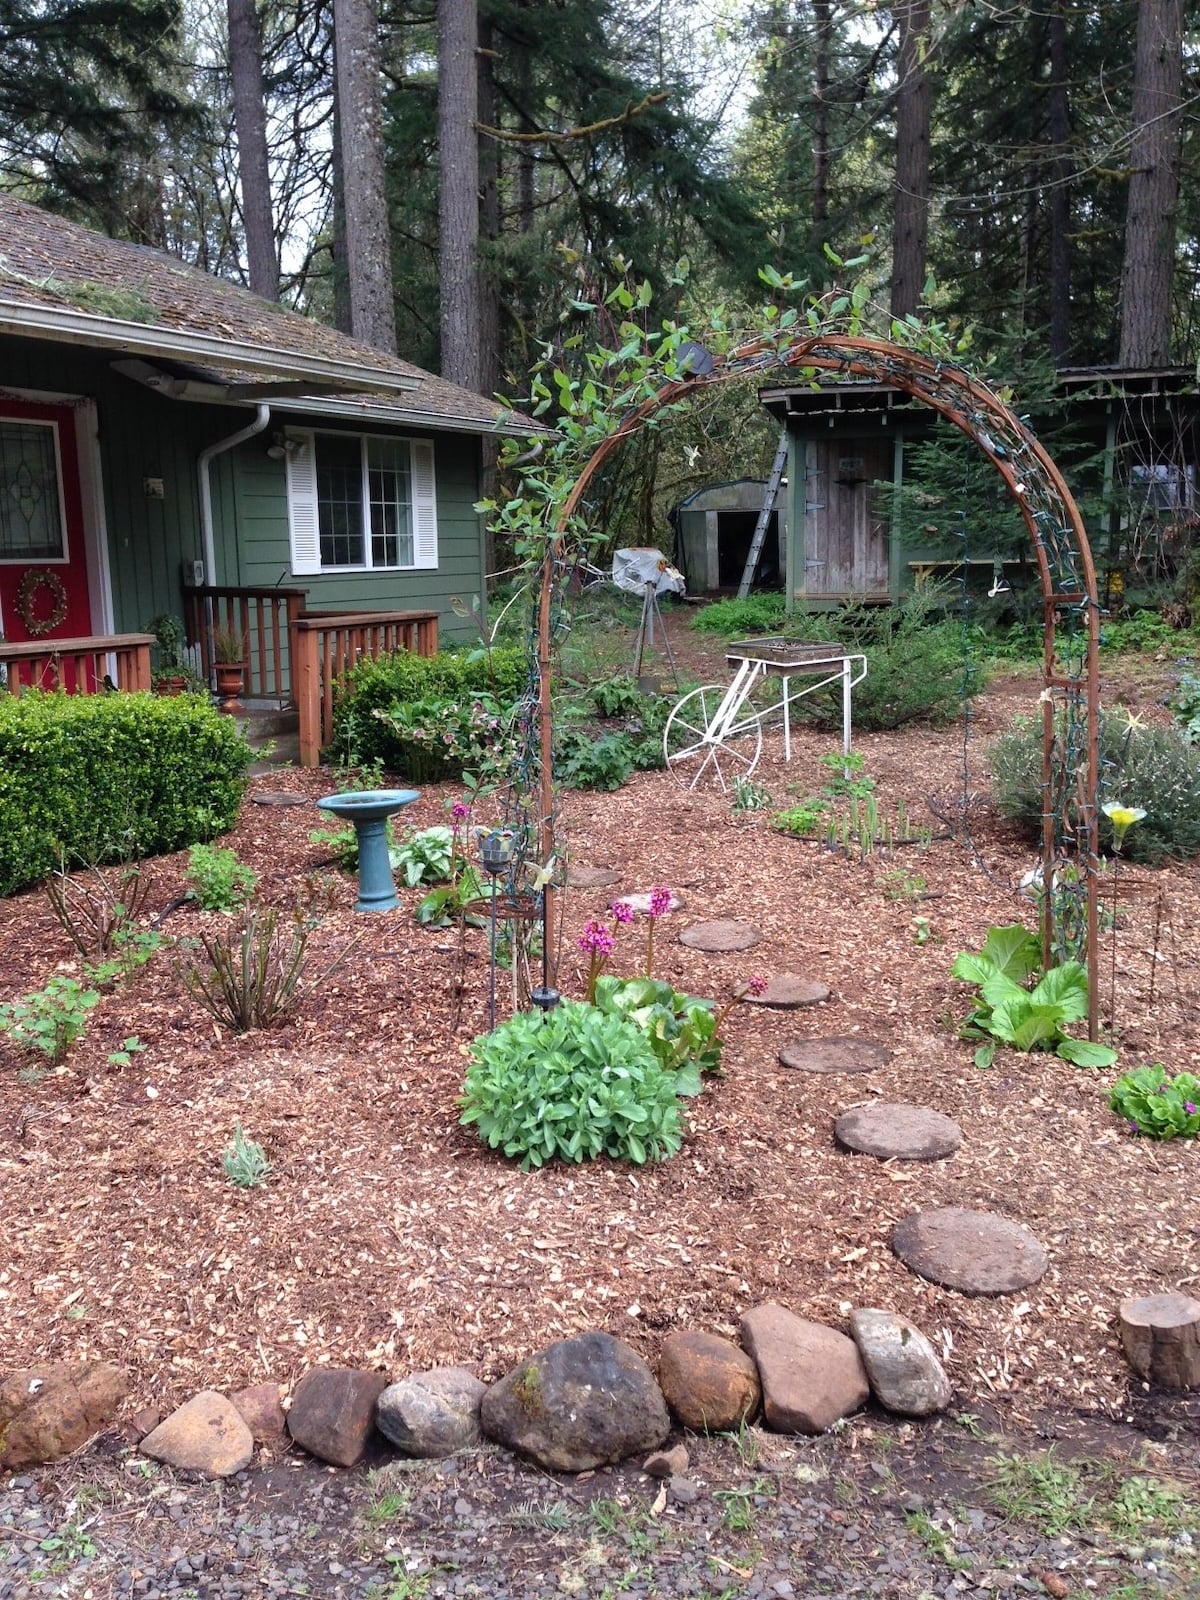
Sure! Here are a few more areas around our previous home’s yard and our farmhouse’s garden to hopefully inspire you:

Laying paper and mulch with soaker hose. You can see in the top left the area that still needs to be done, as well as the left side of the stepping stones.
I love how the new layer of paper and mulch makes the bed look so fresh again, even around established plants in the spring,
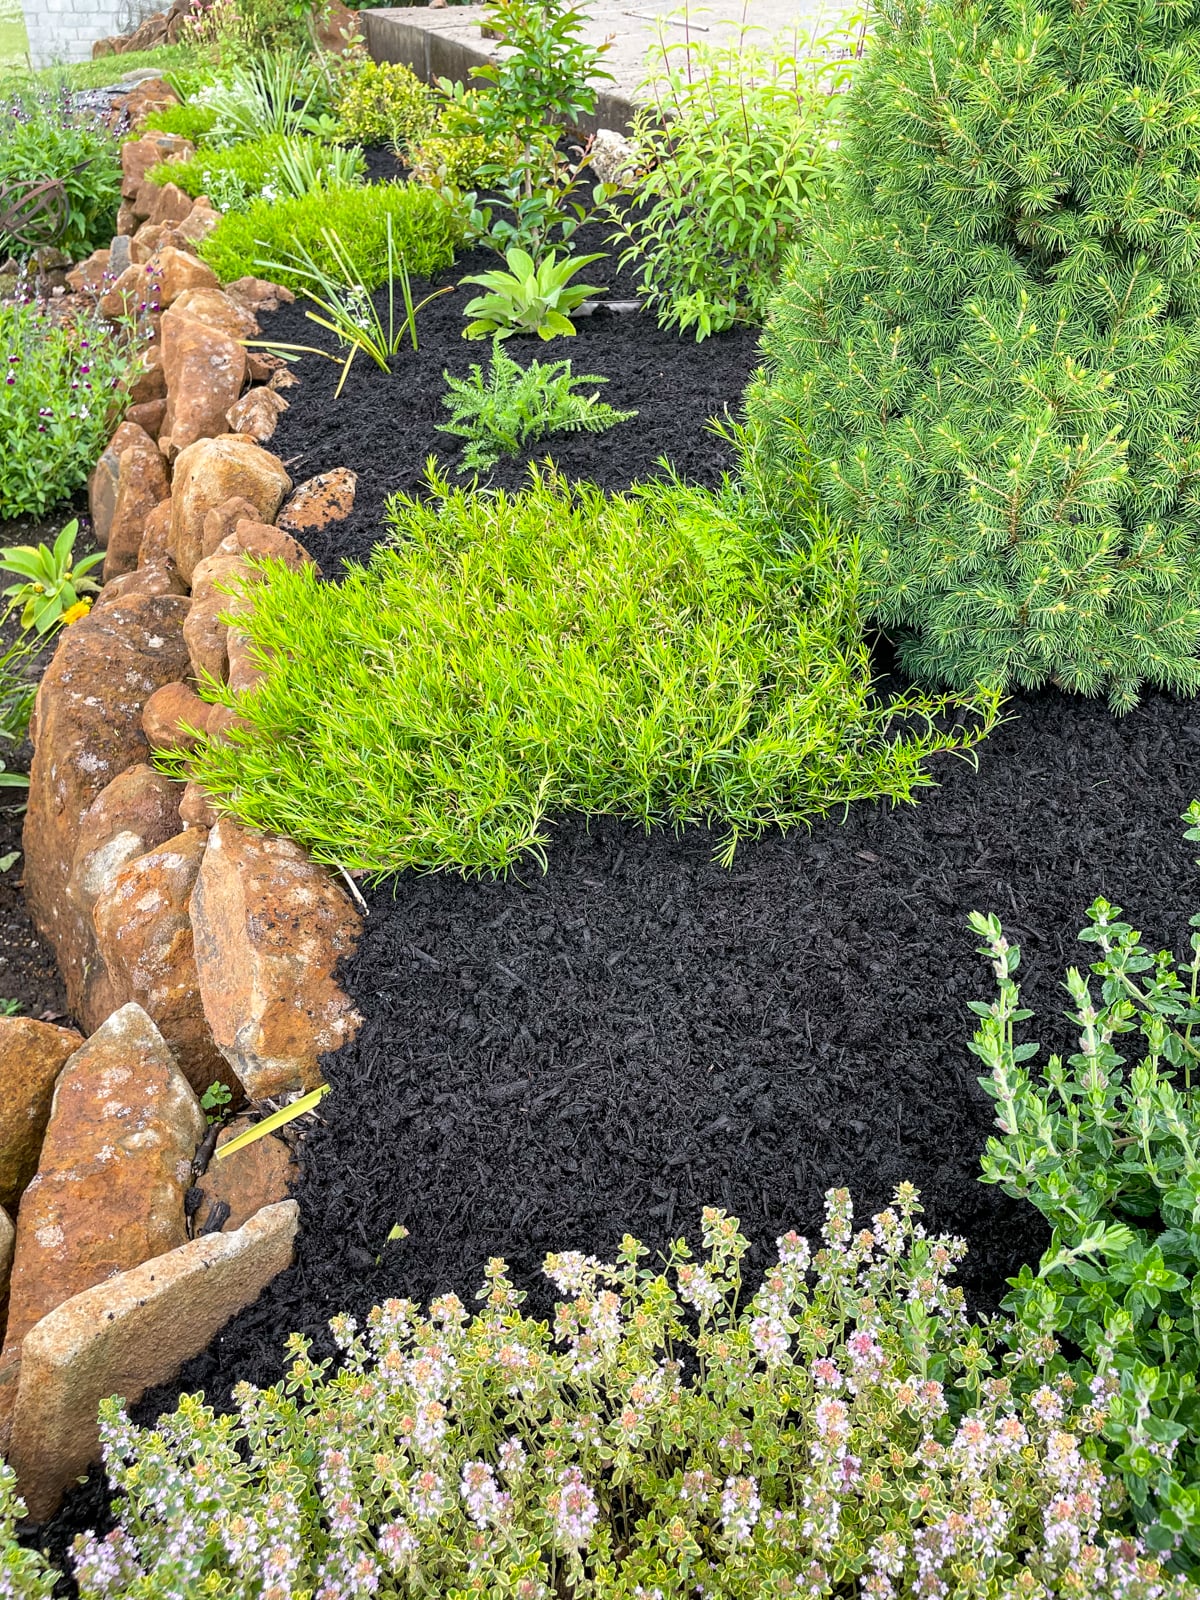
This clean and tidy look is what motivates me to get out there and get the beds cleaned up. That and the fact that I know if I get it done, I won’t have to do it again for another year!
I promise that if you use this paper and mulch technique for weed control, your gardening life will be changed forever just like mine was! Do let me know if you use this and how it works for you, too.
More Weeding Tips
- How To Keep Weeds Out Of Your Garden: Simple Organic Techniques
- How To Lay Wood Chip Garden Paths For Weed Suppression
- How to Plant a Garden the Easy Care Way
This article has been updated, it was originally published in March 2011.
Disclosure: affiliate links in this article will earn commission based on sales, but it doesn’t change your price. Click here to read my full disclaimer and advertising disclosure.

Thank you so much for your tutorials on using paper and cardboard for weeds. Do you have any ideas for getting rid of wild onions that grow in and around a stone border? There are lots of them and they would be difficult to dig out. Any ideas would be greatly appreciated! Thanks so much for your informative emails!
Ah, weeds of any kind in stone/rocks is never easy. This is where I’d look at some type of homemade weed killer. A propane flame weed killer might work well in the rocks, but if it’s too dry I would try a vinegar based killer made with 30-50% vinegar (you can buy on Amazon). I don’t have one on my site, but you can Google the recipe! Hope this is helpful😀
I have been looking forever for a way to fix my garden. We bought the house and the next spring we found out they had covered a million weeds with mulch for a temp fox but it came through so fast. Question: do we have to shovel the mulch out of the whole garden before laying the newspaper? It’s the black bark mulch. Please help!!!!
No, the mulch will just help the soil – you can leave it there!
You may want to use cardboard if the weeds are so bad, or even use black plastic for a few months to kill the weeds before adding the paper and mulch layers.
I started doing a similar weed control a few years using brown paper grocery bags. I cut out the bottom of the bags to flatten them, then place in the garden, overlapping, and add a thick layer of mulch. This method results in weed control that in one instance has kept the area in nice shape foe at least two seasons. A great low-cost, non-toxic way reuse paper materials. Also great if you need to get rid of something invasive that is taking over.
Perfect! Yes, I use paper bags a lot now, too, since we don’t regularly get the newspaper anymore. 🙂
Thank you for sharing such great ideas. I am hoping you have recommendations on how to deal with gophers. Moles etc
Ugh – the bane of our existence here are the farmhouse (we didn’t have as much problems in the cottage – just voles that we could keep out of our raised beds with hardware cloth). We have all the things at this house – a gopher city that we have to keep up a trapping schedule (30+ each year) or they will take over and now moles that we cannot get rid of no matter what tactic we use. We have a YouTube video on the gopher trap that works, though!
Thanks Jami! I have a flowerbed that I am about to give up on and just start week wacking or mowing. It has large Iris’s and Lily’s and and a few other perennials that I love but I just can’t keep the weeds out and forget the landscaping fabric that I put in 5 years ago! I finally tore it all out because once the weeds grew though it you could NOT get them out of it!!! I have a very invasive fragrant weed with underground runners (no idea what it is). I think I will give this a try although I hope to get at least 2 years out of it! My knees aren’t getting any younger!
Thanks and I love your blog, ideas and recipes!
That’s why I don’t like landscape fabric in flower beds – I’ve dealt with that same thing!
If you have a weed like that I would use cardboard instead of newspaper because it lasts longer before breaking down. You may have to cut it up smaller to fit around the plants, but try and use it on all the unplanted areas. For right next to or between plants, use a LOT of newspaper layers if they are easier to use than cardboard. Hopefully with a good 3-inch layer of mulch you will get your two years!
Thanks for sharing your success with this method! I enjoy your site!
Only one question for you. Doesn’t look like you all have Bermuda grass in your lawn there in Oregon, so assuming your lawn grass must stay put & doesn’t spread with rhizomes like wretched Bermuda does here in Oklahoma?
No, in most areas of Oregon it’s too cold/shady for Bermuda grass. BUT we have Quackgrass which spreads just the same and can grow to 4 feet tall. We call it “pasture grass” here because there are tuffs anywhere there is a pasture in our rural area and we deal with it a lot.
This method does actually work to keep it down and out of planting beds – each spring I have to redo the bed edges, pull any grass that’s migrated in and lay more paper and mulch, but then it’s good to go for the rest of the season.
The mulch and paper weed barrier has worked well for us. We’re online subscribers to our media, so newspaper isn’t as easy to come by as it used to be. (Our neighbors are mostly the same, or we’d go door to door collecting.) The paper we’ve found to use for the beds we don’t want to cover in cardboard is U-Haul packing paper! It’s like the blank newsprint paper we used to buy for kids to draw on, so it breaks down well over time. Quite inexpensive, it comes in sheets about the size of a standard newspaper, all rolled up in a sturdy box that is easy to store.
Such a great idea! Newspaper is becoming harder for me to find, too. I’ve been collecting paper grocery bags and any type of paper packing strips, but it never seems to be enough when the time comes. Thanks for this tip!