
Easy Sourdough Artisan Bread Recipe (Ready in 1 Day)
If you’ve been looking to bake a crusty, golden loaf of sourdough without the complexity of typical recipes then this easy sourdough artisan bread recipe is for you! Designed for simplicity, this method uses everyday measurements, minimal steps, and a stand mixer (or hand-kneading) to create a dough that’s ready to bake in just one day. Baked in an enameled cast iron pot (with other options), the result is a beautifully blistered crust with a soft, chewy interior — perfect for both beginners and seasoned bakers seeking a reliable, no-fuss loaf.
✩ What readers are saying…
“I wish I could say how great this recipe is in words!… Could this be true? Could I have found the perfect sourdough recipe for me and my family? After all these years and all these attempts, suddenly, in my lap, the sourdough recipe that really IS “The Easiest Best Sourdough Recipe on Earth”? Really? Well, I’m here to tell you, “YES!” Emphatically, “YES!” This is it! So good! So easy! So perfect! Please try this recipe! You will be so happy you did.” -David

Some links in this article are affiliate links and if you click on them I will receive a small commission at no cost to you.
Ever since I grew my first sourdough starter and explored how to make sourdough bread, I’ve wanted to be able to make a really good loaf of artisan sourdough bread like my favorite regular yeast easy artisan bread.
I was looking for an easy sourdough bread recipe that had a crispy crust with a nice texture and holes inside, but that was simple to make. Preferably a same day sourdough bread similar to my super easy artisan bread which bakes in an enameled cast iron pot.
What I mean by ‘easy’ is a basic everyday kind of sourdough bread recipe that uses cups to measure, few steps, and very little science involved, sort of like our great-grandmothers would’ve made.
If you’d like to get really into sourdough – which can quickly become complicated (and frankly, overwhelming to me), I’ve found Northwest Sourdough to be very thorough and not too hard to follow for those wanting to dig a little deeper.
I searched for a couple years to find a technique that would produce a loaf of artisan sourdough bread that was all the things I wanted.
When I found this great recipe I knew right away that I could adapt it to be even easier, use my favorite enameled cast iron pot, and consistently turn out good loaves.
And it did! This is truly the easiest sourdough bread recipe that anyone can make, from beginners to seasoned bread bakers. It can be made quickly (well, in sourdough terms) in one day or you can choose a bulk fermentation overnight in a refrigerator.
I want to say, too, that for me an easy bread is always made with a stand mixer, but this recipe can be made by hand – you will just have to work a bit harder.
Artisan Sourdough Bread Recipe Video
Ingredient Notes

You need only 3-4 ingredients for this classic bread – here are some notes and answers to questions I’ve gotten about the ingredients:
- Flour: You can make this bread with all-purpose, white whole wheat, spelt, or whole wheat flours. Spelt and whole wheat will have a denser crumb and less holes. You may get a taller rise by using bread flour, either white or whole wheat, which contains more protein (higher protein content in flour is needed for gluten development). Note: Pastry flours have less protein, which makes them great for cookies, muffins, and quick breads, but not for yeast or sourdough (wild yeast) breads.
In these photos I have used all white whole wheat flour with my regular whole wheat starter so the bread isn’t as white as loaves made with white flour. I also share a loaf made with regular whole wheat below. I always use a whole wheat starter and typically mix and match the flours I have on hand.
- Sourdough starter: I created my starter using these easy steps with whole wheat flour. Your starter should be strong for this recipe – very bubbly and doubling in volume after feeding in 6 hours or less (see the Important Note below). I like to feed the starter the night before (see timeline below).
- Salt: This is the third ingredient you must include in the recipe (in addition to water) or your bread will be very tasteless. After making this one time, feel free to adjust the salt to your preferences.
- Honey: I’ve made this ingredient optional, but I always use it. It adds a bit of immediate sugars for the yeasts to feed on as well as helping the crust to brown.
Sourdough Artisan Bread Step-by-Step Instructions

Step 1. Add all the ingredients (flour, water, starter, optional honey, and salt) to a bowl and mix dough just until combined. Let sit for 15 minutes. If using a mixer and dough hook, knead for 5 minutes. If making by hand, knead for 8 to 10 minutes.

Step 2. As you’re kneading, add more flour as needed, a little at a time, to create a dough that’s still clinging to the bottom of the bowl, but clearing the upper part of the bowl. It should be tacky, but not cling to your finger other than a bit of residue as shown.
TIP: If you’d like to add dried or fresh herbs or any other mix-ins, add them during this kneading portion. Wait until you’ve got the dough to the stage you see in step 2 and then mix them in before scraping into the bowl.

Step 3: Transfer to a large bowl, lightly coated with oil. The dough should stick to the bottom and need to be scraped out.

Step 4: Cover with plastic wrap or a damp towel and let the dough rest for 3 hours.
TIP: I use plastic “shower cap” type bowl covers which I wash and reuse over and over – I’ve had many of them for years. I’ve found plastic keeps the dough more moist over the long rise than a damp towel. Update: I’ve recently been moving away from plastic in the kitchen and have found that beeswax bowl covers do a nice job of keeping the dough moist while rising.

Step 5: During the 3 hour rise, turn and fold the dough once or twice by bringing all the edges of the dough to the center.

Step 6: Remove dough, turn and fold again, and place it back in the bowl, seam-side up. Let rise for another 2 hours.
TIP: I do this right over the bowl with my hands oiled from the dough, which is usually enough – add more oil to your hands if needed. This is described in detail in the video.

Step 7: After the second rise, place a piece of parchment paper on a cookie sheet or small skillet (see tip below), sprinkle the dough with flour and gently shape the dough into a ball or oval right over the bowl (using lots of flour, as the dough is moist) and set on the parchment. Make sure there’s a good coating of flour on the top, as this will make slicing the top later easier. Replace the cover for the final rise.

Step 8: While the shaped dough is resting at room temperature, set an empty 4-6 quart enameled cast iron (or regular cast iron) dutch oven into a cold oven and turn heat to 450 degrees (alternately, you can use a baking stone), and set the timer for 40 minutes. (See FAQs below for cooking without a dutch oven.)
TIP 1: I flour my fingers after setting on the parchment and then use them to push the edges under the loaf to get the shape I want, make it more compact, and create more surface tension. See video for more details.
TIP 2: Shape the dough into a small skillet to keep the edges from spreading as much as a cookie sheet. If you have a bread proofing basket, feel free to use that.

Step 9: When the timer goes off, slash the top of the loaf with a serrated knife in 2-3 places making whatever pattern you’d like. If you have a lame, you can use that to make more intricate patterns.

Step 10: Transfer the slashed loaf to the hot pot (or stone) by holding the edges of the parchment to gently lower into the pot (the bread will bake while on the parchment).

Step 11: Replace the hot lid and bake for 12-15 minutes. Remove the lid and continue baking for another 13-15 minutes, until golden brown and internal temperature reads 190 to 200 degrees with an instant read thermometer.
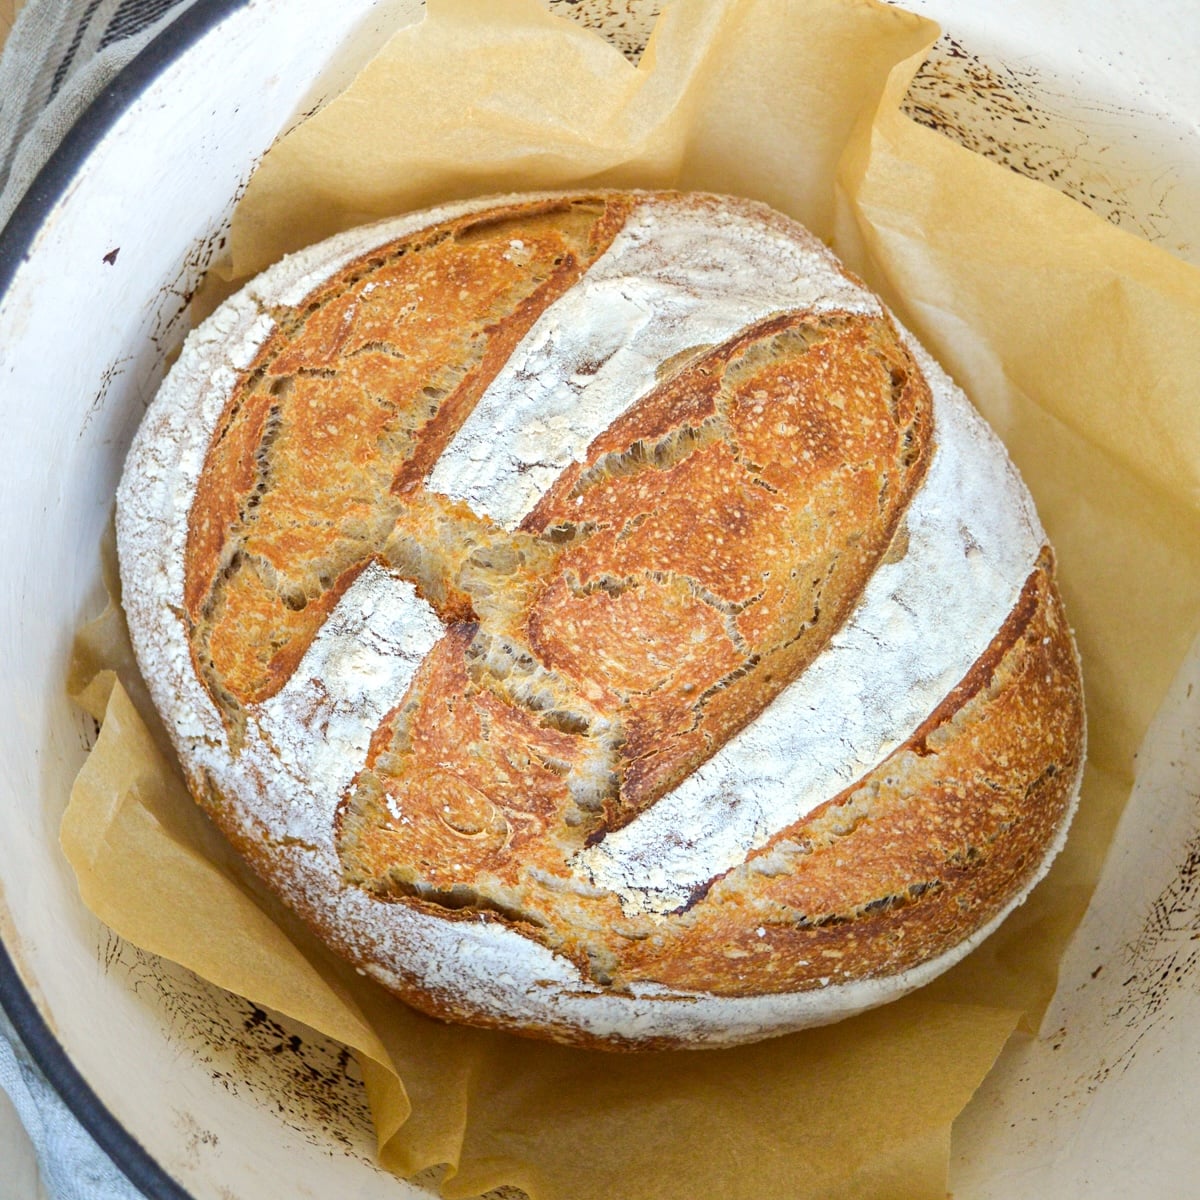
Look at that crust! That’s bread-beauty right there, isn’t it? Blistered and cracked and bubbly. You can see why I think this easy sourdough bread recipe is the best!
What about using all whole wheat flour?

The sliced loaf pictured above was made with whole wheat bread flour (verses the previous loaf pictures made with whole wheat white flour), so the crust isn’t quite the same, but still passes the test.
And the interior is a bit more dense, but still full of holes, chewy, and with just a touch of sourness. Perfection. (Note: When made with all regular whole wheat flour there will be only tiny holes in the crumb, making it more dense than this – but it’s still good in my opinion.)
Since sourdough starter is best when it’s used weekly or every two weeks, I now make this sourdough bread recipe more than my favorite easy artisan bread. But either is a winner recipe, in my book.
Important Note on Using Starter to Make Bread
I have gotten many comments on this recipe along the lines of, “great flavor, but it was so flat,” or “I let it rise all day and it didn’t double.” Here’s what I’ve learned on my sourdough journey:
You cannot make bread rise well with a new starter. It needs time to grow and strengthen to be able to rise bread.
You may be able to rush it if you’re doing a lot of feedings, but it may take weeks or up to a month for the starter to be strong enough to raise bread.
How do you know if a starter is strong enough to raise bread?
Here’s the test I use and find the easiest:
If your starter doubles in less than 6 hours, it is strong enough to raise bread.
If you don’t have a way to measure, use a piece of tape on the outside of your container – anything that allows you to see if it’s doubled. When it’s doubled, you can confidently use this recipe! (
What about using the float test? I find that when working with whole grains the float test (seeing if a piece of your starter floats in water) isn’t as good a guideline as doubling.
What do I do with all the starter I’m making, feeding, and removing while waiting for it to be strong enough to double?
You can make recipes that don’t rely on the wild yeast in sourdough to completely raise it! Lovely baked goods like:
- Whole Wheat Sourdough Crackers
- Sourdough English Muffins
- Sourdough Waffles
- Sourdough Cheese Batter Bread (use this when you’re this close to making bread – the batter doesn’t need to rise as much, but still gives a nice bread).
For even more unique and delicious ways to use your sourdough discard, check out this amazing list of 35 sourdough discard recipes!
Shop This Easy Sourdough Bread Recipe
- This is a great quality, decently priced enameled cast iron dutch oven, similar to the one I use. Here’s another option for a bit less that’s very similar, too.
- I’ve used Kitchenaid mixers for years to make all my breads – this is the current version of the one I’m using now.
- Here’s a rising bucket that holds a lot and is easy to see when your starter is doubling. Personally, though, I use my glass 2-quart measuring cup with a lid instead of plastic.
- This is my favorite brand of white whole wheat flour (made from hard white wheat).
- And I use this brand for hard red wheat flour (‘regular’ whole wheat). My starter is fed with this.
Timing For Same Day Sourdough Bread
The timing of sourdough bread was hard for me to figure out in the beginning, since it takes longer to rise than regular yeast breads, so I thought I’d share the typical timeline needed to serve a loaf of artisan bread for dinner.
To have this sourdough artisan bread ready for an evening dinner:
- Feed your sourdough starter the night before you want to bake.
- Start the sourdough artisan bread recipe the next morning.
- Let the dough rise until early afternoon before baking and cooling in time for dinner.
Forgot to feed your starter? It happens to the best of us! If you find yourself in that situation, you can feed the starter right when you get up in the morning and let it sit until it is bubbly, usually a couple of hours, and then proceed with the recipe.
Made this way, the bread doesn’t have quite the optimum time to cool, so you’ll have a warmer loaf with a bit more squished crumb – but we’ve sure never minded.
Sourdough Artisan Bread FAQs
Yes, the second rise can happen in the fridge. Let the dough come to room temperature for about an hour before you start to shape and heat the pot.
You will have the best results with a dutch oven or some type of pot with a heavy lid. But if you don’t have one, here’s what you can do:
-After shaping the loaf on the parchment on the counter (or in a small skillet), place either a baking stone, cast iron skillet, or cookie sheet into a cold oven and preheat to 450 degrees.
–Creating Steam: To try and get the crust we all love, you’ll need to create some steam (that’s what the dutch oven does – it traps the steam): put a pan with water on the bottom rack to heat while the stone heats OR spray the dough with water right before putting in the hot oven to bake and see which you like best. Also, if you have any deep lid that will fit over the dough and allow to rise, you can add that OR try tenting aluminum foil over the top.
–Baking: Slash and use parchment corners to transfer dough to your hot stone and bake 15 minutes, turning the dough halfway, and then bake until done, another 15 to 20-25 minutes.
These add-ins can be kneaded into the dough at step 2, after the first step of letting the dough sit for 15 minutes.
A Few of The Many Reader Raves
“Wanted to tell you your sourdough recipe was the best and easiest! It tasted great and I felt like I accomplished my dream of finally making sourdough!” -Stephanie
“Here’s another thank you for the simple recipe. I have been been struggling to find one that want so overwhelming; I don’t want to understand every minute detail of science….I just wanna bake some bread! This is the only recipe that I’ve had success with.” -Brittney
“Since I am new to sourdough, I was skeptical that this would work on my first try. It turned out fantastic.” -Helen
“Thank you for this awesome video! A friend gave me a jar of starter over a month ago and I was hesitant and unsure of how to proceed after watching other videos online. I made my first loaf ever last night and it was incredible. I really appreciate your video, it’s like you’re in my kitchen helping me along the way. All of your tips were super helpful and I now love making bread!” -Tracy
I hope you love this sourdough artisan bread as much as we do – if you make it, be sure to leave a recipe rating to let me know!
Want to save this?
Enter your email below and you’ll get it straight to your inbox. Plus you’ll get easy new recipes, gardening tips & more every week!

Easy Sourdough Artisan Bread Recipe
Equipment
- stand mixer or hand kneading
- 4-6 qt cast iron pot or baking stone/cookie sheet with steam bath
Ingredients
- 3+ cups (360-400 g) flour white whole wheat, whole wheat, unbleached, or a combo
- 1 ¼ cups (300 g) warm water*
- 3/4 cup (150 g) active sourdough starter 75%-100% hydration (I prefer 80-90%)
- 1 tablespoon (21 g) honey**
- 1 ½ teaspoons (9 g) salt or to taste
Instructions
- Mix all ingredients together in the bowl of a stand mixer (or large mixing bowl) just until combined and then let sit for 15 minutes.
- Using a dough hook, knead for 5 minutes. If making by hand, knead for 8 to 10 minutes. (TIP: You may add more flour as needed, a little at a time, to create a dough that's still clinging to the bottom of the bowl, but also clearing the upper part of the bowl. It should be tacky, but not cling to your finger.)
- Transfer to a medium-sized bowl, lightly coated with oil. Cover with plastic or a damp towel and let rise for 3 hours, turning and folding the dough once or twice.
- Remove dough, turn and fold again with oiled hands, and place it back in the bowl, seam-side up. Let rise for another 2 hours. TIP: I do this right over the bowl with my hands oiled from the dough, which is usually enough – add more oil to your hands if needed.
- After the second rise, place a square of parchment paper on a cookie sheet, sprinkle the dough with flour and gently shape the dough into a ball or oval (using lots of flour, as the dough is moist) and set on the parchment. Shape it in your hands right over the parchment. I often flour my fingers after setting on the parchment and use my fingers to push the edges under the loaf to get the shape I want and make it more compact. Make sure there's a good coating of flour on the top, as this will make slicing the top later easier. TIP: I often shape the dough in a small skillet to keep the edges from spreading as much as a cookie sheet.
- To Bake with a Dutch Oven: While the shaped dough is resting, set an empty enameled cast iron (or regular cast iron) dutch oven into a cold oven and turn heat to 450 degrees (alternately, you can use a baking stone), and set the timer for 40 minutes.
- When the timer goes off, slash the top of the loaf with a serrated knife (in 2-3 places) and transfer it to the hot pot (or stone) by holding the edges of the parchment to gently lower into the pot (the bread will bake while on the parchment).
- Replace the hot lid and bake for 12-15 minutes. Remove the lid and continue baking for another 13-15 minutes, until golden brown.
- To Bake without a Dutch Oven: After shaping the loaf on the parchment on the counter (or skillet), place either a baking stone, cast iron skillet, or cookie sheet into a cold oven and preheat to 450 degrees.Creating Steam: To try and get the crust we all love, you'll need to create some steam (that's what the dutch oven does – it traps the steam): put a pan with water on the bottom rack to heat while the stone heats OR spray the dough with water right before putting in the hot oven to bake and see which you like best. Also, if you have any deep lid that will fit over the dough and allow to rise, you can add that OR try tenting aluminum foil over the top.Baking: Slash and use parchment corners to transfer dough to your hot stone and bake 15 minutes, turning the dough halfway, and then bake until done, another 15 to 20-25 minutes.
- Remove to a wire rack to cool at least 30 minutes before cutting.
Notes
Nutrition
More Sourdough Recipes to Use Your Starter
Find recipes like no-knead sourdough focaccia, sourdough lemon loaf, soft sourdough bagels and much more on the sourdough recipes page here.

This recipe was originally published in 2012 – it’s been updated as recently as 2025.
Disclosure: affiliate links in this article will earn commission based on sales, but it doesn’t change your price. Click here to read our full disclaimer and advertising disclosure.

This is my first sourdough loaf of bread that I will be making and I am a little confused at the end of recipe where it says you may need less water if your starter is 100% .
What do you mean by wetter and how will I be able to tell?
Thank you
100% starter is fed at a 50-50 ratio of flour to water. Some people (like me now) feed my starter at a higher ratio of flour to water (typically 1/2 cup flour to 1/3 cup water). Everyone’s starter is different because of these things, so sourdough baking recipes sometimes need to be adjusted for this. You can tell by how the dough is: for this recipe, you want the wettest dough possible with still being able to shape it. If it runs all over the place, then it will need more flour to hold it’s shape a bit more. Start with just 1-2 tablespoons at a time, though.
Hope that helps clarify!
So, I ended up having to add probably another good 1/2 cup if not more of flour while it was kneading and then when I took it out, it still stuck like crazy to my hands. That means next time, use less water and flour my hands before removing from kitchen aide? This is my first loaf so we will see how it turns out!
Yes, that’s probably a good idea.
My first time successful with sourdough ! Tried soooo many… Thank you !
Yay!! Celebrating with you. 🙂
How do you fold dough that is really sticky? I measured the flour by spooning the flour into my measuring cup and leveling it, not wanting to ‘scoop’ it. I did add a little flour so it isn’t as sticky, hoping for the best!
You just kind of pull up from one side to the center. And it’s okay to add more – everyone’s starter is a bit different, so if yours had more liquid than mine, that would make it stickier. It’s a balance between how wet it can be and you still handle and shape it, since the liquid gives it the airy texture inside.
How much is “a lot of flour” in step 5? I’ve made this twice now. First time was a really dense loaf. I thought maybe my starter wasn’t ready and too much flour at Step 5. This time starter is better. But, dough was loose, but I was afraid to add too much flour. So, it didn’t really have much shape to it. Still tasty! Thanks for any tips.
I just sprinkle a handful on top of the dough in the bowl and scoop it out, prying the dough from the bowl and using more flour if needed. Your starter may be wetter than mine, so you may need to add a bit more flour – use 1-2 tablespoons at a time to get it to a point it will hold it’s shape.
When you say “better” for your starter, is it doubling in 6 hours and then you make the dough then?
If my starter is 100% fed,
Should we still use the 1 1/4 cup warm water at recipe written— how do I know if my dough is too wet.
This is my first try at making any type of bread.
And do I have to put honey if I am using unbleached whole wheat Bread flour with all purpose flour starter?
I would use the amount of water listed and then add more flour as needed – I think you’ll have better control over it that way. 1-2 tablespoons at a time to get to a dough that is wet and somewhat sticky still, but can be shaped after the second rise.
The little bit of honey helps with browning and gives something for the yeast to feed on to help increase rise. It’s probably not that much, so you can try leaving it out.
Amazing recipe! Followed it exactly except I let it rest overnight in the fridge after the second rise. Perfection!!!! This one is a keeper. Can’t wait to share with my friends. Thank you so much for creating such a forgiving recipe for beginners like me 🙂
You’re so welcome, Kate, I’m so glad you enjoyed it!
If you use a bread stone would you need to make steam in the oven while baking.
Yes, to get that crust we all like. 🙂 Put a pan with water on the bottom rack to heat while the stone heats OR spray with water right before putting in the hot oven to bake and see which you like best.
I have a question. In step 3, where the dough is rising for 3 hours, do you do the turn and fold sometime in the middle of the rise?
Yes, fold 1-2 times during that time.
Easy and works every time.
Yay – thanks for the review!
I really want to make this.. What can I use instead of a dutch oven?
Shape the loaf on the parchment on either a baking stone or cookie sheet. To try and get the crust we all love, you’ll need to create some steam (that’s what the dutch oven does – it traps the steam). Put a pan with water on the bottom rack to heat while the stone heats OR spray with water right before putting in the hot oven to bake and see which you like best.
Hi Jami.
This recipe is my new go to bread. I’ve tried many recipes only to have most of them fail. I used a combination of bread flour and AP flour. I added jalapenos and pepper jack cheese. The bread was so soft. The dough rose mostly while baking, which made me totally excited because I live in the mountains, where the climate is starting to get cooler. Thank you so much for sharing this fine recipe.
I’m so glad to hear this, Diana – and your additions sound so good!
Quick question… Do you cool it in the Dutch oven or do you pull it out by the parchment paper and then cool for 30 minutes?
Pull out by parchment and let cool on a rack.
Have made this easy recipe 3 times already this week. It’s a great thank you for the lady who made us pandemic masks, the friend who picked up groceries for us, oh, and we like it too! I appreciated the author’s attention to detail about why sometimes the recipe doesn’t work….take care of your starter and it will! My new favorite recipe.
What a fun gift, Helen – lovely idea. 🙂 So glad you found this doable, that’s always my goal!
I thought I would leave a comment, since I have probably followed your recipe about 15 times at this point. This makes a great loaf, and the recipe is very forgiving. A few times (having poorly memorized the recipe) I ended up with a pretty wet dough and was worried it wouldn’t turn out… but it always does! I also appreciate how your recipe is unpretentious but still results in a gorgeous, artisan boule. Thank you!
Wow, thank you for taking the time to write this great review, Beth!
Wow!! For a first-timer like myself, this recipe was PERFECTION! Easy to follow, great tips… and TO DIE FOR bread! Thank you!!!!!
Yay!! So happy for you – I love that feeling of bread turning out. 🙂
Thanks so much for the review!
Hello, I am super eager to make my first home made sourdough loaf. My only question is what size enameled cast iron Dutch oven do I use? I want to make sure that I get the right size. Thank you very much in advance.
Anything from 3 quart to 6 quart will work.
Do you think a 3 quart dutch oven is too small for this recipe?
I would try it, Jen – it might just help keep your dough in a smaller ball. You may have to cook 5 minutes longer.
I am guilty of using my favorite recipes and never rating them. I’ve been using this recipe and sharing it with friends for a while, now. I love how clear, concise and informative the author is. I feel like so many online recipes go into way too much detail and then often leave out the most simple details that are really important. Thank you so much for this recipe – it’s truly a staple in my home!
Thank YOU for writing and reviewing, Billie (and your kind words!) – I’m so glad this is a staple for you!
Hey Jami,
Excellent recipe… I tried it yesterday with my first attempt at a starter and it turned out great. I used store bought whole wheat, however, next time I’ll grind my own wheat berries which always makes great bread taste even better. I’ve used fruit pectin on some of my other bread recipes to lengthen shelf life and may try that with this as well.
Thanks for the information…
JY
This is great, JY – a new starter and good bread!
Quick question if I wanted to use bread flour, should I use half bread flour and half Ap? Both are unbleached flours. Thanks!
You can use all bread flour in this recipe, Monique.
I love this recipe and have used it successfully multiple times, even without a Dutch oven!
I’m wondering if anyone has found a way to do the “rise” overnight so that it can be baked first thing in the morning (without waking up at the crack of dawn)… has anyone done this successfully? If so, how?
Thank you!
I don’t know if I’ve read in the comments if someone has done this, Karen, but you could experiment. I think you could leave it in the fridge on the second rise, then take it out and shape it cold. Let it sit on the counter a bit longer – about an hour – and heat your oven the last 40 minutes.
Let me know if you try it!
I just had to come back and report that I tried this exact method and it worked PERFECTLY!!! My bread turned out so beautiful (and I am such a beginner). I am totally hooked now. Thank you SO MUCH for a forgiving recipe that was so much fun to make. Saving this one forever and passing it on to everyone I know!
Thank you for letting me know!
I put the bowl in the refrigerator after the first rise, took it out in the morning 9 hours later and left it at room temperature for 1 1/2 hours. Proceeded with shaping the loaf and heating the oven for 50 minutes and then baked and it came out great.
Glad that worked!